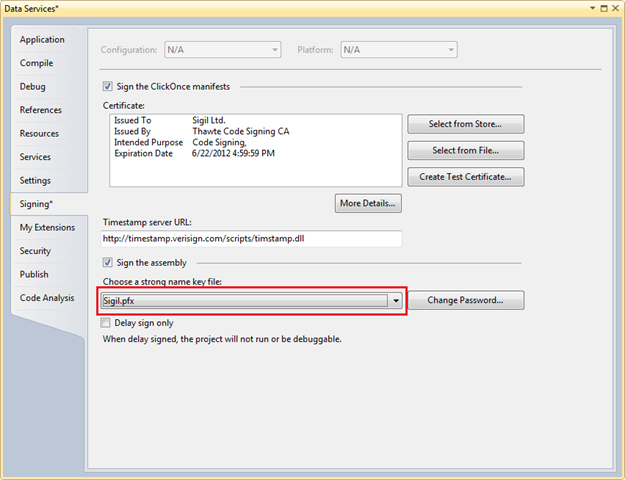
Open Project Properties.
Click on the Signing section.
Where it says ‘Choose a strong name key file:’, reselect the current value from the drop-down box:
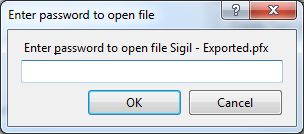
Visual Studio will now prompt you for the password. Enter it.
Save your project and do a rebuild.
If get error message:”An attempt was made to reference a token that does not exist” just ignore it and Continue the below steps
Click the ‘Change Password” button:
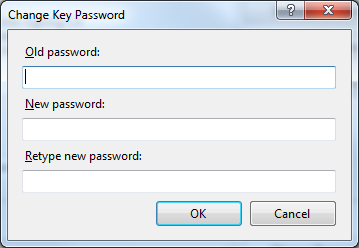
Enter the original password in all three boxes and click OK. If you’d like to change your password (or if your old password doesn’t meet complexity requirements), you can do so now.
Save your project and do a rebuild.
More Info..
C:\workspace\Company\Kentico\Source\Kentico12\Instructions.txt
Solution files:
———————————————–
CMSSolution.sln
– The main solution containing all source projects of the Kentico web application.
– Can be used for deployments to standard web servers and Azure Web Apps.
CMSAzure.sln
– Source code solution with projects suitable for deployments to Azure Cloud Services.
– Requires Azure SDK and Microsoft Azure Tools for Visual Studio.
– If using MSBuild to build projects (*.ccproj or *.csproj) from the command line, you need to include the “/p:CMSAzureBuild=true” switch.
Using the Kentico source code as a new web project:
———————————————–
1. Start Visual Studio 2017 or newer.
2. Click File -> Open Project and select the CMSSolution.sln or CMSAzure.sln file in the source code folder.
3. Search for any signed project in the Solution Explorer (for example the “Activities” project).
4. Right-click the project and select Properties.
5. Switch to the project’s Signing tab.
6. In the key file selector, choose the <Browse> option and reselect the CMS.pfx file in the given project folder.
7. Enter the following password: password
8. Save the project.
9. Rebuild the solution.
10. Create an IIS application for the web project:
a. Open Internet Information Services (IIS) Manager.
b. Add a new application under your IIS web site and map the Physical path to the CMS folder in the source code directory.
c. Create a new application pool for the application (or use an existing application pool).
11. Open the application in a browser and install a new Kentico database.