ubuntu14.4 64位 Unable to run mksdcard SDK tool.
1. sudo apt-get update
2. run: sudo apt-get install lib32z1 lib32ncurses5 lib32stdc++6
ubuntu14.4 64位 Unable to run mksdcard SDK tool.
1. sudo apt-get update
2. run: sudo apt-get install lib32z1 lib32ncurses5 lib32stdc++6
This paper mainly introduces how to install and configure opencv from the source code in Ubuntu 18.04, and uses a simple example to verify whether the installation is successful
For specific installation and configuration steps, please refer to the following article: https://cv-tricks.com/installation/opencv-4-1-ubuntu18-04/
Different from the tutorial provided in the above link:
Some dependent package installations may need to be modified
In this paper, opencv version 4.2 is installed and configured to support CUDA to accelerate the calculation of DNN module
This article does not deal with Python interface configuration, only for C + +, so steps 2 ~ 5 will be skipped
Step by step, install all the following dependent packages:
sudo apt-get update -y # Update the list of packages
sudo apt-get remove -y x264 libx264-dev # Remove the older version of libx264-dev and x264
sudo apt-get install -y build-essential checkinstall cmake pkg-config yasm
sudo apt-get install -y git gfortran
sudo add-apt-repository -y "deb http://security.ubuntu.com/ubuntu xenial-security main"
sudo apt-get install -y libjpeg8-dev libjasper-dev libpng12-dev
sudo apt-get install -y libtiff5-dev
sudo apt-get install -y libavcodec-dev libavformat-dev libswscale-dev libdc1394-22-dev
sudo apt-get install -y libxine2-dev libv4l-dev
sudo apt-get install -y libgstreamer1.0-dev libgstreamer-plugins-base1.0-dev
sudo apt-get install -y qt5-default libgtk2.0-dev libtbb-dev
sudo apt-get install -y libatlas-base-dev
sudo apt-get install -y libfaac-dev libmp3lame-dev libtheora-dev
sudo apt-get install -y libvorbis-dev libxvidcore-dev
sudo apt-get install -y libopencore-amrnb-dev libopencore-amrwb-dev
sudo apt-get install -y x264 v4l-utils

# Some Optional Dependencies
sudo apt-get install -y libprotobuf-dev protobuf-compiler
sudo apt-get install -y libgoogle-glog-dev libgflags-dev
sudo apt-get install -y libgphoto2-dev libeigen3-dev libhdf5-dev doxygen
In the process of installing the above dependent package, there may be some errors in . Here I will list the problems I encountered and give the solutions error 1:
E: Unable to locate package libjasper-dev
Implementation:
sudo add-apt-repository "deb http://security.ubuntu.com/ubuntu xenial-security main"
sudo apt-get update
Just install the dependency package again
error 2:
E: Unable to locate package libgstreamer0.10-dev
Implementation:
sudo apt install libgstreamer1.0-dev libgstreamer-plugins-base1.0-devOpenCV 4.2.0:
https://github.com/opencv/opencv/releases/tag/4.2.0
OpenCV Contib 4.2.0:
https://github.com/opencv/opencv_contrib/releases/tag/4.2.0
If you save the two compressed packages to /home/user name/opencv4.2/, unzip them
In addition, you need ippicv when compiling_ 2019_ lnx_ intel64_ general_ 20180723. Tgz this file is very slow to download. Here is a link to download and configure by referring to steps 1 and 2
For example, I put the downloaded file in the opencv4.2 folder and changed it to "/ home/username/opencv4.2/
Finally, the directory structure is as follows:
/home/username/opencv4.2/
	opencv-4.2.0/
	opencv_contrib-4.2.0/
	ippicv_2019_lnx_intel64_general_20180723.tgz
Implementation:
cd /home/username/opencv4.2/opencv-4.2.0
mkdir build
cd build
Implementation:
cmake -D CMAKE_BUILD_TYPE=RELEASE \
      -D CMAKE_INSTALL_PREFIX=/usr/local \
      -D INSTALL_C_EXAMPLES=ON \
      -D CUDA_ARCH_BIN='7.5'
      -D WITH_CUDA=ON
      -D WITH_TBB=ON \
      -D WITH_V4L=ON \
      -D WITH_QT=ON \
      -D WITH_OPENGL=ON \
      -D OPENCV_EXTRA_MODULES_PATH=/home/username/opencv4.2/opencv_contrib-4.2.0/modules \
      -D BUILD_EXAMPLES=ON \
      -D OPENCV_GENERATE_PKGCONFIG=YES ..
There are two aspects that need to be modified in the above steps
CUDA_ARCH_BIN='7.5'
Because opencv 4.2 supports CUDA to accelerate the calculation of DNN module, CUDA is configured here; Before that, you need to configure the driver and CUDA of NVIDIA graphics card
Among them, 7.5 refers to the computing power of the graphics card, my GTX 1660ti, and the corresponding computing power is 7.5
Here is a link for reference: nvida CUDA graphics card computing capacity table
The second place that needs to be modified is:
OPENCV_EXTRA_MODULES_PATH=/home/username/opencv4.2/opencv_contrib-4.2.0/modules
This is modified to your own OpenCV_ Location of contrib-4.2.0/modules
To view the number of CPU cores:
nproc
For example, my CPU core number is 12, and the execution time is 12
cd /home/username/opencv4.2/build
make -j12
Wait for a while, and then configuration done appears
Implementation:
sudo make install
After waiting for a while again, execute:
sudo sh -c 'echo "/usr/local/lib" >> /etc/ld.so.conf.d/opencv.conf'
sudo ldconfig
opencv4. PC fileIf the above configuration is successful, a pkgconfig folder will appear in the /usr/local/lib/ folder, in which there is a OpenCV. PC file. The contents are as follows:
# Package Information for pkg-config

prefix=/usr/local
exec_prefix=${prefix}
libdir=${exec_prefix}/lib
includedir_old=${prefix}/include/opencv4/opencv2
includedir_new=${prefix}/include/opencv4

Name: OpenCV
Description: Open Source Computer Vision Library
Version: 4.2.0
Libs: -L${exec_prefix}/lib -lopencv_gapi -lopencv_stitching -lopencv_aruco -lopencv_bgsegm -lopencv_bioinspired -lopencv_ccalib -lopencv_cudabgsegm -lopencv_cudafeatures2d -lopencv_cudaobjdetect -lopencv_cudastereo -lopencv_cvv -lopencv_dnn_objdetect -lopencv_dnn_superres -lopencv_dpm -lopencv_highgui -lopencv_face -lopencv_freetype -lopencv_fuzzy -lopencv_hdf -lopencv_hfs -lopencv_img_hash -lopencv_line_descriptor -lopencv_quality -lopencv_reg -lopencv_rgbd -lopencv_saliency -lopencv_sfm -lopencv_stereo -lopencv_structured_light -lopencv_phase_unwrapping -lopencv_superres -lopencv_cudacodec -lopencv_surface_matching -lopencv_tracking -lopencv_datasets -lopencv_text -lopencv_dnn -lopencv_plot -lopencv_videostab -lopencv_cudaoptflow -lopencv_optflow -lopencv_cudalegacy -lopencv_videoio -lopencv_cudawarping -lopencv_xfeatures2d -lopencv_shape -lopencv_ml -lopencv_ximgproc -lopencv_video -lopencv_xobjdetect -lopencv_objdetect -lopencv_calib3d -lopencv_imgcodecs -lopencv_features2d -lopencv_flann -lopencv_xphoto -lopencv_photo -lopencv_cudaimgproc -lopencv_cudafilters -lopencv_imgproc -lopencv_cudaarithm -lopencv_core -lopencv_cudev
Libs.private: -lm -lpthread -L/usr/lib/x86_64-linux-gnu -lGL -lGLU -lcudart_static -ldl -lrt -lnppc -lnppial -lnppicc -lnppicom -lnppidei -lnppif -lnppig -lnppim -lnppist -lnppisu -lnppitc -lnpps -lcublas -lcudnn -lcufft -L-L/usr/local/cuda -llib64 -L-L/usr/lib -lx86_64-linux-gnu
Cflags: -I${includedir_old} -I${includedir_new}
note: the sixth line needs to be modified to:
includedir_old=${prefix}/include/opencv4/opencv2
If it is not generated automatically, you can try to create a new file, copy the above content into it, and continue to the next step
PKG to . Bashrc file_ CONFIG_ PATHImplementation:
sudo gedit ~/.bashrc
Add at the end of the file:
PKG_CONFIG_PATH=$PKG_CONFIG_PATH:/usr/local/lib/pkgconfig
export PKG_CONFIG_PATH
After exiting, execute
source ~/.bashrc

# Determine when the path is added successfully and return :/usr/local/lib/pkgconfig
echo $PKG_CONFIG_PATH
Create a test. CPP file in any directory and add the following content:
#include "opencv.hpp"

using namespace cv;
using namespace std;

int main( int argc, char** argv )
{
  cout << "OpenCV version : " << CV_VERSION << endl;
  cout << "Major version : " << CV_MAJOR_VERSION << endl;
  cout << "Minor version : " << CV_MINOR_VERSION << endl;
  cout << "Subminor version : " << CV_SUBMINOR_VERSION << endl;
}
Use the command line to execute under its folder:
# Compile the test.cpp program and generate the executable file
g++ -std=c++11 test.cpp `pkg-config --libs --cflags opencv4` -o result

# Execute executable files
./result
The output of the following indicates that the configuration is successful
OpenCV version : 4.2.0
Major version : 4
Minor version : 2
Subminor version : 0
docker Failed to connect to socket /com/ubuntu/upstart: Connection refused
How to Solve: You can workaround this by doing:
dpkg-divert –local –rename –add /sbin/initctl
ln -s /bin/true /sbin/initctl
When using $sudo status docker to check the state of the docker daemon, the following error was encountered:
status: cannot connect to Upstart: Failed to connect to socket /com/ubuntu/upstart: connect deniedGoogle found that ubntun no longer supports upstart
SYSTEMd is the latest init in Linux system. Its main design goal is to overcome the inherent shortcomings of sysvinit and improve the startup speed of the system. Upstart of SYSTEMd and Ubuntu are competitors and will replace upstart. In fact, the author’s Ubuntu 16.04 lts has adopted SYSTEMd as its standard system initialization system
SYSTEMd is a kind of init software under Linux, a system and service manager under Linux, compatible with SYSV and LSB startup scripts. Led by Lennart poetering and released under LGPL 2.1 and its subsequent licenses, the development goal is to provide a better framework to express the dependency relationship between system services, and to realize the parallel startup of services during system initialization. At the same time, it can reduce the system overhead of shell, and finally replace the commonly used init programs of System V and BSD style
compared with init, the system V style used in most distributions, SYSTEMd adopts the following new technologies:(1) using socket activated and bus activated services to improve the parallel performance of interdependent services
(2) cgroups is used instead of PID to track the process, so that even the generated daemons after two forks will not be out of the control of SYSTEMd
The features of SYSTEMd are as follows:
Support parallel tasks; At the same time, socket and D-Bus are used to activate the service; Start the daemons on demand. The cgroups of Linux is used to monitor the process; Support snapshot and system recovery. Maintain mount point and own active mount point. Each service is precisely controlled based on the dependency relationship
Name source:
The name SYSTEMd comes from a convention in UNIX: in UNIX, “d” is often used as the suffix identification of the system daemons. In addition, SYSTEMd is also a substitute for the English term D system, which is used to describe a person’s ability to quickly adapt to the environment and solve difficulties
the main command to view and control SYSTEMd is systemctl
This command can be used to view system status and manage systems and services
Tips:
- Adding -H <username>@<hostname> to the systemctl parameter enables remote control of other machines.

This procedure uses an SSH connection.
- systemadm is the official graphical front-end for systemd. A stable version, systemd-ui, is available from the official repository.

- Plasma users can install the systemctl graphical front-end systemd-kcm.

Once installed, it can be found under System administration$ systemctl status docker$ sudo systemctl start docker
Undefined reference to ‘pthread’ appears in Linux Ubuntu running thread program_ Create ‘and undefined reference to’ pthread ‘_ ‘join’ error
Write good thread code, compile
gcc xiancheng.c -o xianchengThe following prompt appears
1 linux@ubuntu64-vm:~/workdir$ gcc xiancheng.c -o xiancheng
2 /tmp/ccOCxLrd.o: In function `main':
3 xiancheng.c:(.text+0x11e): undefined reference to `pthread_create'
4 xiancheng.c:(.text+0x131): undefined reference to `pthread_join'
5 collect2: ld return 1
6 linux@ubuntu64-vm:~/workdir$
The reason for the problem: the pthread header file is included in the header file reference of the program, and it is not the default library under Linux, that is, when linking, the entry address of the function in the phread library cannot be found, so the link will fail
#include <pthread.h>Solution: when compiling GCC, add the – lpthread parameter
Compile using the following code
gcc xiancheng.c -o xiancheng -lpthreadYou can pass
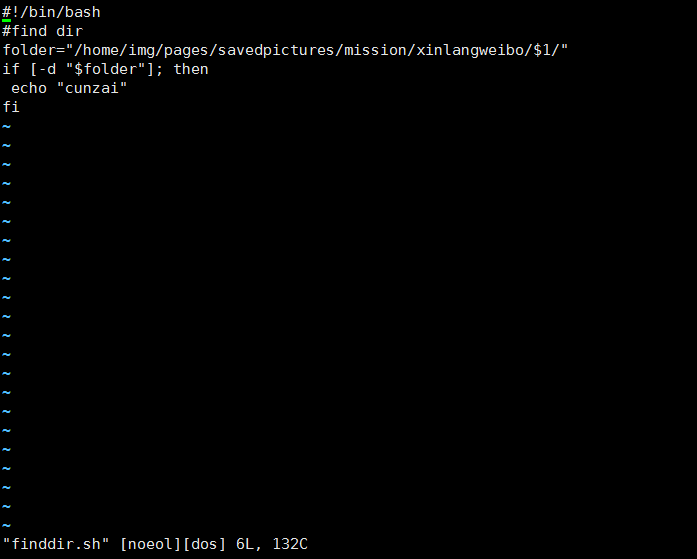
When executing the shell script, the following error is prompted:

After searching for information, I found:
carried out:
|
1
|
vi finddir.sh |
Then, enter
|
1
|
:set ff |
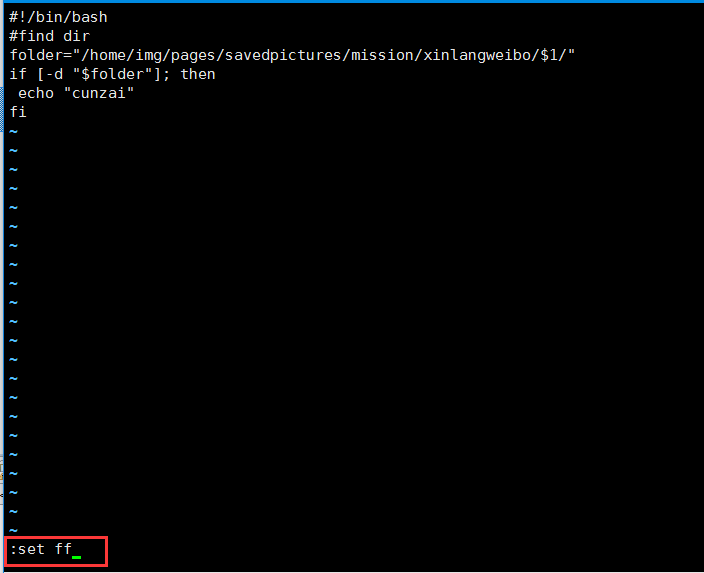
The results are:
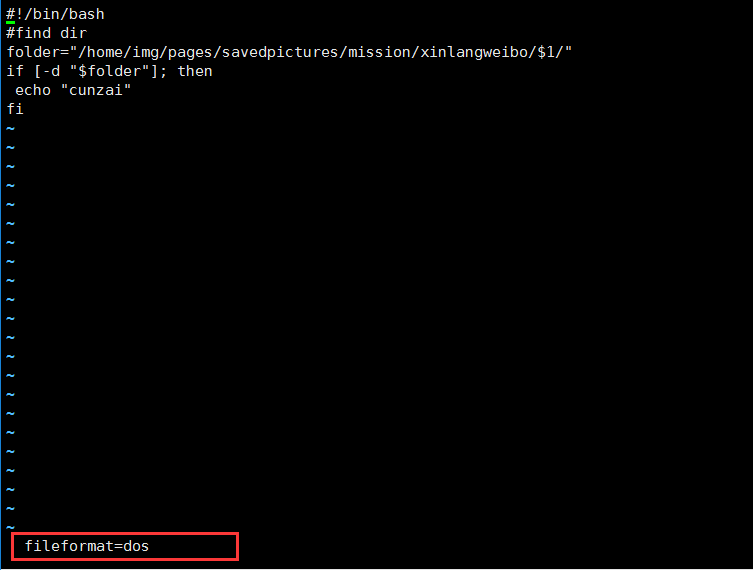
The solution is to modify it to unix:
|
1
|
:set ff=unix |
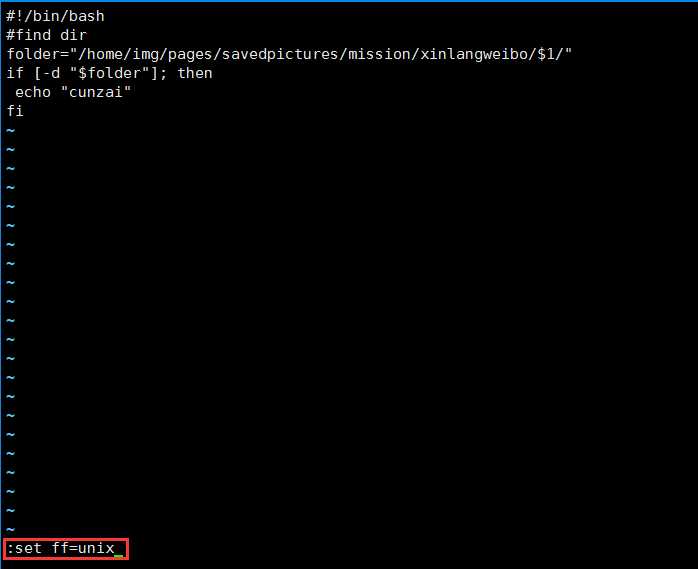
Execute the save command:
|
1
|
:wq |
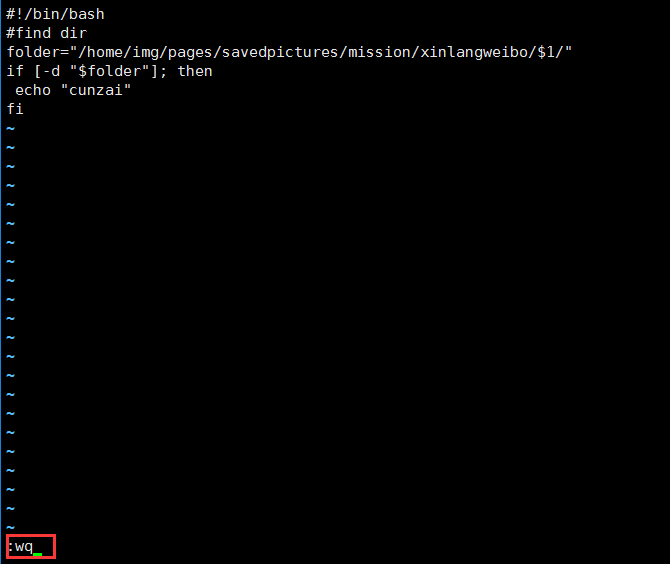
Execute again:
|
1
|
:set ff |
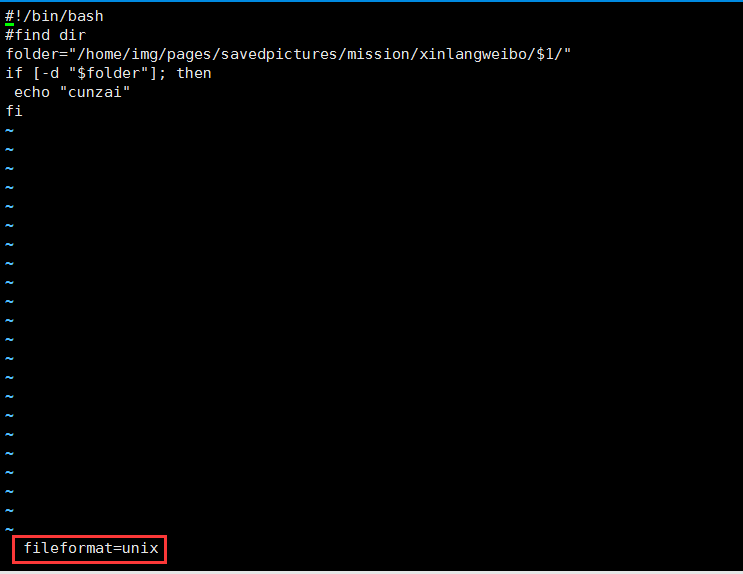
Finally execute the command.
There is an error in this article, that is in the script
|
1
|
if [-d "$folder"]; then |
To:
|
1
|
if [ ! -d "$folder" ]; then |
Pro-test so good.
In the morning, there was a problem when starting Chrome with selenium under Linux: error:
Traceback (most recent call last):
  File "get2.py", line 62, in <module>
    browser = webdriver.Chrome()
  File "/root/.pyenv/versions/anaconda3-5.1.0/lib/python3.6/site-packages/selenium/webdriver/chrome/webdriver.py", line 75, in __init__
    desired_capabilities=desired_capabilities)
  File "/root/.pyenv/versions/anaconda3-5.1.0/lib/python3.6/site-packages/selenium/webdriver/remote/webdriver.py", line 154, in __init__
    self.start_session(desired_capabilities, browser_profile)
  File "/root/.pyenv/versions/anaconda3-5.1.0/lib/python3.6/site-packages/selenium/webdriver/remote/webdriver.py", line 243, in start_session
    response = self.execute(Command.NEW_SESSION, parameters)
  File "/root/.pyenv/versions/anaconda3-5.1.0/lib/python3.6/site-packages/selenium/webdriver/remote/webdriver.py", line 311, in execute
    self.error_handler.check_response(response)
  File "/root/.pyenv/versions/anaconda3-5.1.0/lib/python3.6/site-packages/selenium/webdriver/remote/errorhandler.py", line 237, in check_response
    raise exception_class(message, screen, stacktrace)
selenium.common.exceptions.WebDriverException: Message: unknown error: Chrome failed to start: exited abnormally
  (unknown error: DevToolsActivePort file doesn't exist)
  (The process started from chrome location /usr/bin/google-chrome is no longer running, so ChromeDriver is assuming that Chrome has crashed.)
  (Driver info: chromedriver=2.43.600233 (523efee95e3d68b8719b3a1c83051aa63aa6b10d),platform=Linux 4.9.0-6-amd64 x86_64)
Solution: add code:
from selenium.webdriver.chrome.options import Options
chrome_options = Options()
chrome_options.add_argument('--no-sandbox')
chrome_options.add_argument('--disable-dev-shm-usage')
chrome_options.add_argument('--headless')
browser = webdriver.Chrome(chrome_options=chrome_options)
The “– no sandbox” parameter allows chrome to run under the root permission, and the “– headless” parameter allows chrome to have a better experience without opening the graphical interface
The “– no sandbox” parameter allows chrome to run under the root permission, and the “– headless” parameter allows chrome to have a better experience without opening the graphical interface
chrome_options.add_argument('blink-settings=imagesEnabled=false')
chrome_options.add_argument('--disable-gpu')
preface
The blogger has a new Samsung SSD, which can’t be identified by inserting different devices. This paper records this problem.
questions
Error mounting /dev/sda1 at /media/nvidia/Samsung_T5: Command-line `mount -t "exfat" -o "uhelper=udisks2,nodev,nosuid,uid=1001,gid=1001,iocharset=utf8,namecase=0,errors=remount-ro,umask=0077" "/dev/sda1" "/media/nvidia/Samsung_T5"' exited with non-zero exit status 32: mount: unknown filesystem type 'exfat'reasons
It should be related to the type of hard disk. Please refer to here
sudo apt-get install exfat-fuseThis method can solve this problem in TX2 and workstation, but Lenovo notebook encountered this problem, but it is not easy to use this method, I do not know what the reason is, there is no in-depth study
Error occurred
~$ sudo apt-get install exfat-fuse
Reading package lists... Done
Building dependency tree
Reading state information... Done
You might want to run 'apt-get -f install' to correct these:
The following packages have unmet dependencies:
 linux-image-generic : Depends: linux-image-4.4.0-165-generic but it is not going to be installed or
                                linux-image-unsigned-4.4.0-165-generic but it is not going to be installed
 linux-modules-extra-4.4.0-154-generic : Depends: linux-image-4.4.0-154-generic but it is not going to be installed or
                                                  linux-image-unsigned-4.4.0-154-generic but it is not going to be installed
 linux-modules-extra-4.4.0-165-generic : Depends: linux-image-4.4.0-165-generic but it is not going to be installed or
                                                  linux-image-unsigned-4.4.0-165-generic but it is not going to be installed
E: Unmet dependencies. Try 'apt-get -f install' with no packages (or specify a solution).
It seems to have something to do with the kernel version of Linux
reference
1. There is an error in mounting the mobile hard disk on Ubuntu
end
When switching branches in idea, such an error occurs, resulting in the failure of normal switching
:error: The following untracked working tree files would be overwritten by checkout
According to the error prompt, it is due to some problems caused by untracked working tree files. So as long as we solve these untracked files, we can solve this problem. If you want to keep the changes made on the production server and only incorporate the new configuration items, the processing method is as follows:
git stash
git pull
git stash pop
then you can use git diff – W + file name to confirm the automatic code merging.
conversely, If you want to completely cover the local working version with the files in the code base, the method is as follows:
git reset — hard
git pull
where git reset is for the version, if you want to back the local modification for the file, Use
untracked working tree file
reference: http://blog.csdn.net/sheismylife/article/details/7204345
Note when writing scripts for automatic compilation and deployment:
if you want to write scripts on C2 to automatically obtain the latest code from S1, you should pay attention to:
1, Otherwise, the password will be required every time git pull
2. Do not submit the intermediate files in the project to S1, such as the files in the build directory of cmake project and the files in the target directory of Maven project. Otherwise, the next time you use git pull on C2 and other clients, you will report an error similar to this:
error: untracked working tree file ‘public/images/icon. GIF’ would be written by merge.
you need to execute the following command to repair:
Git reset — hard head
git clean – F – d
git pull
This command is equivalent to the method of selecting file opening (or associated file type) in windows. For example, to edit a file, Notepad, Notepad + +, EDITPLUS and so on can be used. Under Ubuntu, update alternates is used to manage the file. Its principle is to establish a soft connection for each managed program in the/etc/alternates directory, Man, he can find out why it’s designed this way
time is precious, so don’t talk nonsense. Turn several articles and read them together:
Article 1
If you have installed different versions of the same software, you can use the update alternates command to set which version to use by default. For example, if you have installed gcc-4.6 and gcc-4.8 in Ubuntu 12.04, you want the GCC command to use version 4.8 automatically
After installing G + + – 4.8, set it as the default. GCC is the same as
in the same way
# First let the system know that we have multiple versions of g++ installed
# The 20 and 50 at the end of the command are the priority levels, if you use auto select mode, the system will default to the higher priority
sudo update-alternatives --install /usr/bin/g++ g++ /usr/bin/g++-4.6 20
sudo update-alternatives --install /usr/bin/g++ g++ /usr/bin/g++-4.8 50
# Use the command interactively to select the default version to use
sudo update-alternatives --config g++
# Other commands.
# Query which versions are installed on the system
sudo update-alternatives --query g++
Article 2:
jdk installation
Move the downloaded jdk-7u11-linux-i586.tar.gz archive binary to the directory you want to install.
Open a Terminal, the the command to unpack the tarball and install the JDK:
$tar zxvf jdk-7u11-linux-i586.tar.gz
For example, if you download the .tar.gz is /home/you, your installed directory will be /home/you/jdk1.7.0_11.
Then, you have to update alternatives for javac and java:
$sudo update-alternatives –install /usr/bin/javac javac /home/you/jdk1.7.0_11/bin/javac 1
$sudo update-alternatives –install /usr/bin/java java /home/you/jdk1.7.0_11/bin/java 1
If you have more than one javac installed, you have to config your javac alternative
$sudo update-alternatives –config javac
$sudo update-alternatives –config java
Finally, delete the downloaded .tar.gz after then.
Cyper battle.
Although I installed jdk, set the environment variables, and also used a long time, but since the study of alternatives, practice a hand, the process is as follows.
cyper@zerorun:~$ which java
/opt/jdk/jdk1.7.0_45/bin/java
cyper@zerorun:~$ update-alternatives --config java
update-alternatives: error: no alternatives for java.
cyper@zerorun:~$ sudo update-alternatives --install /usr/bin/java java `which java` 1
[sudo] password for cyper:
update-alternatives: using /opt/jdk/jdk1.7.0_45/bin/java to provide /usr/bin/java (java) in auto mode.
cyper@zerorun:~$ update-alternatives --config java
There is only one alternative in link group java: /opt/jdk/jdk1.7.0_45/bin/java
Nothing to configure.
cyper@zerorun:~$ sudo update-alternatives --install /usr/bin/javac javac `which javac` 1
update-alternatives: using /opt/jdk/jdk1.7.0_45/bin/javac to provide /usr/bin/javac (javac) in auto mode.
cyper@zerorun:~$ ls /usr/bin/java*
/usr/bin/java /usr/bin/javac
cyper@zerorun:~$ ls -l /usr/bin/java*
lrwxrwxrwx 1 root root 22 Dec 20 23:07 /usr/bin/java -> /etc/alternatives/java
lrwxrwxrwx 1 root root 23 Dec 20 23:07 /usr/bin/javac -> /etc/alternatives/javac
cyper@zerorun:~$ ls -l /etc/alternatives/java*
lrwxrwxrwx 1 root root 29 Dec 20 23:07 /etc/alternatives/java -> /opt/jdk/jdk1.7.0_45/bin/java
lrwxrwxrwx 1 root root 30 Dec 20 23:07 /etc/alternatives/javac -> /opt/jdk/jdk1.7.0_45/bin/javac
cyper@zerorun:~$ which java
/opt/jdk/jdk1.7.0_45/bin/java
cyper@zerorun:~$ sudo update-alternatives --remove java `which java`
cyper@zerorun:~$ ls -l /usr/bin/java
ls: cannot access /usr/bin/java: No such file or directory
cyper@zerorun:~$ sudo update-alternatives --remove-all java
update-alternatives: error: no alternatives for java.
cyper@zerorun:~$ which java
/opt/jdk/jdk1.7.0_45/bin/java
cyper@zerorun:~$ sudo update-alternatives --set java `which java`
update-alternatives: error: no alternatives for java.
cyper@zerorun:~$ sudo update-alternatives --install /usr/bin/java java `which java` 1
update-alternatives: using /opt/jdk/jdk1.7.0_45/bin/java to provide /usr/bin/java (java) in auto mode.
cyper@zerorun:~$ sudo update-alternatives --set java `which java`
Note: the format of install is as follows:
Sudo update alternates — install link name path priority, very easy to understand
‘which Java’ in the command line is
/opt/jdk/jdk1.7.0_ 45/bin/Java, too lazy to write the full path.
As you can see, for Java commands, he did the following:
1) create a new symbolic link/usr/bin/Java, pointing to/etc/alternatives/Java
2) and this second file is also a symbolic link, pointing to/opt/JDK/* * * *, your actual JDK installation directory.
Because I only have one version of JDK installed, it’s useless to use sudo update alternates — config Java
Last play — query, – set
cyper@zerorun:~$ sudo update-alternatives --query java
Link: java
Status: manual
Best: /opt/jdk/jdk1.7.0_45/bin/java
Value: /opt/jdk/jdk1.7.0_45/bin/java

Alternative: /opt/jdk/jdk1.7.0_45/bin/java
Priority: 1
cyper@zerorun:~$ sudo update-alternatives --query editor
Link: editor
Status: auto
Best: /bin/nano
Value: /bin/nano

Alternative: /bin/ed
Priority: -100
Slaves:
 editor.1.gz /usr/share/man/man1/ed.1.gz

A cyper@zerorun:~$ sudo update-alternatives --config editor
There are 4 choices for the alternative editor (providing /usr/bin/editor).

 Selection Path Priority Status
------------------------------------------------------------
* 0 /bin/nano 40 auto mode
 1 /bin/ed -100 manual mode
 2 /bin/nano 40 manual mode
 3 /usr/bin/vim.basic 30 manual mode
 4 /usr/bin/vim.tiny 10 manual mode

Press enter to keep the current choice[*], or type selection number: ^Ccyper@zerorun:~$ ^C
cyper@zerorun:~$ sudo update-alternatives --set editor 2
update-alternatives: error: alternative 2 for editor not registered, not setting.
cyper@zerorun:~$ sudo update-alternatives --set editor /usr/bin/vim.basic
update-alternatives: using /usr/bin/vim.basic to provide /usr/bin/editor (editor) in manual mode.
cyper@zerorun:~$ sudo update-alternatives --config editor
There are 4 choices for the alternative editor (providing /usr/bin/editor).

 Selection Path Priority Status
------------------------------------------------------------
 0 /bin/nano 40 auto mode
 1 /bin/ed -100 manual mode
 2 /bin/nano 40 manual mode
* 3 /usr/bin/vim.basic 30 manual mode
 4 /usr/bin/vim.tiny 10 manual mode