Tag Archives: ubuntu

Ubuntu Install opencv320 Error: error: ‘CODEC_FLAG_GLOBAL_HEADER’ was not declared in this scope

Modify /opt/opencv/opencv-3.2.0/modules/videoio/src/cap_ffmpeg_impl.hpp, add the following in the header:

#define AV_CODEC_FLAG_GLOBAL_HEADER (1 << 22)
#define CODEC_FLAG_GLOBAL_HEADER AV_CODEC_FLAG_GLOBAL_HEADER
#define AVFMT_RAWPICTURE 0x0020

Save and recompile.

[Solved] Connect to Ubuntu Error Via xshell: Could not connect to ‘xxxxx’ (port 22)

Unable to connect to XXX when connecting to Ubuntu with xshell

At first, I thought it was a port problem. So port 22 was opened

firewall-cmd --zone=public --add-port=22/tcp --permanent

Then it still reports an error when it is used again.

zheng@ubuntu:~$ ps -e|grep ssh

  5548 ?       00:00:00 ssh-agent


The query is with an agent's end


So you need to install the server side
sudo apt-get install openssh-server

Next, check again
zheng@ubuntu:~$ ps -e|grep ssh
  5548 ?       00:00:00 ssh-agent
  9744 ?       00:00:00 sshd


That'll do it!

Later, I found that it was because I didn’t install the server side of SSH.

Temporary failure in name resolution solution when Ubuntu installs essential (GCC)

Just change DNS

1 view DNS

  vi /etc/resolv.conf

2 add after the original DNS

  nameserver 114.114.114.114

  nameserver 8.8.8.8

3 reassembly

  sudo apt-get install build-essential

Prompt for update during loading

  Unable to fetch some archives, maybe run apt-get update or try with –fix-missing?

Just update

  sudo apt-get update

4 check whether the installation is successful

  gcc –version

reference resources

“Temporary failure resolving ‘CN. Archive. Ubuntu. Com’ appears in Ubuntu apt get install”_ Ben wolf CSDN blog


Ubuntu darknet Error: Cannot load image“/home/…/1380.jpg” STB Reason: can’t fopen

Yolo3 training prompts that pictures cannot be loaded. I carefully compared the previous training sets, and found that the previous picture format was “.JPG”, the training format was “.JPEG”, and the error path was also “.JPG”. I tried to change the picture format to “.JPG” and found that I could successfully train.

Batch change suffix:

Execute in the directory where the picture is located

rename  's/\.jpeg/.jpg/' *.jpeg

Win10 installs the Ubuntu system and reports an error wslregisterdistribution failed with error: 0x8007019e

Reference link: when installing Ubuntu system, the error wslregisterdistribution failed with error: 0x8007019e

When installing the Ubuntu system in the windows app store, the error wslregisterdistribution failed with error: 0x8007019e is reported

1. Error reporting:

Installing, this may take a few minutes...
Installation Failed!
Error: 0x8007019e
Press any key to continue...

2. Cause: Windows subsystem support is not installed.

3. Solution:

1. Win + X, select windows PowerShell (administrator)

2. Input: enable windowsoptionalfeature – Online – featurename Microsoft Windows subsystem Linux

3. Press enter, enter y and restart!

4. Reopen the installed subsystem, wait a few minutes, and enter the account and password.


Ubuntu System Goland Error: External file changes sync may be slow: The current inotify(7) watch limit is too low


vim /etc/sysctl.conf

Increase the value of fs.inotify.max_user_watches inside (or add the following line if you don't have this value).
fs.inotify.max_user_watches=524288

After saving, execute.
sysctl -p

Restart Goland it's OK

Link: https://stackoverflow.com/questions/65064450/how-to-fix-external-file-changes-sync-may-be-slow-the-current-inotify7-watch

Configuring Google Android test station for Ubuntu

ATS: definition and configuration method

The above configuration method is very detailed, but some small problems are encountered in the actual operation. It is summarized as follows:

1. If you execute MTT start in the desktop command window, you will be prompted that the MTT command is not supported and you need to install a watv:

Solution: follow the prompts and use apt command to install

2. Unable to run MTT

Solution: create a new atsstation folder on the desktop (the name of this folder can be taken at will), then download MTT and move it to this directory

Where to download:

Getting the Android Test Station CLI

Download the command line interface (CLI) package here.


3. Open the command window in atsstation and execute MTT start, and directly prompt: VBI: open failed [/ dev/vbi0] error

Solution: first grant the execution permission to the MTT file, sudo Chmod – R 774 MTT, and then start the MTT through./MTT start (note that “. /”) and the interface will display as follows:

Note that the following is a pull file from the Google server, which is related to the computer and the network. The length of time varies. Just wait patiently, showing “ATS is serving at” http://localhost:8000 “After that, it indicates that the MTT service has been started successfully. At this time, you can access the address on the web page


Ubuntu Error: libcublas.so.8.0 [How to Solve]

Error reporting when using Yolo in QT program:

./conjugateGradientPrecond: error while loading shared libraries: libcublas.so.8.0: cannot open shared object file: No such file or directory

solution:
first find libcublas. So. 8.0   Where is this file?It’s on my system ubuntu16.04. Where is the file  /Usr/local/cuda-8.0/lib64 /
then:

sudo gedit  /etc/ld.so.conf.d/cuda.conf

Add directory to document

 /usr/local/cuda-8.0/lib64/   

When finished, then:

sudo ldconfig
``` 
Remember to always use sudo, unless you are under root.


A start job is running for dev disk by when Ubuntu starts

write in front: this blog is my original, no reprint in any form! This blog is only allowed to be placed in the blog Garden (. Cnblogs. Com). If you see this blog post on other websites, please go to the original through the only legal link below

the only legal URL of this blog: http://www.cnblogs.com/acm-icpcer/p/8448519.html

I’m on my blog

The most complete and detailed: Linux kernel compilation and device driver writing under Ubuntu 16.04 (for novices)

There is something wrong with the “virtual machine expansion” in . Originally, it was no problem to operate according to the steps I described (because I later installed Linux on Lenovo antique all-in-one machine at home and found that there was no problem), but maybe it was the first time when I attached the hard disk to the virtual machine that swap was not set properly, It’s not a big problem that Linux kernel can’t sense the existence of the hard disk switch area, because Linux is within 90 seconds by default. If it doesn’t sense the swap switch area, it will execute the default boot program to start the operating system, but this will increase the boot time by 90 seconds. That’s too much+ How can 90s give up the chance of life extension?So this article will continue… No, put forward a solution to the problem

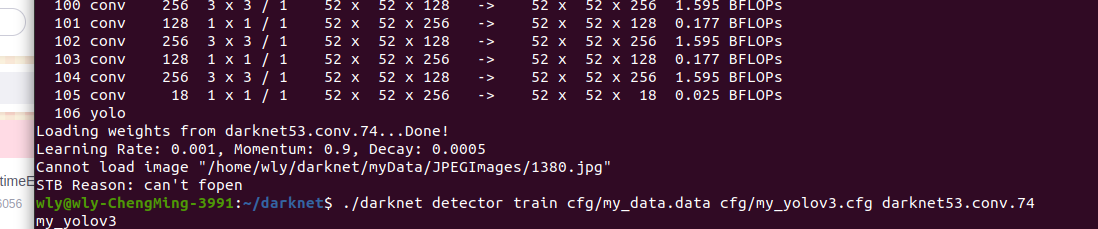
first of all, we can find the error statements of Linux kernel in the boot interface:

a start job is running for dev-disk-by uuid <disk-partition-uuid>

this is the root of all evils. Linux has been delayed for 90 seconds here, but this sentence is not understood. It doesn’t matter. After the 90 seconds delay, there is another unimportant sentence:

Denpendency failed for Swap

before, I didn’t find a solution because I didn’t see the most critical warning. After seeing this sentence, I suddenly realized that there was something wrong with the exchange area

so how to solve this problem?Naturally, we have to go to the exchange area and execute the command:

swapon --show

if your swap area is normal, it will be like this:

abnormal is this:

in other words, you execute the command to view the swap area, but you can’t find the swap area. That is to say, your operating system doesn’t have a swap area at all. This is a very troublesome thing, because in this way, the data exchange between the operating system memory and the virtual memory is carried out directly. First of all, it will slow down the system throughput, because the virtual memory is on the hard disk, whether it is SSD or mechanical Winchester hard disk, their speed is far less than DRAM memory; Secondly, without the buffer effect of the switch area, a large amount of data is written directly from the memory to the hard disk, which will be unbearable and cause certain damage. In short, in the long run, there is no exchange zone, which is a very serious problem. Especially for large servers, this is a fatal injury, because if the access volume is too large or the server is attacked by DDoS, the server’s hard disk is likely to burn out directly

however, now that you know what the problem is, it’s easy to solve it. We know that the operating system perceives processes through PCB, threads through TCB, and jobs waiting to be scheduled through JCB. Then the operating system must perceive the data exchange area through an East, which is the UUID number

first execute the following command to view the existing hard disk:

mount

the result is:

the above is the result of my repair. If not, we can see from the execution result that the swap area is not mounted

enter the following command to view the UUID prepared by the operating system for the switch area:

sudo blkid

The results of implementation are shown in the following figure:

from the second message/dev/sda5, you can see the UUID that the swap area should have

look at the UUID actually generated after we failed to mount the hard disk:

sudo nano /etc/fstab

after execution, it is found that the two UUIDs are inconsistent, and then it is known that the problem lies in the UUID

if you know the problem, it’s easy to do. Just change the UUID of the swap partition in the/etc/fstab file. That is to say, open VIM through command to modify:

sudo vim /etc/fstab

remember to use sudo’s permission to modify here, because /etc/fstab file is a system file, which can only be read but not written without administrator’s permission

modify the UUID of the swap in the file to the UUID that should be held by the swap just viewed with the command sudo blkid. The following figure shows the result of successful modification:

restart the operating system and fix the problem. Life extension + 90s


TZ@home

2018/2/14

Ubuntu Error: Invalid or corrupt jarfile xxx.jar [How to Solve]

1. Problem description

After packaging Maven project into jar package in Ubuntu environment, run the following instructions:

1 $ java -jar my.jar

An error occurred:

1 Error: Invalid or corrupt jarfile my.jar

2. Problem analysis

First, make sure that the jar package is not damaged during transmission

If the jar package is not damaged, it is most likely that the entry information is misconfigured or lost

3. Solutions

Case 1: the configuration of information in manifest.mf file in meta-inf folder in Java directory is wrong

Open the manifest.mf file and observe whether the main function entry corresponding to main class: is correct, for example:

1 Manifest-Version: 1.0
2 Main-Class: com.myproject.Main

Case 2: the information in manifest.mf file is configured correctly, but the program entry cannot be found correctly

In this case, the entry information may be lost in the packaging process, there are too many entries, the main entry is not specified, or the entry cannot be successfully found for other reasons. You can use the – CP instruction to forcibly specify the program entry. The instruction is as follows:

1 $ java -cp my.jar com.myproject.Main

After finding the entry, the program can run smoothly