Author Archives: Robins

[Solved] pycharm+selenium Build Environment Error: no module named ‘selenium’

1. After the installation is successful through the pip command in cmd, check the installation success in the command line

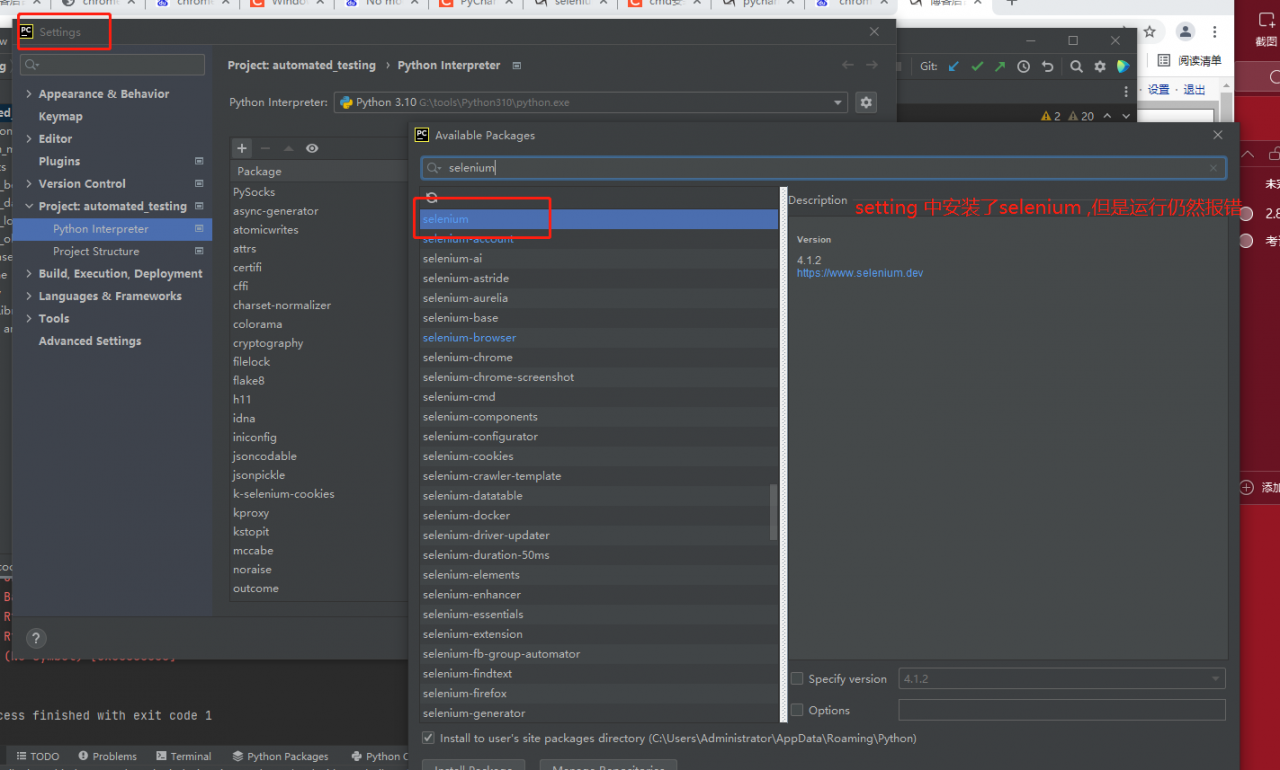
2. Running the program in pycharm still prompts the error

Set as shown below

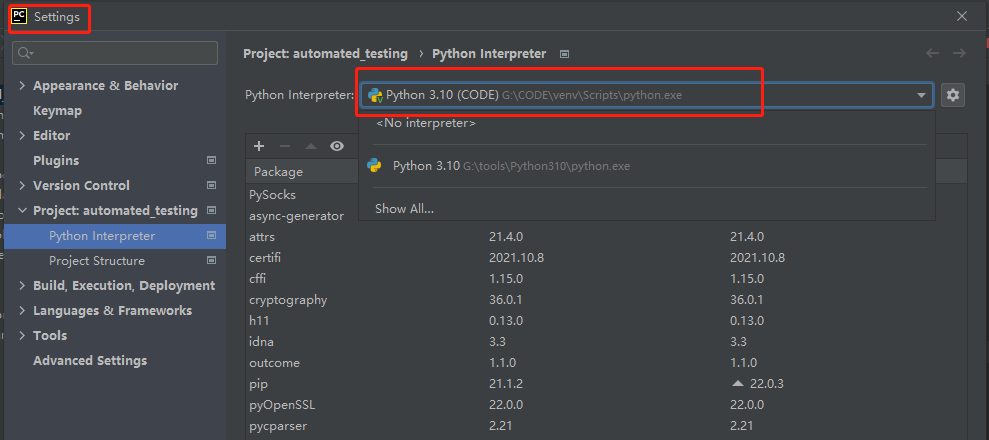
3. The python location on the first line of the runner console needs to be configured in the setting


4. Setting configuration The path of the location shown in the figure below is the same as the console output.


After successful execution

Centos7: How to Install GPU v100 Driver

The installation of the graphics card driver is not difficult, but the choice of the driver version is more troublesome, and if it is an offline environment, there will be many dependent packages, which are not included in the default installation of the system. This article does not discuss extreme environments, and now introduces the general driver installation method.
1. Check the graphics card version of the server
lshw -numeric -C display
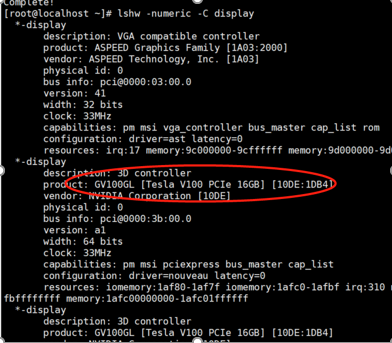
Then the server graphics card version I tested is Tesla V100

2. Select the appropriate driver to download from the official website
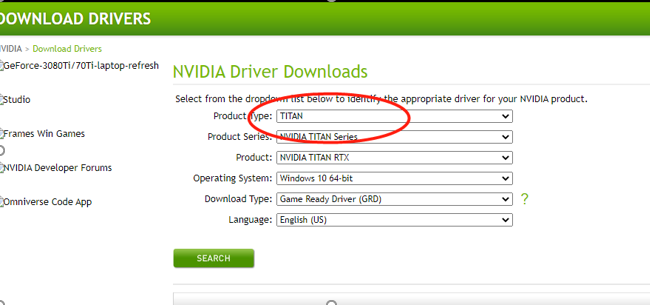
As shown in the figure: Tesla is selected as the Priduce Type, and linux 64 is selected as the Operating system. The response of the multi-select box is a bit slow, and it takes a few seconds after the selection is completed.
After the selection is complete, click search to download the given driver version, or you can copy the download address and wget directly on the server

3. Prepare the installation environment

3.1 Installation dependencies
yum install install -y tar bzip2 make automake gcc gcc-c++ pciutils elfutils-libelf-devel libglvnd-devel iptables firewalld vim bind-utils wget

3.2 Edit the configuration file
vim /lib/modprobe.d/dist-blacklist.conf
Comment out nvidiafb:
#blacklist nvidiafb
add the following statement:

blacklist nouveau
options nouveau modeset=0

3.3 Rebuild the initramfs image file

cp /boot/initramfs-$(uname -r).img /boot/initramfs-$(uname -r).img.bak
dracut /boot/initramfs-$(uname -r).img $(uname -r)

After the rebuild is complete, restart the server to take effect , and restart this step must be done.

3.4 After restarting, verify whether nouveau has been disabled
lsmod | grep nouveau. If there is no output, the disablement is successful.

4. Install the driver
chmod +x NVIDIA-Linux-x86_64-440.118.02.run
./NVIDIA-Linux-x86_64-470.103.01.run
Next step, pay attention to the error.

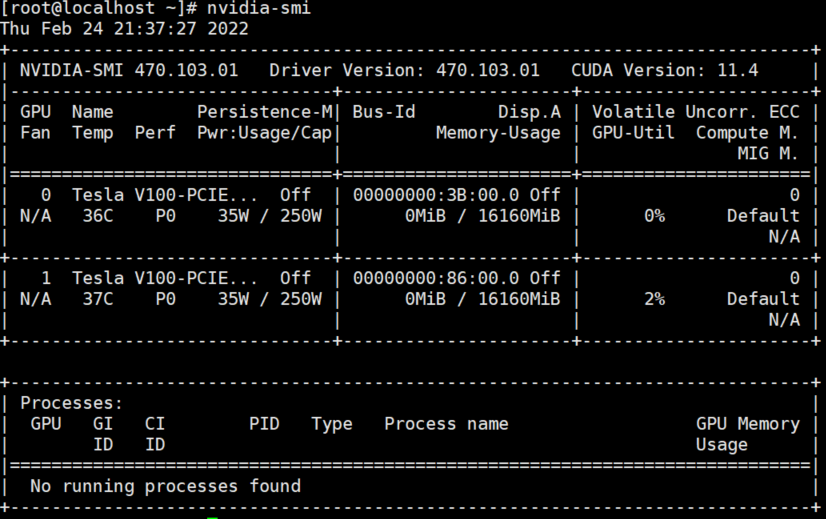
5. Verify
nvidia-smi
How to Close the iframe Window opened by layui

(1) Close the specific iframe

//When closing itself in the iframe page, the following js script is executed in the iframe page

var index = parent.layer.getFrameIndex(window.name); //get the index of the current iframe layer first

parent.layer.close(index); //then execute close

(2) The parent page passes a reference to the iframe pop-up layer

var collectionId = parent.$(“#hideCollectionId”).val();//you can define the hidden field in the parent page, the id is hideCollectionId, you need to refer to jquery

(3) close all pop-up layers

If there is no complex logic such as pop-up layer stacking, you can close all pop-up layers as needed

layer.closeAll(); //mad mode, close all layers

layer.closeAll(‘dialog’); //close the message box

layer.closeAll(‘page’); //close all page layers

layer.closeAll(‘iframe’); //close all iframe layers

layer.closeAll(‘loading’); //close the loading layer

layer.closeAll(‘tips’); //close all tips layers

[Solved] Received subscribe acknowledgement with invalid QoS values from the broker

Server: emqx

Client: php-mqtt/client 3.x

PHP≥7.4

  • need
    • The project needs to customize the offline and online of the subscription client
  • code
    $server   = 'emqx server url';
    $port     = 1883;
    $clientId = 'sys_client';
    $username = 'test';
    $password = '12345678';
    $topics='$SYS/brokers/+/clients/#';//Subscription client online and offline
    $mqtt = new \PhpMqtt\Client\MqttClient($server, $port, $clientId);
    $connectionSettings = (new \PhpMqtt\Client\ConnectionSettings)
        ->setUsername($username)
        ->setPassword($password);
    
    $mqtt->connect($connectionSettings, true);
    $mqtt->subscribe($topics, function ($topic, $message) {
    			echo sprintf("Received message on topic [%s]: %s\n", $topic, $message);
    		}, 0);
    $mqtt->loop(true);
    $mqtt->disconnect();
    
  • Why is there an exception?
    Received subscribe acknowledgement with invalid QoS values from the broker.
    
  • How to solve it?
    • Refer to the ACL documentation of EMQX for rule setting: https://www.emqx.io/docs/zh/v4.3/advanced/acl-file.html
    • Default acl.conf
      {allow, {user, "dashboard"}, subscribe, ["$SYS/#"]}.
       
      {allow, {ipaddr, "127.0.0.1"}, pubsub, ["$SYS/#", "#"]}.
       
      {deny, all, subscribe, ["$SYS/#", {eq, "#"}]}.
       
      {allow, all}.
      
    • Modify acl.conf, for the sake of security, I only allow the specified ip subscription here$SYS/brokers/+/clients/#
      {allow, {user, "dashboard"}, subscribe, ["$SYS/#"]}.
       
      {allow, {ipaddr, "127.0.0.1"}, pubsub, ["$SYS/#", "#"]}.
      
      #Specify ip subscription
      {allow, {ipaddr, "127.0.0.1"}, subscribe, ["$SYS/brokers/+/clients/#"]}.
      #Allow all clients to subscribe
      #{allow, all, subscribe, ["$SYS/brokers/+/clients/#"]}.
      
      {deny, all, subscribe, ["$SYS/#", {eq, "#"}]}.
       
      {allow, all}.
      
    • Then, run it through the command line, it should not report an error

NodeJS: How to Create New Project and Module

Here is a simple guide on how to create new project and module in NodeJS.


1. Create a new project

nest new project name

2. Create a service file (user has been used as an example)

Syntax: nest g [file type] [file name] [file directory (under src directory)]
For example: nest g service user (create user folder under src) logical
You can also write: nest g service user (also create a user under src)
The user folder contains the user.service.ts file

3. Create a Controller (user has been used as an example)

nest g controller user logical (logical can not be written)

4. Create a Module (user has been used as an example)

nest g module user logical

[Fixed] IDEA Login Warning: Server’s certificate is not trusted

Reason: Your local idea certificate cannot

Solution 1:

you go to install a genuine;

Solution 2:

Set to accept untrusted certificates.

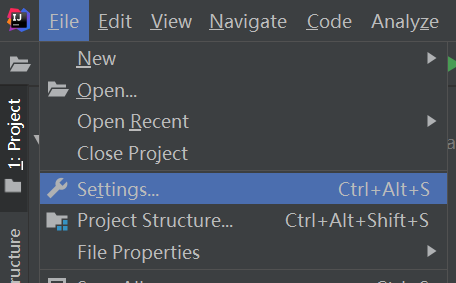
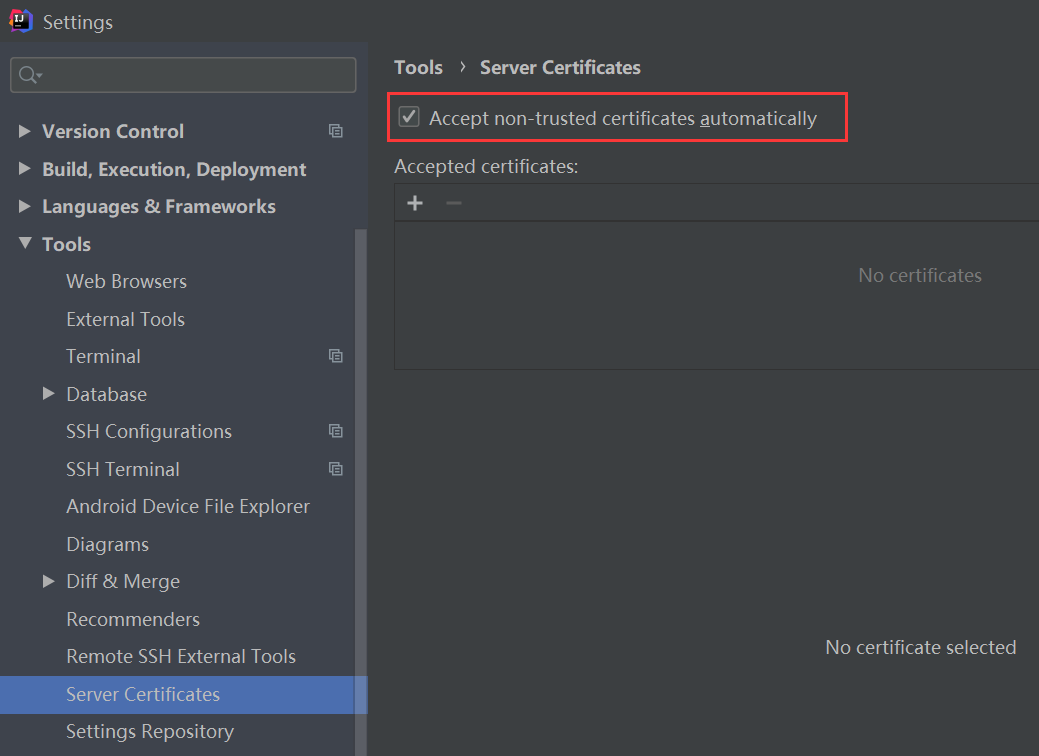
AS: File – Settings – Tools – Server Certificates – [checked] Accept non-trusted certiticates aotumatically


2.1. Enter the Settings configuration window


2.2. Open the corresponding Tools – Server Certificates – check Accept non-trusted certiticates aotumatically, and click apply.

How to Add a Upload Files Function with Cypress

1. Download the plugin for the cypress action file

Download the plugin:
--save-dev: save during development; no -dev means any environment can be used
npm install --save-dev cypress-file-upload


2. Write the html file of the locally uploaded file and start the service

<!DOCTYPE html>
<html lang="en">
<!-- Go to the html path and use the npx http-server command to temporarily start a service and access it through http://127.0.0.1:8080/-- >
<head>
    <meta charset="UTF-8">
    <meta name="Viewport" content="width=device-width, initial-scale=1.0">
    <title>Document</title>
    
</head>

<body>
    <input type="file" name="mfile" id="mfile">
</body>

</html>


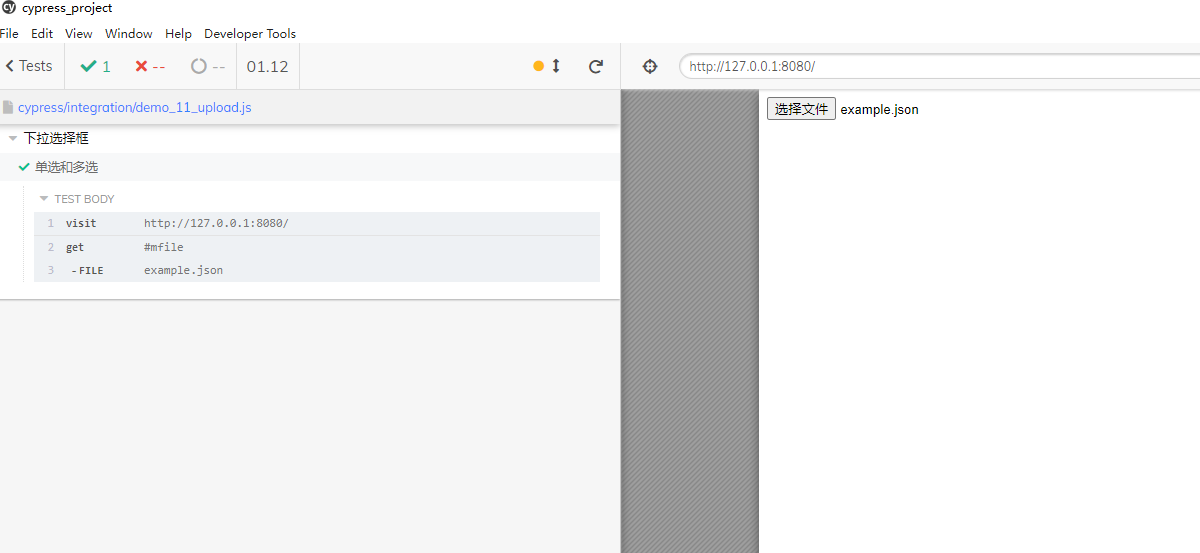
3. cypress operation upload file

// import "cypress-file-upload" can put the import operation in the commands.js file in the support folder, and it can be used globally. 
describe("Drop-down selection box", () => {
    it( 'Single selection and multiple selection', () => {
        cy.visit( "http://127.0.0.1:8080/" )
         // The uploaded file will be saved in the fixtures folder by default, select 
        cy.get('#mfile').attachFile('example according to the file name .json' )
    })
})