Category Archives: Linux

Yum Install Docker and Upgrade Yum Storage error: No packages marked for update

Problem: when using Yum to install docker and update Yum storage, the following error is reported, which causes Yum to break down

[root@localhost yum.repos.d]# vi docker.repo
[root@localhost yum.repos.d]# yum update
Loaded plugins: fastestmirror, langpacks
base                                                     | 3.6 kB     00:00
dockerrepo                                               | 2.9 kB     00:00
extras                                                   | 3.4 kB     00:00
updates                                                  | 3.4 kB     00:00
dockerrepo/7/primary_db                                    |  34 kB   00:00
Loading mirror speeds from cached hostfile
 * base: mirrors.cn99.com
 * extras: mirrors.aliyun.com
 * updates: mirrors.cn99.com
No packages marked for update

Solution: reinstall yum

[root@localhost ~]# rpm -qa|grep yum|xargs rpm -e --nodeps  
[root@localhost ~]# rpm -qa |grep yum 
[root@localhost ~]# wget http://centos.ustc.edu.cn/centos/7/os/x86_64/Packages/yum-metadata-parser-1.1.4-10.el7.x86_64.rpm
[root@localhost ~]# wget http://centos.ustc.edu.cn/centos/7/os/x86_64/Packages/yum-3.4.3-154.el7.centos.noarch.rpm
[root@localhost ~]# wget http://centos.ustc.edu.cn/centos/7/os/x86_64/Packages/yum-plugin-fastestmirror-1.1.31-42.el7.noarch.rpm
[root@localhost ~]# rpm -ivh yum-*
Preparing...                          ################################# [100%]
Updating/installing...
   1:yum-metadata-parser-1.1.4-10.el7 ################################# [ 33%]
   2:yum-plugin-fastestmirror-1.1.31-4################################# [ 67%]
   3:yum-3.4.3-154.el7.centos         ################################# [100%]
[root@localhost ~]# wget http://docs.linuxtone.org/soft/lemp/CentOS-Base.repo
[root@localhost ~]# yum makecache
Loaded plugins: fastestmirror
base                                                     | 3.6 kB     00:00
extras                                                   | 3.4 kB     00:00
updates                                                  | 3.4 kB     00:00
(1/8): extras/7/x86_64/other_db                            | 108 kB   00:00
(2/8): extras/7/x86_64/filelists_db                        | 636 kB   00:01
(3/8): updates/7/x86_64/prestodelta                        | 771 kB   00:01
(4/8): extras/7/x86_64/prestodelta                         | 102 kB   00:02
(5/8): updates/7/x86_64/other_db                           | 621 kB   00:00
(6/8): updates/7/x86_64/filelists_db                       | 3.5 MB   00:06
(7/8): base/7/x86_64/filelists_db                          | 6.7 MB   00:08
(8/8): base/7/x86_64/other_db                              | 2.5 MB   00:09
Loading mirror speeds from cached hostfile
 * base: mirrors.163.com
 * extras: mirrors.aliyun.com
 * updates: mirrors.cn99.com
Metadata Cache Created
Centos Dhcpd Error: No subnet declaration [How to Solve]

1.Centos dhcp environment

centos 6.6, dhcp installed via yum, NIC IP: 10.70.11.230/24

2.dhcp configuration file

option domain-name-servers 10.70.11.230;
default-lease-time 432000;
max-lease-time 432000;
authoritative;
ddns-update-style none;
subnet 10.70.12.0 netmask 255.255.255.0{
range dynamic-bootp 10.70.12.10 10.70.12.229;
option broadcast-address 10.70.12.255;
option routers 10.70.12.1;
}

3. The dhcp service starts with an error, and the log is as follows.

Oct 7 10:52:31 sh dhcpd: No subnet declaration for eth0 (10.70.11.230).
Oct 7 10:52:31 sh dhcpd: ** Ignoring requests on eth0. If this is not what
Oct 7 10:52:31 sh dhcpd: you want, please write a subnet declaration
Oct 7 10:52:31 sh dhcpd: in your dhcpd.conf file for the network segment
Oct 7 10:52:31 sh dhcpd: to which interface eth0 is attached. **
Oct 7 10:52:31 sh dhcpd:
Oct 7 10:52:31 sh dhcpd: Not configured to listen on any interfaces!
Oct 7 10:52:31 sh dhcpd:
Oct 7 10:52:31 sh dhcpd: This version of ISC DHCP is based on the release available
Oct 7 10:52:31 sh dhcpd: on ftp.isc.org. Features have been added and other changes
Oct 7 10:52:31 sh dhcpd: have been made to the base software release in order to make
Oct 7 10:52:31 sh dhcpd: it work better with this distribution.
Oct 7 10:52:31 sh dhcpd:
Oct 7 10:52:31 sh dhcpd: Please report for this software via the CentOS Bugs Database:
Oct 7 10:52:31 sh dhcpd: http://bugs.centos.org/
Oct 7 10:52:31 sh dhcpd:
Oct 7 10:52:31 sh dhcpd: exiting.

4.Problem solving method

When configuring the Centos dhcpd service, be sure to include its IP address in the DHCP allocation range.

Adjusted dhcpd.conf

option domain-name-servers 10.70.11.230;
default-lease-time 432000;
max-lease-time 432000;
authoritative;
ddns-update-style none;

subnet 10.70.11.0 netmask 255.255.255.0{
range dynamic-bootp 10.70.11.10 10.70.11.229;
option broadcast-address 10.70.11.255;
option routers 10.70.11.1;
}

subnet 10.70.12.0 netmask 255.255.255.0{
range dynamic-bootp 10.70.12.10 10.70.12.229;
option broadcast-address 10.70.12.255;
option routers 10.70.12.1;
}

CentOS 6.9: ntpdate[3115]: no server suitable for synchronization found

Doing a cluster experiment with cloned VMs and then using ntpdate it throws an error. The machines can ping each other, selinux and iptables are turned off.

[root@Server_2 ~]# service ntpd stop
Shutting down ntpd: [ OK ]
[root@Server_2 ~]# ntpdate Server_1
17 Apr 21:30:18 ntpdate[3113]: no server suitable for synchronization found

[root@Server_2 ~]# ntpdate -d Server_1
17 Apr 21:30:53 ntpdate[3115]: ntpdate [email protected] Mon Feb 6 07:22:46 UTC 2017 (1)
Looking for host Server_1 and service ntp
host found : Server_1
transmit(192.168.30.130)
receive(192.168.30.130)
transmit(192.168.30.130)
receive(192.168.30.130)
transmit(192.168.30.130)
receive(192.168.30.130)
transmit(192.168.30.130)
receive(192.168.30.130)
192.168.30.130: Server dropped: Leap not in sync
server 192.168.30.130, port 123
stratum 2, precision -24, leap 11, trust 000
refid [192.168.30.130], delay 0.02629, dispersion 0.00018
transmitted 4, in filter 4
reference time: de807515.a49f3f25 Tue, Apr 17 2018 21:28:53.643
originate timestamp: de80758d.672d9b0d Tue, Apr 17 2018 21:30:53.403
transmit timestamp: de80758d.5d4ac5ea Tue, Apr 17 2018 21:30:53.364
filter delay: 0.02629 0.02710 0.02734 0.02632
0.00000 0.00000 0.00000 0.00000
filter offset: 0.038197 0.037718 0.037627 0.038198
0.000000 0.000000 0.000000 0.000000
delay 0.02629, dispersion 0.00018
offset 0.038197

17 Apr 21:30:53 ntpdate[3115]: no server suitable for synchronization found

After tossing and turning for almost 20 minutes, the sad blowing ended with a reboot of the machine, then nothing was done and it was fine again.

[root@Server_2 ~]# ntpdate Server_1
17 Apr 21:36:24 ntpdate[3143]: adjust time server 192.168.30.130 offset -0.005873 sec

[Solved] nginx no resolver defined to resolve..

Try to find this problem when nginx uses different domain name proxy applications,
for example

listen 8888;
server_name www.test.com;

location ~ /testa {
      proxy_pass http://beta.test.com; #apache
} 

If IP is 127.0.0.1, an error will be reported

Asked the next Baidu need to set nginx resolver

The specific settings are as follows

The local MAC environment has been set


brew install  dnsmasq

vim /usr/local/etc/dnsmasq.conf

Open the following comments

domain-needed
bogus-priv
cache-size=51200
listen-address=127.0.0.1
resolv-file=/etc/resolv.conf

Start up

sudo brew services start dnsmasq

Add in nginx configuration

listen 8888;
server_name www.test.com;

location ~ /testa {
      resolver 127.0.0.1;
      proxy_pass http://beta.test.com; #apache
} 

Restart nginx again, and the access test is normal

Git Error: nothing to commit, working directory clean [How to Solve]

Local access to remote changes (only access, not merged): git remote update or git fetch origin

Next, git status - uno : allows you to see if the current branch is ahead/behind/diverging from the remote branch it tracks

Or, git show branch * Master : you can see the commits of all the branches whose names end with master, so you can see the differences between origin/master and master on the commits level

Finally, git diff origin/Master : you can see the difference between origin/master and master in code (file) level

Linux Implement Django Error: nohup: ignoring input and appending output to ‘nohup.out’

1、 Deploying Django to remote Linux server

Using xshell to connect to Linux server through SSH, the normal startup command is

python3 manage.py runserver 0.0.0.0:80

However, after you close xshell, you won’t be able to access Django

Concept: if you are running a process and you feel that the process will not end when you exit the account, you can use the nohup command. This command can continue to run the corresponding process after you exit the account/close the terminal.)

Enter

nohup python3 manage.py runserver 0.0.0.0:80

An error will be reported

nohup: ignoring input and appending output to ‘nohup.out’

2、 Solutions

1. Why

Because using nohup will generate log files, which are written to nohup.out by default

2. Solution

Output the log of nohup to/dev/null, this directory will make all the information to it disappear automatically

nohup python3 manage.py runserver 0.0.0.0:80 > /dev/null 2> /dev/null &

[Solved] ERR:/usr/local/lib/libcrypto.so.1.0.0: no version information available

Solution:

locate libssl.so.1.0.0
sudo rm /usr/local/lib/libssl.so.1.0.0
sudo ln -s /lib/x86_64-linux-gnu/libssl.so.1.0.0 /usr/local/lib/libssl.so.1.0.0
sudo rm /usr/local/lib/libcrypto.so.1.0.0

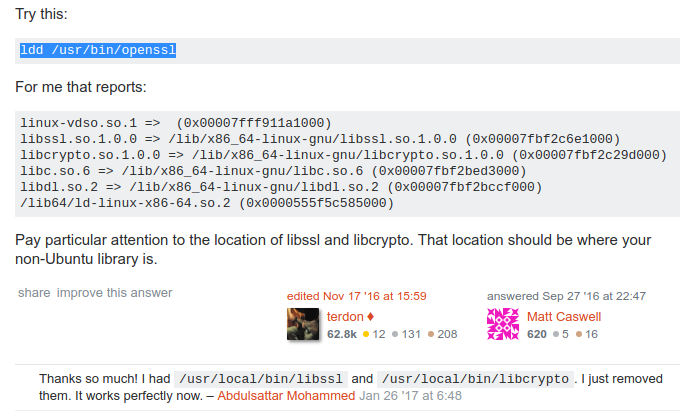
Use ldd /usr/bin/openssl to check and then delete is more reliable

I. Use the wget command to report an error.

➜ nginx wget
wget: /usr/local/lib/libcrypto.so.1.0.0: no version information available (required by wget)
wget: /usr/local/lib/libcrypto.so.1.0.0: no version information available (required by /usr/local/lib/libssl.so.1.0.0)
wget: missing URL
Usage: wget [OPTION]… [URL]…

Try `wget –help’ for more options.

2.use ldd /usr/bin/openssl query references
➜ nginx ldd /usr/bin/openssl
/usr/bin/openssl: /usr/local/lib/libcrypto.so.1.0.0: no version information available (required by /usr/bin/openssl)
/usr/bin/openssl: /usr/local/lib/libcrypto.so.1.0.0: no version information available (required by /usr/local/lib/libssl.so.1.0.0)
linux-vdso.so.1 => (0x00007ffe65931000)
libssl.so.1.0.0 => /usr/local/lib/libssl.so.1.0.0 (0x00007f3a09aae000)
libcrypto.so.1.0.0 => /usr/local/lib/libcrypto.so.1.0.0 (0x00007f3a0965a000)
libc.so.6 => /lib/x86_64-linux-gnu/libc.so.6 (0x00007f3a09291000)
libdl.so.2 => /lib/x86_64-linux-gnu/libdl.so.2 (0x00007f3a0908c000)
/lib64/ld-linux-x86-64.so.2 (0x000055bb1a158000)
➜ nginx ll /usr/local/lib/libcrypto.so.1.0.0
lrwxrwxrwx 1 root root 41 10月 24 21:19 /usr/local/lib/libcrypto.so.1.0.0 -> /usr/local/openssl/lib/libcrypto.so.1.0.0

3.delete
➜ nginx sudo rm /usr/local/lib/libcrypto.so.1.0.0
[sudo] password for brian:

4. Return to normal
➜ nginx wget
wget: missing URL
Usage: wget [OPTION]… [URL]…

Try `wget –help’ for more options.


https://askubuntu.com/questions/830466/libcrypto-so-1-0-0-no-version-information-available-required-by-ssh

[Solved] Linux yum: One of the configured repositories failed (Unknown), and yum doesn’t have.

Error

One of the configured repositories failed (CentOS-7 – Addons – sohu.com),
and yum doesn’t have enough cached data to continue.At this point the only
safe thing yum can do is fail.There are a few ways to work “fix” this:

1.Contact the upstream for the repository and get them to fix the problem.

2.Reconfigure the baseurl/etc.for the repository, to point to a working
upstream.This is most often useful if you are using a newer
distribution release than is supported by the repository (and the
packages for the previous distribution release still work).

3.Disable the repository, so yum won’t use it by default.Yum will then
just ignore the repository until you permanently enable it again or use
–enablerepo for temporary usage:

yum-config-manager –disable addons

4.Configure the failing repository to be skipped, if it is unavailable.
Note that yum will try to contact the repo.when it runs most commands,
so will have to try and fail each time (and thus.yum will be be much
slower).If it is a very temporary problem though, this is often a nice
compromise:

yum-config-manager –save –setopt=addons.skip_if_unavailable=true

failure: repodata/repomd.xml from addons: [Errno 256] No more mirrors to try.
http://mirrors.sohu.com/centos/7/addons/x86_64/repodata/repomd.xml: [Errno 14] HTTP Error 404 – Not Found
http://mirror.centos.org/centos/7/addons/x86_64/repodata/repomd.xml: [Errno 14] HTTP Error 404 – Not Found

Solution

1. Please first determine whether you are unable to network or a configuration problem.

ping www.google.com If it is normal ping then you can see this to complete the configuration

The first step: vi /etc/resolv.conf, just add the following line


nameserver 8.8.8.8
After the modification, service network restart restarts, try the yum update command, it should be fine. If not, you can proceed to the next step.


Step 2: Enter /etc/yum.repos.d, edit vi CentOS-Base.repo, find the following black bold part, comment out the first line (mirrorlist), and uncomment the second line (baseurl).

# CentOS-Base.repo

#
# The mirror system uses the connecting IP address of the client and the
# update status of each mirror to pick mirrors that are updated to and
# geographically close to the client.  You should use this for CentOS updates
# unless you are manually picking other mirrors.
#
# If the mirrorlist= does not work for you, as a fall back you can try the
# remarked out baseurl= line instead.
#
#


[base]
name=CentOS-$releasever – Base
#mirrorlist=http://mirrorlist.centos.org/?release=$releasever&arch=$basearch&repo=os&infra=$infra
baseurl=http://mirror.centos.org/centos/$releasever/os/$basearch/
gpgcheck=1
gpgkey=file:///etc/pki/rpm-gpg/RPM-GPG-KEY-CentOS-7


#released updates
[updates]
name=CentOS-$releasever – Updates
#mirrorlist=http://mirrorlist.centos.org/?release=$releasever&arch=$basearch&repo=updates&infra=$infra
baseurl=http://mirror.centos.org/centos/$releasever/updates/$basearch/
gpgcheck=1
gpgkey=file:///etc/pki/rpm-gpg/RPM-GPG-KEY-CentOS-7


#additional packages that may be useful
[extras]
name=CentOS-$releasever – Extras
#mirrorlist=http://mirrorlist.centos.org/?release=$releasever&arch=$basearch&repo=extras&infra=$infra
baseurl=http://mirror.centos.org/centos/$releasever/extras/$basearch/
gpgcheck=1
gpgkey=file:///etc/pki/rpm-gpg/RPM-GPG-KEY-CentOS-7


#additional packages that extend functionality of existing packages
[centosplus]
name=CentOS-$releasever – Plus
#mirrorlist=http://mirrorlist.centos.org/?release=$releasever&arch=$basearch&repo=centosplus&infra=$infra
baseurl=http://mirror.centos.org/centos/$releasever/centosplus/$basearch/
gpgcheck=1
enabled=0
gpgkey=file:///etc/pki/rpm-gpg/RPM-GPG-KEY-CentOS-7


~

“CentOS-Base.repo” 44L, 1664C


After completing the above two steps and re-executing other installation commands such as yum update, it can run normally.

2. If there is a problem with ping, then.

1. enter the command: vi /etc/sysconfig/network-scripts/ifcfg-ens33 in the Linux system

2. change ONBOOT=no in the file, change no to yes

3. restart the service: service network restart

Test ping and then go to yum, it should work

git Please tell me who you are [How to Solve]

When git creates a project,
appears because the information is not perfect when creating git folder.
the following figure is correct.
appears when git creates a project,
This is due to incomplete information when creating git folder
the following figure is correct
1. Git init
2. Git config user. Name “someone”
3. Git config user. Email“ [email protected]
4.git add *
5.git commit -m “some init msg”
*** Please tell me who you are.

Run

git config –global user.email ” [email protected]
git config –global user.name “Your Name”

to set your account’s default identity.
Omit –global to set the identity only in this repository.

fatal: unable to auto-detect email address (got ‘ Administrator@MS-201610130300. (none)’)

so the solution is to add when the above prompt appears
you execute git config — global user.email “your mailbox”
git config — global user.name “your name”
(note that “there are spaces in front of it)
after entering, then execute Git commit to succeed