Because there are many public Maven warehouses on the Internet, and it’s not convenient to manage jar packages by yourself, I’ll take advantage of this time to set up a project environment and sort out the steps involved in creating Maven projects.
install Nexus (take windows32 platform as an example):
Download nexus: http://www.sonatype.org/nexus/
decompress nexus-2.6.4-02- bundle.zip To any directory
note: Nexus runs in a servlet container called jetty and starts with a local service wrapper called tanuki Java service wrapper. The service wrapper can be configured to run nexus as a Windows service or as a UNIX daemons thread. To start nexus, you need to find the right startup script for your platform. To see a list of available platforms, look at ${nexus_ The contents of the home}/bin/JSW directory. [view the original]
therefore, first you need to install wrapper: ${nexus}_ Find the corresponding platform under home}/bin/JSW and start install as administrator- nexus.bat .
as an administrator (otherwise there will be errors such as wrapper | OpenSCManager failed – access is denied. (0x5)) Run CMD and CD into ${nexus}_ Home}/bin/directory, nexus start to start nexus.
after the console prompts wrapper | nexus started http://localhost:8081/nexus/enter nexus platform, default user name: admin, password: admin123.
quick understanding of nexus by looking at the pictures:
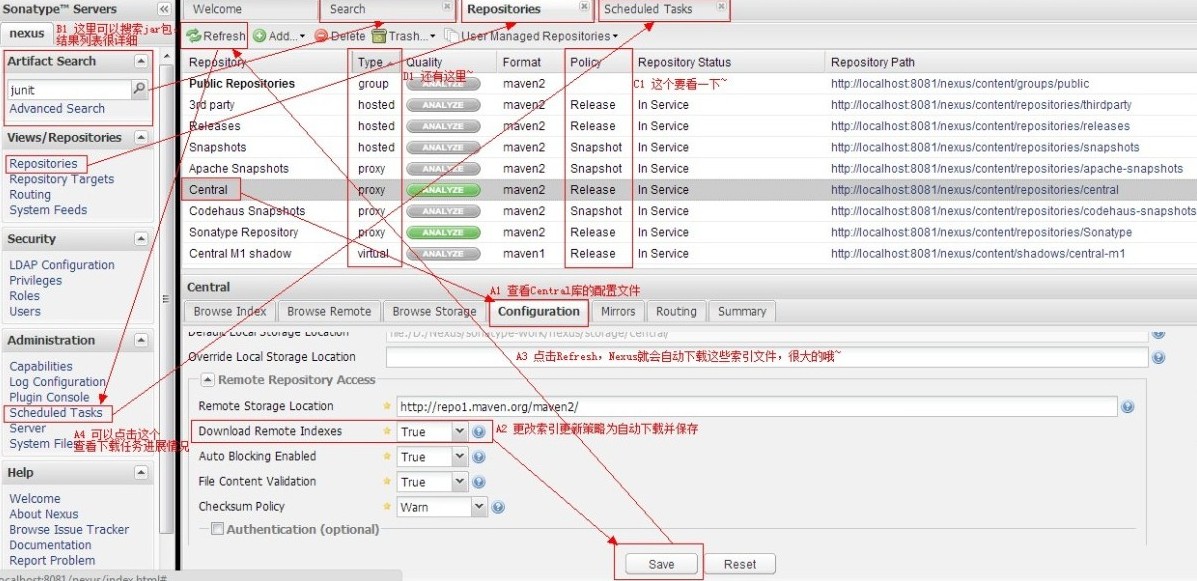
for details, please refer to the online materials, such as here.
install Maven:
nexus is used to manage artifacts, and Maven uses them to build and build projects
Download Maven: http://maven.apache.org/download.cgi ;
unzip the installation package to any directory and add m2 to the environment variable_ Home = D/apache-maven-3.0.4 (unzip directory), add bin path to path: M2_ HOME%\bin;
CMD input command: MVN – version to check whether it is installed correctly
the next step is to configure Maven. These operations do not use the command line. Open Maven at% m2_ Under home%/conf/directory setting.xml Documents
mainly change the following items, [] symbol annotation, pay attention to the notes :
<!--【localRepository】
|Thepathtothelocalrepositorymavenwillusetostoreartifacts.
|
|Default:~/.m2/repository-->
<localRepository&>D:\Maven3.0.4\repository</localRepository>
<!--【servers】
|Thisisalistofauthenticationprofiles,keyedbytheserver-idusedwithinthesystem.
|Authenticationprofilescanbeusedwhenevermavenmustmakeaconnectiontoaremoteserver.
|-->
<servers>
<!--server
|Specifiestheauthenticationinformationtousewhenconnectingtoaparticularserver,identifiedby
|auniquenamewithinthesystem(referredtobythe'id'attributebelow).
|
|NOTE:Youshouldeitherspecifyusername/passwordORprivateKey/passphrase,sincethesepairingsare
|usedtogether.
|
-->
<server>
<id&>nexus-releases</id>
<username>admin</username>
<password>admin123</password>
</server><!--【mirrors】
|Thisisalistofmirrorstobeusedindownloadingartifactsfromremoterepositories.
|
|Itworkslikethis:aPOMmaydeclarearepositorytouseinresolvingcertainartifacts.
|However,thisrepositorymayhaveproblemswithheavytrafficattimes,sopeoplehavemirrored
|ittoseveralplaces.
|
|Thatrepositorydefinitionwillhaveauniqueid,sowecancreateamirrorreferenceforthat
|repository,tobeusedasanalternatedownloadsite.Themirrorsitewillbethepreferred
|serverforthatrepository.
|-->
<mirrors>
<!--mirror
|Specifiesarepositorymirrorsitetouseinsteadofagivenrepository.Therepositorythat
|thismirrorserveshasanIDthatmatchesthemirrorOfelementofthismirror.IDsareused
|forinheritanceanddirectlookuppurposes,andmustbeuniqueacrossthesetofmirrors.
|[Note: The following url is replaced with xx; in fact, when we install nexus above is in the local machine, but the actual application will be placed on the server, so here with x to remind the next.
-->
<mirror>
<id>nexus-releases</id>
<mirrorOf&>*</mirrorOf>
<url>http://xx.xx.xx.xx:8080/nexus/content/groups/public</url>
</mirror>
</mirrors><!--and several profiles、activeProfiles--&>at this point, Maven is basically ready. Next, we install the Maven plug-in for MyEclipse, and then build the Maven project with the support of MyEclipse.
install the Maven plug-in of MyEclipse (MyEclipse version is 10, there may be small differences between different versions): install the Maven plug-in of MyEclipse
we use the online installation function of MyEclipse to install the Maven plug-in
open myeclipse10, MyEclipse – &> MyEclipse configuration center – &> software, and click add site, name: maven, URL: http://m2eclipse.sonatype.org/sites/m2e ;
after the installation, you can see the following options in MyEclipse preferences: 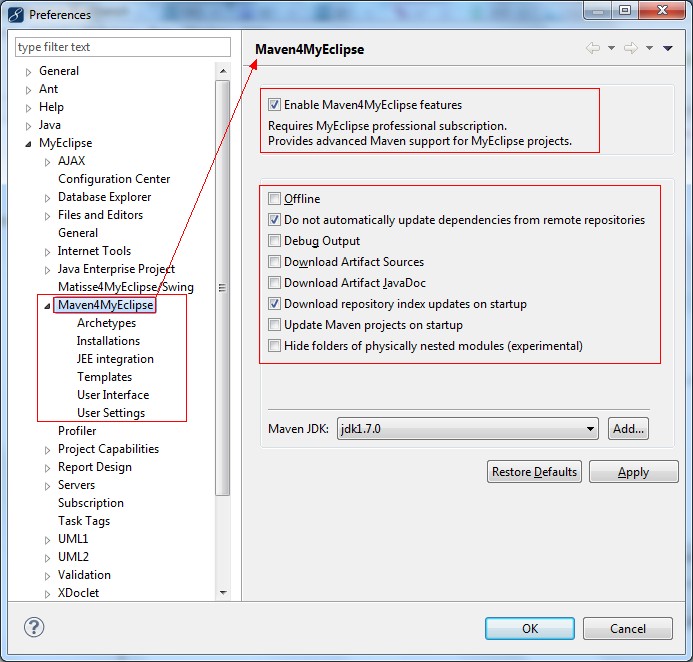
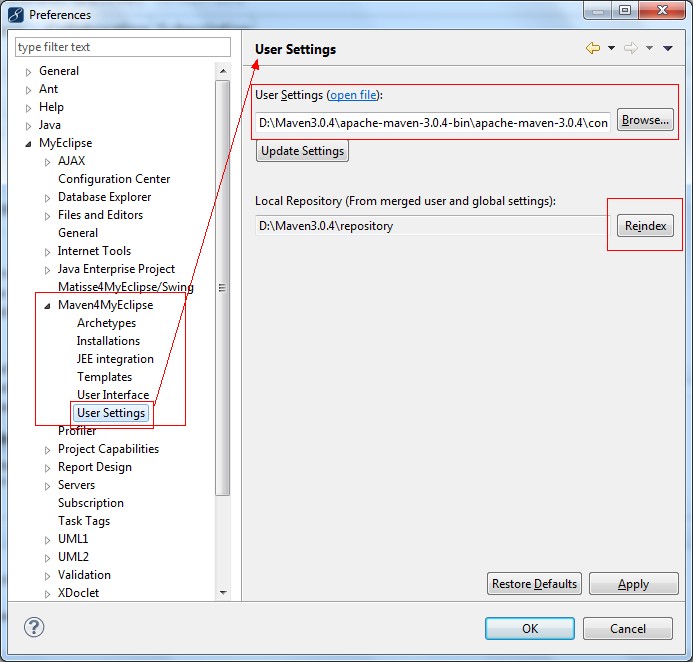
after the relevant settings are set as shown in the figure, the Maven plug-in in MyEclipse takes effect. Next, let’s build a maven project.
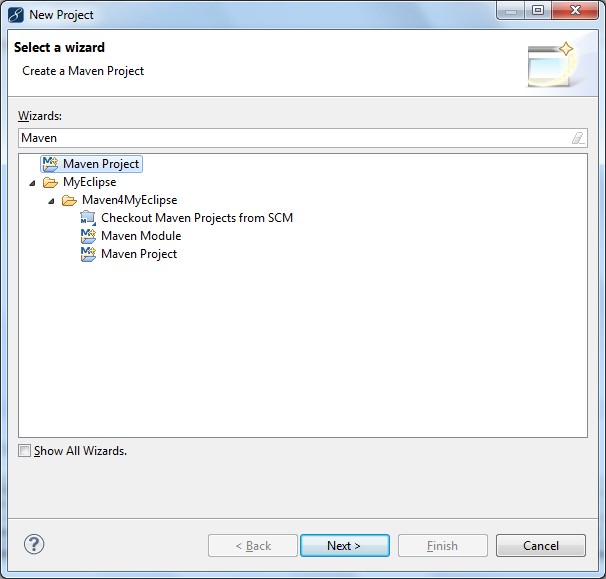
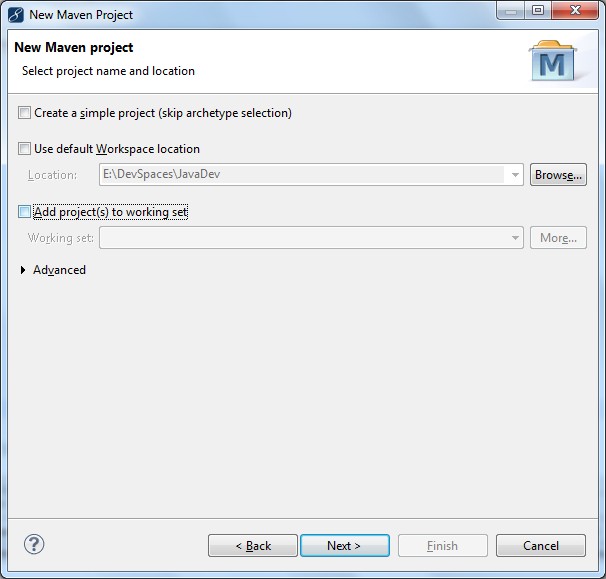
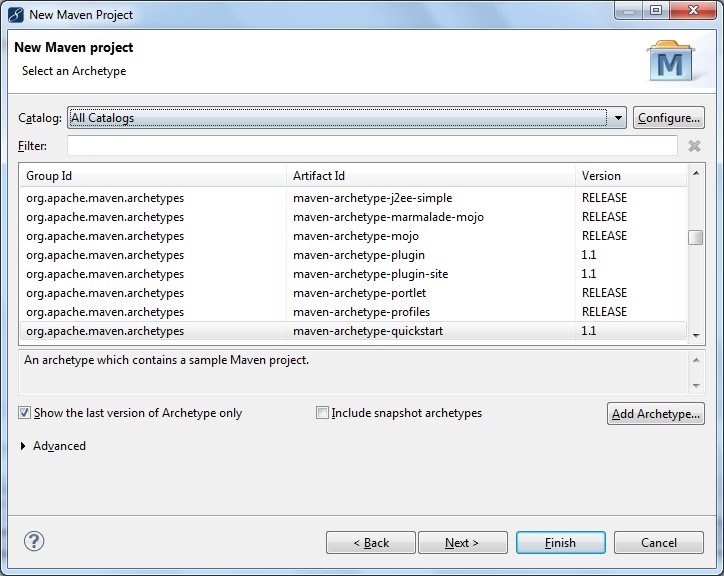
create Maven project in MyEclipse
let’s take a look at the picture:
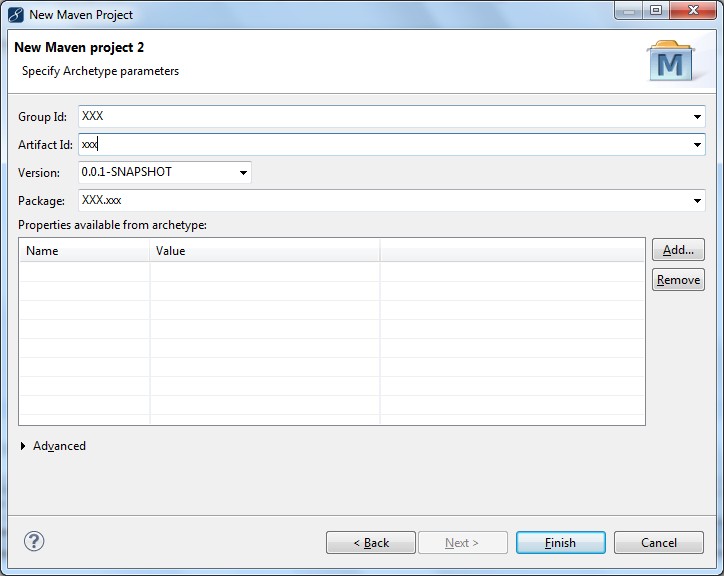
the next step is to use pom.xml Build your project, the project will have a default pom.xml You can learn this file first. pom.xml The repositories in point to the nexus warehouse built just now, and dependencies make the specific jar packages needed. It can be considered preliminarily that pom.xml It is used to manage the jar packages you need, instead of searching on the Internet one by one or manually maintaining a bunch of jar packages locally. Of course, this is only preliminary. Maven has other powerful functions, which are not clear.
postscript:
Starting from building nexus, installing Maven and MyEclipse plug-ins, and then creating Maven project, this article basically goes through these steps. Next, in the process of using maven, there will be many problems, including using Maven to build management projects efficiently, or using Maven in MyEclipse environment will encounter some inexplicable problems, which I hope to communicate with you, and I will add in the following chapters.
Similar Posts:
- [Solved] Missing artifact com. oracle:ojdbc6 : jar:11.2.0.1.0 Problem solving ojdbc package pom.xml error
- No compiler is provided in this environment. Perhaps you are running on a JRE rather than a JDK?
- [Solved] Could not find method google() for arguments [] on repository container,rn react-native-camera …
- Build failed for Android studio new project
- Missing value auth-url required for auth plugin password [Solved]
- Spring cloud multi module packaging errors [How to Solve]
- Maven Error: Failed to read artifact descriptor for xxx:jar and missing artifact maven dependency
- [Solved] openstack Missing value auth-url required for auth plugin password
- When deploying Tomcat service, resolve the cannot invoke Tomcat manager exception
- Python upgrade resulted in an error using yum