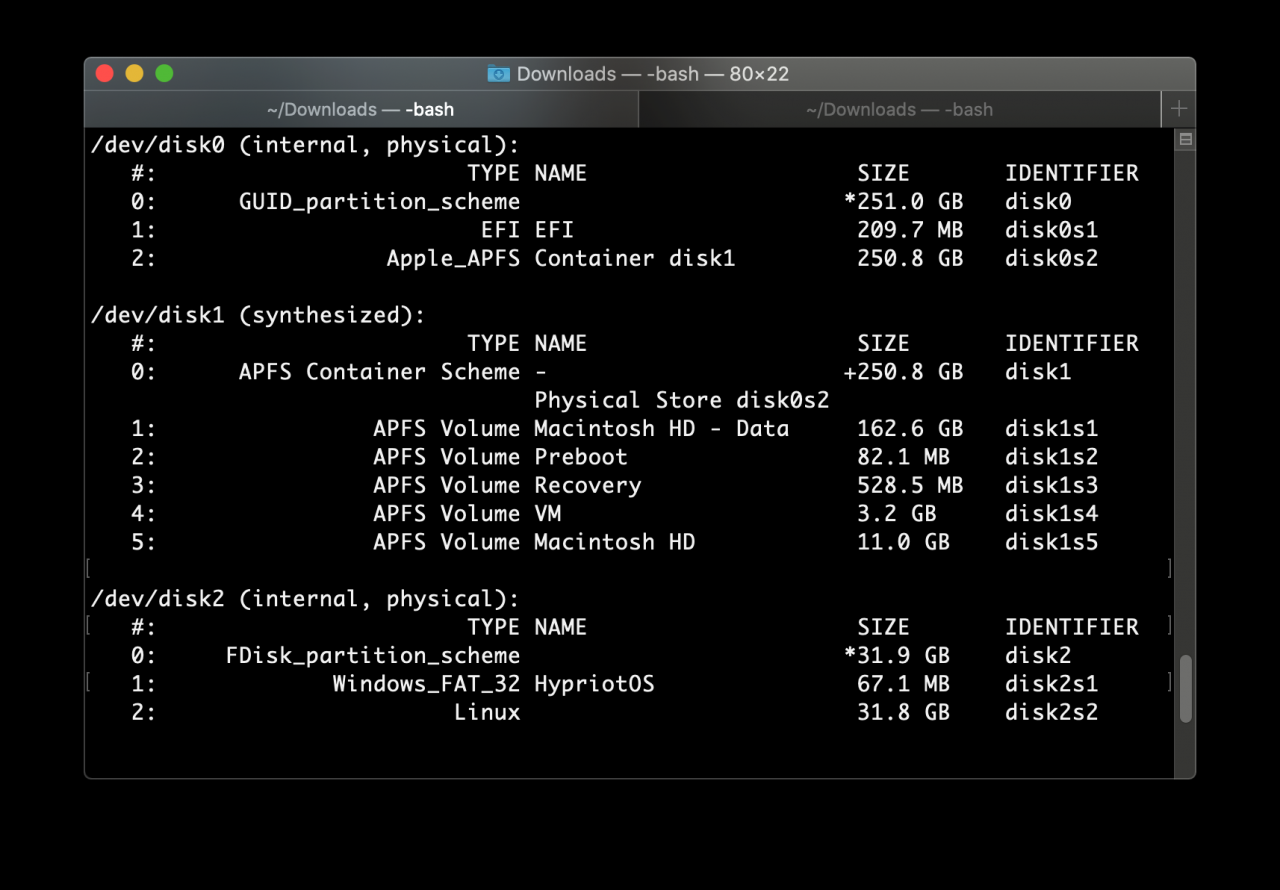
First, verify the path to your SD card. You can do this by running the following command from a terminal:
diskutil list 
In this case i can verify /dev/disk2 is my SD card because the TYPE,NAME and Size values are correct.
IF you have an existing partiton on the disk you may need to unmount it,otherwise you’will get a ”Resource Busy” error message when you try to write the image .
diskutil unmount /dev/disk2s1Now to write the image file to the disk. Note the ‘r’ added to rdisk2 which drastically improves write performance by telling dd to operate in raw disk mode:
sudo dd if=2019-09-26-raspbian-buster.img of=/dev/rdisk2 bs=1m
Depending on the size of your SDcard this may take a while. You can press CTRL+T to see the current status of dd.
Copy the image
From Terminal, enter:
sudo dd bs=1m if=path_of_your_image.img of=/dev/rdiskN conv=syncReplaceNwith the number that you noted before.
This can take more than 15 minutes, depending on the image file size. Check the progress by pressing Ctrl+T.
If the command reportsdd: bs: illegal numeric value, change the block sizebs=1mtobs=1M.
If the command reportsdd: /dev/rdisk2: Operation not permittedyou need to disable SIP before continuing.
If the command reports the errordd: /dev/rdisk3: Permission denied, the partition table of the SD card is being protected against being overwritten by Mac OS. Erase the SD card’s partition table using this command:
sudo diskutil partitionDisk /dev/diskN 1 MBR "Free Space" "%noformat%" 100%That command will also set the permissions on the device to allow writing. Now issue theddcommand again.
After theddcommand finishes, eject the card:
sudo diskutil eject /dev/rdiskN