Tag Archives: gradle

An error is reported when eclipse uses gradle to build the system

After starting eclipse today, the gradle project running normally yesterday reported an error and could not be compiled. The error information is as follows:

Unable to start the daemon process.
This problem might be caused by incorrect configuration of the daemon.
For example, an unrecognized jvm option is used.
Please refer to the user guide chapter on the daemon at http://gradle.org/docs/2.2.1/userguide/gradle_daemon.html
Please read the following process output to find out more:
-----------------------
Error occurred during initialization of VM
Could not reserve enough space for object heap
Error: Could not create the Java Virtual Machine.
Error: A fatal exception has occurred. Program will exit.

Could not fetch model of type 'EclipseProject' using Gradle distribution 'https://services.gradle.org/distributions/gradle-2.2.1-bin.zip'.

According to the literal meaning, it seems that there is not enough memory. All gradle memory needs to be configured. The steps are as follows

1. Navigate to the directory C: \ users \ & lt; username>\. gradle  

2. Create the file gradle. Properties; Content: org. Gradle. Jvmargs = – xmx512m  

3. After saving, restart eclipse to compile normally
Gradle Error: “aapt.exe” finished with non-zero exit value 1 [How to Solve]

I upgraded the Android studio version from 3.0 to 3.3. After the upgrade, the compilation is much faster, but the project has been reported since it was imported

“aapt.exe” finished with non-zero exit value 1

There has been no specific error information. Visual inspection should be that there is a problem with the code, but it has not been reported. The final solution is as follows:

Input command: gradle clean build in the process of compiling, there is an error code exposed, the problem is solved by modifying, and the compilation is successful


Gradle Packages Springboot Error: no main manifest attribute, in ./build/libs/scaffold-1.0-SNAPSHOT.jar

The reason for the error is that the build. Gradle file is missing the package plug-in for gradle

buildscript {
    dependencies {
        classpath("org.springframework.boot:spring-boot-gradle-plugin:2.2.6.RELEASE")
    }
}

plugins {
    id 'java'
}


apply plugin: 'java'
apply plugin: 'org.springframework.boot'

group 'com.guanguan.docker'
version '1.0-SNAPSHOT'

sourceCompatibility = 1.8

repositories {
    mavenCentral()
}

dependencies {
    compile('org.springframework.boot:spring-boot-starter-web:2.2.6.RELEASE')
    testCompile group: 'junit', name: 'junit', version: '4.12'
}

Just patch spring-boot-gradle-plugin.

Verification.

./gradlew build

$ java -jar ./build/libs/scaffold-1.0-SNAPSHOT.jar

Then you can see the program get up.

Eact Native Generate APP: You have not accepted the license agreements of the following SDK components:

1、 Error information

* What went wrong:
A problem occurred configuring project ':app'.
&> You have not accepted the license agreements of the following SDK components:
  [Android SDK Build-Tools 26.0.3, Android SDK Platform 26].
  Before building your project, you need to accept the license agreements and complete the installation of the missing components using the Android Studio SDK Manager.
  Alternatively, to learn how to transfer the license agreements from one workstation to another, go to http://d.android.com/r/studio-ui/export-licenses.html

* Try:
Run with --stacktrace option to get the stack trace. Run with --info or --debug option to get more log output.

2、 Cause of error

Starting from Android gradle plugin 2.2.0, gradle will automatically load the required SDK and build tools. However, because it does not accept the license, the loading dependency is terminated.

3、 Solutions

(1) Find your own Android SDK location and enter the tools/bin directory

(2) Open CMD (do not use any other one) and enter the above directory

(3) Enter the following command

sdkmanager.bat --licenses

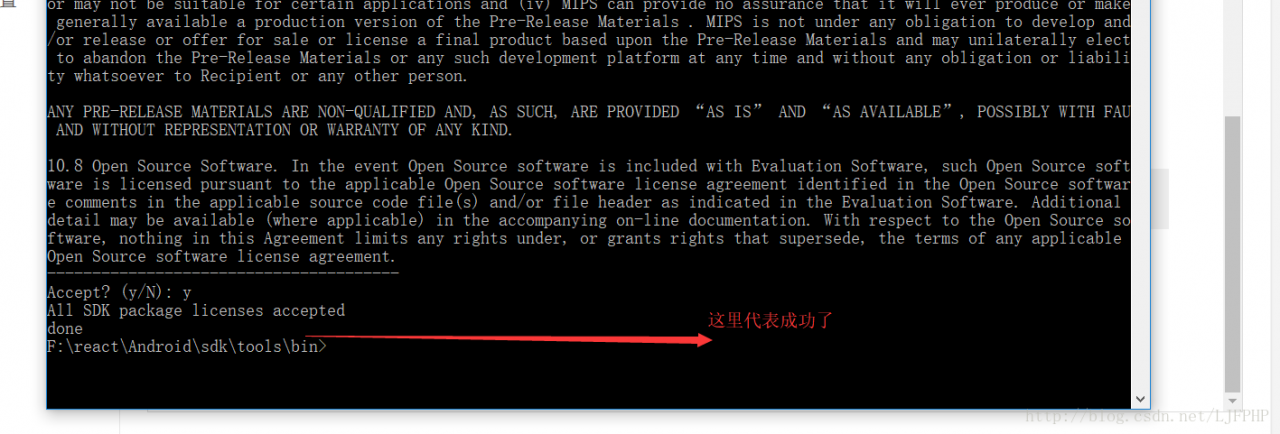
(4) After input, a lot of things will pop up. We just need to write y in all of them

(5) Success tips

Flutter: Android dependency ‘com.android.support:support-v4’ has different version …

Launching lib\main.dart on Nokia X6 in debug mode...
Initializing gradle...
Resolving dependencies...
Gradle task 'assembleDebug'...

FAILURE: Build failed with an exception.

* What went wrong:
Execution failed for task ':app:preDebugBuild'.
&> Android dependency 'com.android.support:support-v4' has different version for the compile (26.1.0) and runtime (27.1.1) classpath. You should manually set the same version via DependencyResolution

* Try:
Run with --stacktrace option to get the stack trace. Run with --info or --debug option to get more log output. Run with --scan to get full insights.

* Get more help at https://help.gradle.org

BUILD FAILED in 14s
Finished with error: Gradle task assembleDebug failed with exit code 1

How to Solve:

Add a new line in android/app/build.gradle,dependencies

dependencies {
    //PART TO ADD

    implementation "com.android.support:support-v4:27.1.1" 
}

There is another way online:

subprojects {

    project.evaluationDependsOn(':app')
    //[PART TO ADD START]
    project.configurations.all {

        resolutionStrategy.eachDependency { details -&>

            if (details.requested.group == 'com.android.support'
                    && !details.requested.name.contains('multidex') ) {
                details.useVersion "27.1.0"
            }
        }
    }
    //[PART TO ADD END]
    }

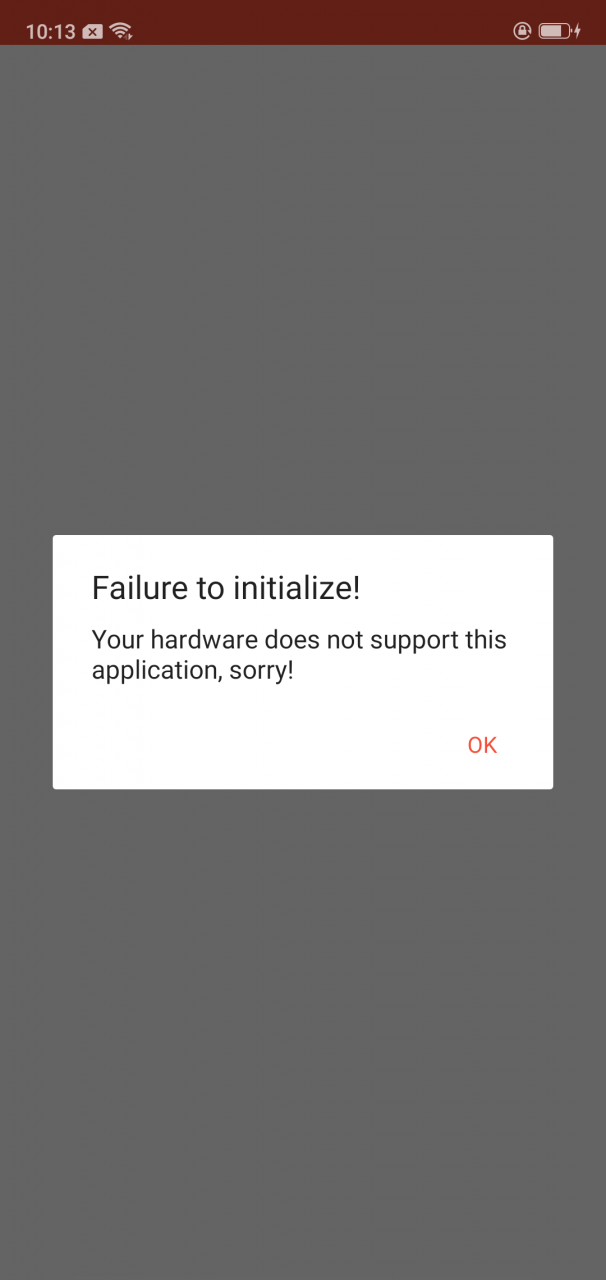
android unity Error: your hardware does not support this application,sorry!

recently, I met a problem about this, which occurred when I connected to unity3d on Android

the problem is to open the app and pop up the pop-up box below. Click OK to exit

This problem is caused by a problem with the so file in the LIBS folder

Solution one

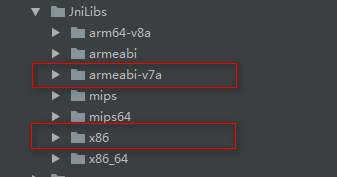
Delete other so files, only v7a and x86

then clean it and run it

Next, I’ll post out the LIBS folder in the project: (just two red boxes are needed)

Solution two

Edit the build.gradle File, add the following code to it:

sourceSets {
        main {
            jniLibs.srcDirs = ['libs']
        }
    }

Code after adding:

apply plugin: 'com.android.application'

android {
    compileSdkVersion 28
    buildToolsVersion "28.0.0"

    defaultConfig {
        minSdkVersion 21
        targetSdkVersion 28
        versionCode 1
        versionName "1.0"
    }
    buildTypes {
        release {
            runProguard false
            proguardFiles getDefaultProguardFile('proguard-android.txt'), 'proguard-rules.pro'
        }
    }
    sourceSets {
        main {
            jniLibs.srcDirs = ['libs']
        }
    }