Category Archives: Linux

Nginx normal user startup configuration error: && springboot-swagger & Unable to infer base url

2022/01/04 08:50:55 [crit] 8715#8715: *107201 mkdir() “/var/cache/nginx/proxy_temp/3” failed (13: Permission denied) while reading upstream, client: 192.168.181.166, server: localhost, request: “GET /prod-api/swagger-ui/swagger-ui-standalone-preset.js?v=3.0.0 HTTP/1.1”, upstream: “http://[::1]:8090/swagger-ui/swagger-ui-standalone-preset.js?v=3.0.0”, host: “hostname:9000”, referrer: “http://hostname:9000/prod-api/swagger-ui/index.html”. 

Solution:

Looking at the nginx log, there is no /var/cache/nginx/proxy/temp permission. Authorize it.
sudo chmod a+w /var/cache/nginx/proxy_temp -R

How to Install nginx yum:

Add repo of nginx:

echo '[nginx]
name=nginx repo
baseurl=http://nginx.org/packages/centos/7/x86_64
gpgcheck=0
enabled=1' > /etc/yum.repos.d/nginx.repo

install

yum update
yum install nginx

Did you install the latest version of nginx directly?
log]$ whereis nginx
nginx: /usr/sbin/nginx /usr/lib64/nginx /etc/nginx /usr/share/nginx /usr/share/man/man8/nginx.8.gz

Then you need to configure the normal user path of nginx. Create the relevant directory and copy the configuration file. Authorize proxy_temp. As above.
log]$ mkdir -p /data/nginx/log /data/nginx/run  /data/nginx/conf.d
log]$ cp /etc/nginx/nginx.conf /data/nginx/
log]$ cp /etc/nginx/conf.d/default.conf /data/nginx/conf.d/
sudo chmod a+w /var/cache/nginx/proxy_temp -R
log]$ vi /data/nginx/nginx.conf

#user  nobody;
worker_processes  auto;

error_log  /data/nginx/log/error.log notice;
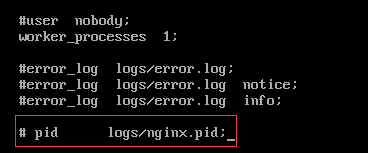
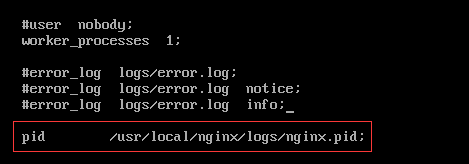
pid        /data/nginx/run/nginx.pid;


events {
    use epoll;
    worker_connections  1024;
}


http {
    include       /etc/nginx/mime.types;
    default_type  application/octet-stream;

    log_format  main  '$remote_addr - $remote_user [$time_local] "$request" '
                      '$status $body_bytes_sent "$http_referer" '
                      '"$http_user_agent" "$http_x_forwarded_for"';

    access_log  /data/nginx/log/access.log  main;

    sendfile        on;
    #tcp_nopush     on;

    keepalive_timeout  65;

    #gzip  on;

    include /data/nginx/conf.d/*.conf;
}

Hope this article will help you.

Error: listen EADDRINUSE: address already in use :::80 [How to Solve]

The port is occupied. There may be a conflict between the port settings of the previous project and the current project.
solution:

1. Open the terminal

2. Enter netstat - ano | findstr 80

3. Find the PID occupied by port 80

4. Execute the close command, tskill + PID, and terminate the port operation.

Git pull Error: error: Your local changes to the following files would be overwritten by merge:

In this case, how to keep the local changes while merging the remote ones?

First, it depends on whether you want to save local changes(yes/no)

yes

git stash  
git pull origin master  
git stash pop

git stage will take your local snapshot, and then git pull will not stop you. After the pull, your code does not retain your modifications. Surprised! Don’t worry, what did we seem to have done before

STASH

At this time, execute git stash pop. When you go to the local area, you will find that the conflicting local modifications are still there. At this time, you can commit and push whatever you want.

No

Since you don’t want to keep the local changes, it’s easy to do. Directly restore the local state to the previous commit ID. Then use the remote code to directly overwrite the local code.

git reset --hard 
git pull origin master

nginx Server Start Error: nginx: [emerg] open() “/var/run/nginx/nginx.pid” failed (Linux Restart)

Question:

After Linux restarts, an error is reported when starting the nginx server

Solution:

1. Use the command CD/usr/local/nginx/conf to enter the specified directory

2. Use the command VI nginx Conf modify the configuration file # and remove the # number in the figure

3. Change to PID/usr/local/nginx/logs/nginx.pid;

4. Use the command MKDIR/usr/local/nginx/logs to create a directory

5. Start nginx service

[Solved] 1.4pip Install xgboost Error: Command errored out with exit status

If you can’t install it on pip, you can go to Python extension packages for windows – Christoph gohlke (UCI. EDU) to find what you need to install. For example, if I can’t install xgboost, search for xgboost here

Find the WHL file that matches your own Python Version (the file name and version supported by PIP), such as Python 3.0 represented by cp38.8;

You can enter Python – M PIP debug — verbose in CMD to view the file names and versions supported by your PIP:

After downloading the file, put the file in the same level directory of your Python running file and run PIP install # xgboost-1.5.1-cp38-cp38-win32.WHL (what I need is xgboost-1.5.1-cp38-cp38-win32.WHL)

Linux Files Save Error: E325: ATTENTION [How to Solve]

Error Messages:

E325: ATTENTION
Found a swap file by the name “.server.properties.swp”
owned by: root dated: Thu Jan 1 12:02:39 2022
file name: /server.properties
modified: YES
user name: root host name: wang.localdomain
process ID: 10718 (still running)
While opening file “server.properties”
dated: Thu Jan 1  12:02:39 2022
(1) Another program may be editing the same file. If this is the case,
be careful not to end up with two different instances of the same
file when making changes. Quit, or continue with caution.
(2) An edit session for this file crashed.
Error: If this is the case, use “:recover” or “vim -r server.properties”
to recover the changes (see “:help recovery”).
Error: If you did this already, delete the swap file “.server.properties.swp”
to avoid this message.


Solution:

First use (individual tutorials have said that the deleted files are in the root directory, at least I didn’t find them)
ls -a
to see if there is a .swp file that opens with an error
For example, the one I opened with an error was server.properties
In this file directory use ls -a

Then use rm -f

Then the error report disappears.

[Solved] fsync: failed to connect to feed.openvas.org (89.146.224.58)

The server address has been updated, the original address feed.openvas.org has been updated to the new address feed.community.greenbone.net
You need to change the URL of the corresponding command:


vim /usr/sbin/greenbone-nvt-sync
vim /usr/sbin/greenbone-scapdata-sync
vim /usr/sbin/greenbone-certdata-sync

We are seeing no further transitions from old server feed.openvas.org to new server feed.community.greenbone.net. Since the server will simply not be available beyond September 30th, we decided the following steps to make all users of the deprecated server aware of the situation:

  • On September 1st 2020 we stop updating the Greenbone Community Feed as served via feed.openvas.org.
  • On the same day we add a VT that alerts for any scanned host a highest severity and it will inform about the options to either change the server name for the Greenbone Community Feed or to go with a professional Greenbone product.

and replacing the url, it started downloading the feeds!

Please note that this is not required if you have build GVM-20.08 as this release already includes the sync script pointing at the updated feed server.

If you had to change the URL you probably have some older sync scripts in your PATH which takes precedence over the updated ones from GVM-20.08.

I would strongly suggest to check how you have build your setup and to remove remains / leftovers from your old installation (at least the sync scripts are still the ones from an older GVM installation if you had to change the URL).

If the suggestion isn’t followed you might get into trouble into the future due to using outdated sync scripts not getting any updates.

[Solved] Ubuntu 18.04 install MATLAB Error: “License Manager Error -8”

Following the tutorial, the following error occurred when the installation was completed:

Solution:
Copy the crack tool MATLAB_R2018b_Linux64_Crack directory /home/username/mnt/LINUX/MATLAB/R2018b/bin/glnxa64/matlab_startup_plugins/lmgrimpl/ libmwlmgrimpl.so Copy to the installation directory /usr/local/MATLAB/R2018b/bin/glnxa64/matlab_startup_plugins/lmgrimpl/libmwlmgrimpl.so

Just restart

Ubuntu Install opencv320 Error: error: ‘CODEC_FLAG_GLOBAL_HEADER’ was not declared in this scope

Modify /opt/opencv/opencv-3.2.0/modules/videoio/src/cap_ffmpeg_impl.hpp, add the following in the header:

#define AV_CODEC_FLAG_GLOBAL_HEADER (1 << 22)
#define CODEC_FLAG_GLOBAL_HEADER AV_CODEC_FLAG_GLOBAL_HEADER
#define AVFMT_RAWPICTURE 0x0020

Save and recompile.