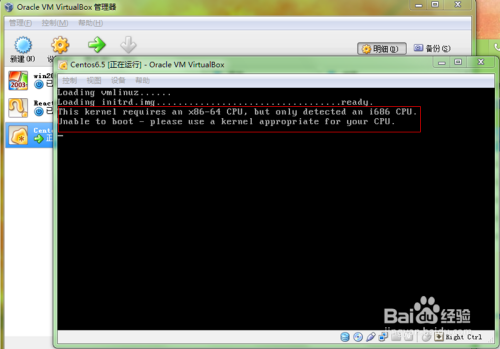
Oracle VM virturalbox is a free and open source powerful virtual machine software. The main products of Oracle (Oracle database, Oracle convergence middleware, Oracle business products and Oracle RAC) have passed the certification of Oracle VM, which is also the only virtualization software with Oracle application certification in the industry. There will always be problems in the process of using the product. The author recently re installed the machine, and the following problems occurred when installing the virtual machine on the new machine: as shown in Figure 1
This kernel requires an x86-64 CPU,but only detected an i686 CPU.
Unable to boot – please use a kernel appropriate for your CPU.
After reading a lot of materials, I successfully solved the problem. Now I will share the process of solving the problem with you, so as to help more people
Tools/raw materials
Oracle VM VirturalBox
your computer BIOS Setup help book
Method/step
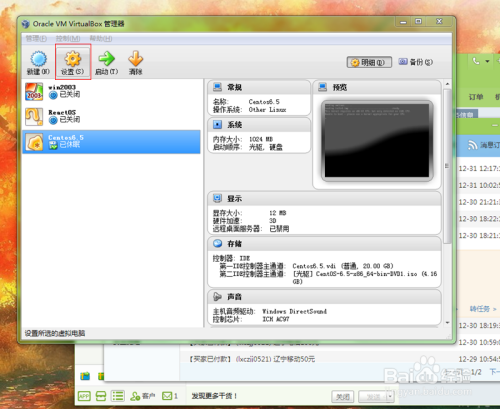
first, shut down the virtual machine and check whether there is a problem with the virtual machine settings, as shown in Figure 2
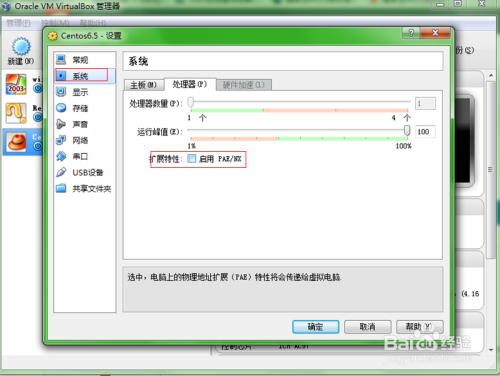
switch to the system tag processor, check the enable PAE/NX option, as shown in Figure 3, confirm
if the problem remains, we should start to check the problems of our computer. Download the software secure,
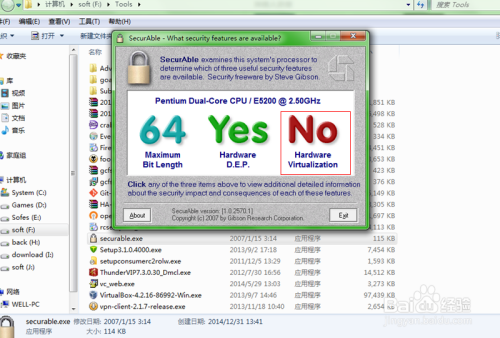
shared connection (Pan. Baidu. COM/S/1ddiu3up), and the check results are shown in Figure 4; In the first case, we will continue to look. In the second case, we will jump to step 5 directly
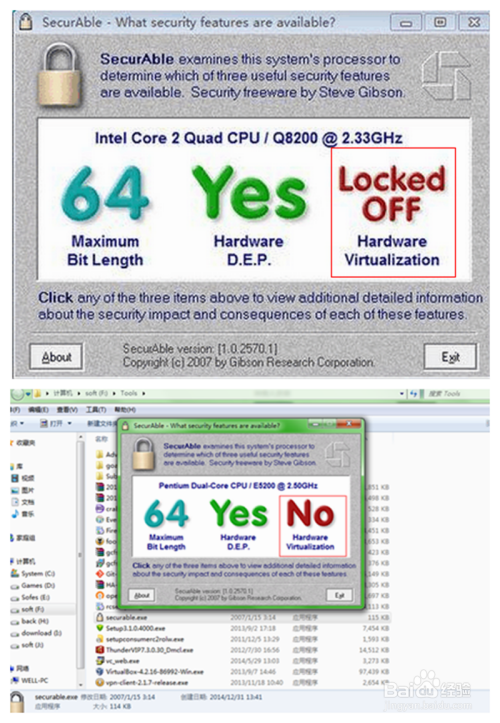
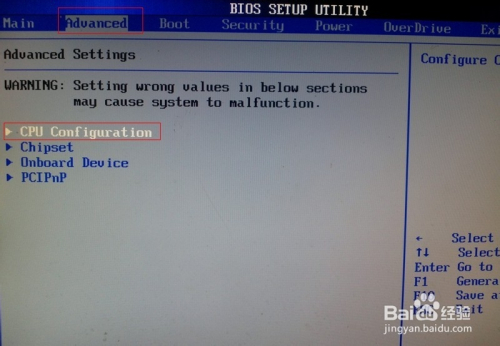
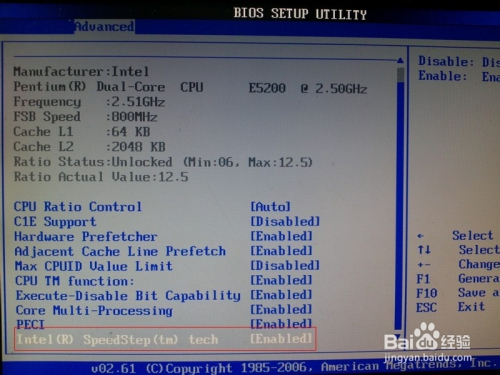
lockoff option, which is not supported by the motherboard; Please restart the machine and enter the BIOS settings (the settings of each motherboard manufacturer are slightly different, but they are basically the same. Please pay attention to the power on self-test items and motherboard manufacturer’s help). As shown in Figure 5, advanced – CPU settings; Intel XXX selects enable. F10 save restart. If you restart the machine, it will be like the second case in Figure 4, red “no”
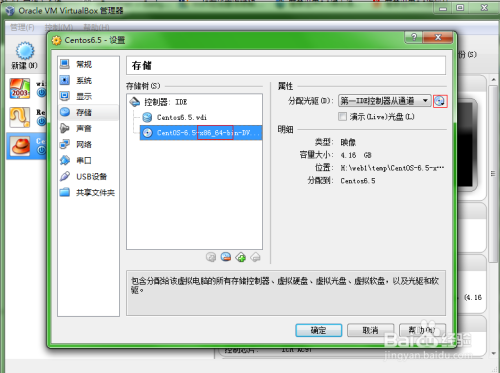
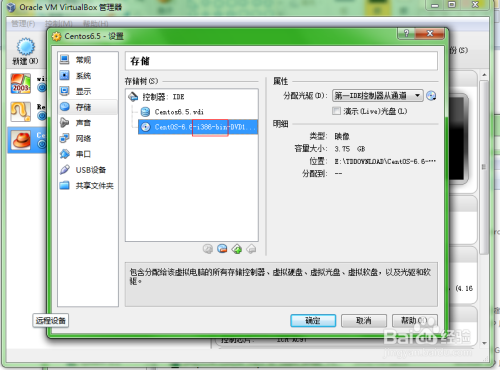
in Figure 4, the red “no” option is not supported by CPU, as shown in Figure 6. There is no way but to switch to 32-bit system; Open virtual machine settings – storage – change 64 bit CD to 32-bit CD, as shown in Figure 7 and figure 8. Confirm; Start the installation again and find that everything is normal, as shown in Figure 9

Similar Posts:
- the virtual machine is configured for 64-bit guest operating systems
- [Run the android emulator] emulator: ERROR: x86 emulation currently requires hardware acceleration!
- The solution of failed to install Intel haxm error in Android studio installation
- Emulator: Process finished with exit code 1
- Ubuntu16.04: How to Solve “no java virtual machine was found after searching the following locations:” Error
- [Solved] Dell server kernel error: ACPI: No handler for Region [POWR] (ffff88012e5ad2b8) [IPMI]
- Windows 10 Install Docker Error: “Hardware assisted virtualization and data execution protection must be enabled”
- How to fix VirtualBox session error: Call to NEMR0InitVMPart2 failed VERR_NEM_INIT_FAILED (VERR_NEM_VM_CREATE_FAILED)
- How to Solve Vagrant Start Error
- [Solved] virtualbox Kernel driver not installed(rc=-1908)