Tag Archives: mysql

MYSQL ERROR 1819 (HY000): Your password does not satisfy the current policy requirements

When I’m ready to authorize users:

grant all privileges on *.* to 'root'@'%' identified by '123456' with grant option;

In the following situation o (╥﹏╥) O:

ERROR 1819 (HY000): Your password does not satisfy the current policy requirements
mysql> show variables liek "%validate%"

When I still can’t resist my enthusiasm of learning and struggling, After a while, we found the key to the problem

The original reason is the default security level of MySQL

Next, let’s look at the default security level of MySQL

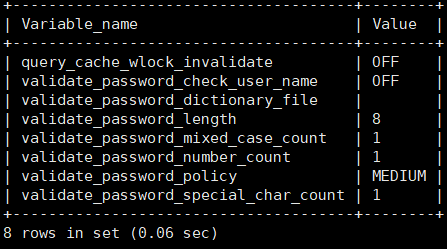
mysql> show variables like "%validate%";

The length of the original MySQL password is 8 bits, and the password principle is medium

We found this problem, and we started to solve it

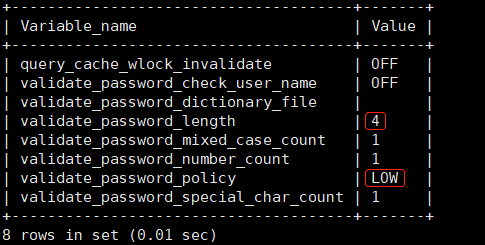
(1) In ordinary learning and training, we can set its length to 4 digits

mysql> set global validate_password_length=4;

(2) Set its security policy as: low

mysql> set global validate_password_policy=0;

Ha ha! Next, we can check the password security information of MySQL

mysql> show variables like "%validate%";

Now we can reauthorize~

mysql> grant all privileges on *.* to 'root'@'%' identified by '123456' with grant option;
Query OK, 0 rows affected, 1 warning (0.03 sec)

I hope the above methods are useful to you, there is no bug problem in life.

[Solved] MySQL uses the workbench tool, and the table status is read only

Solution:

If the primary key is not set in the database table in MySQL, you cannot edit the data directly in the workbench, you must set PK and NN.

Expansion:

– PK: primary key (column is part of a pk)

– NN: not null (column is nullable)

– UQ: unique (column is part of a unique key)

– AI: auto increment (the column is auto incremented when rows are inserted)

– BIN: binary (if dt is a blob or similar, this indicates that is binary data, rather than text)

– UN: unsigned (for integer types, see docs: “10.2. Numeric Types”)

– ZF: zero fill (rather a display related flag, see docs: “10.2. Numeric Types”)

When installing MySQL database on Mac OS, the system prompts MySQL: command not found

Geeks, please accept the hero post of 2021 Microsoft x Intel hacking contest>>>

After we install mysql, we enter the MySQL command in the terminal and find that we can’t see the database we installed. This is because you don’t configure the environment variables

Install MySQL database in OS system and save it in/usr/local/MySQL by default

So how do we configure environment variables

1. Open terminal, enter: sudo Su enter to enter the system administrator management directory (of course, you need to enter your user password to enter)

2. Enter the command: VIM/etc/profile, and then enter the VIM editing interface

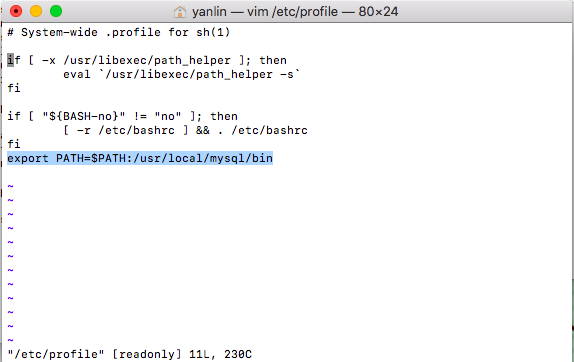
3. In the VIM editing interface, press I to enter the editing state. Then, you can add the path name and enter the command: export path = $path/usr/local/MySQL/bin

4. Press the ESC key to exit the editing state

5. Enter the command: WQ( Indicates save and force exit)

6. Then I’ll call back to my previous terminal interface

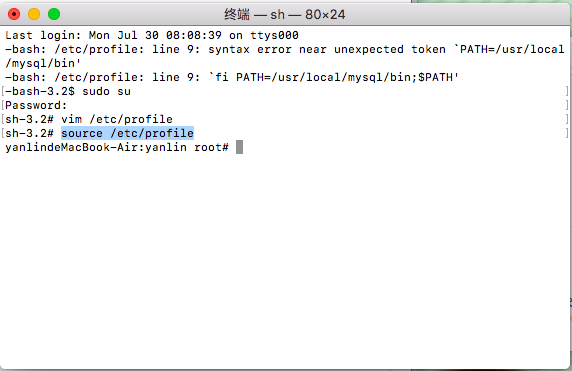
7. Then enter the command: source/etc/profile in this interface to indicate that the settings will take effect immediately. Of course, it’s the same for you to restart after closing

At this time, you can enter: MySQL carriage return to test

What if the system still prompts MySQL: command not found

1. Apple – > System Preferences – > At the bottom, click Mysql to close the MySQL service in the pop-up page

2. Enter the terminal input: CD/usr/local/MySQL/bin

3. After entering, log in the administrator permission sudo Su (enter your computer password)

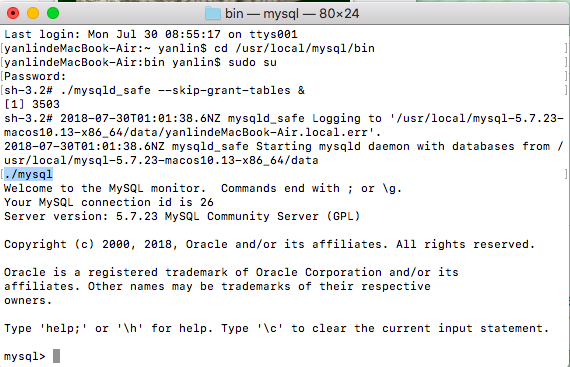
4. Enter the following command to disable the MySQL verification function./mysqld_ safe –skip-grant-tables & ( Note that mysqld

5. After entering, MySQL will restart automatically (you can see in the preferences that the state of MySQL will change to running)

6. Then enter the command./MySQL

7. After entering, you can see the following effect:

The comfortable MySQL > Prompt

8. Here’s how to change the password

Then enter: flush priorities

After entering, enter: set password for ‘root’ @’localhost ‘= password (‘123’)

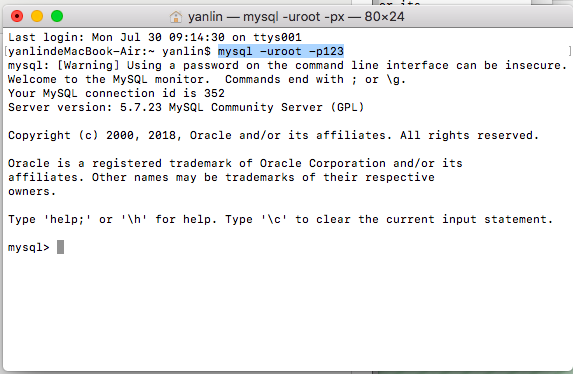
9. Re open a terminal and enter: MySQL – uroot – P123 to enter MySQL data:

Reference: https://blog.csdn.net/adley_ app/article/details/54694230

No compatible servers were found when installing MySQL

Geeks, please accept the hero post of 2021 Microsoft x Intel hacking contest>>>

1、 Problem description

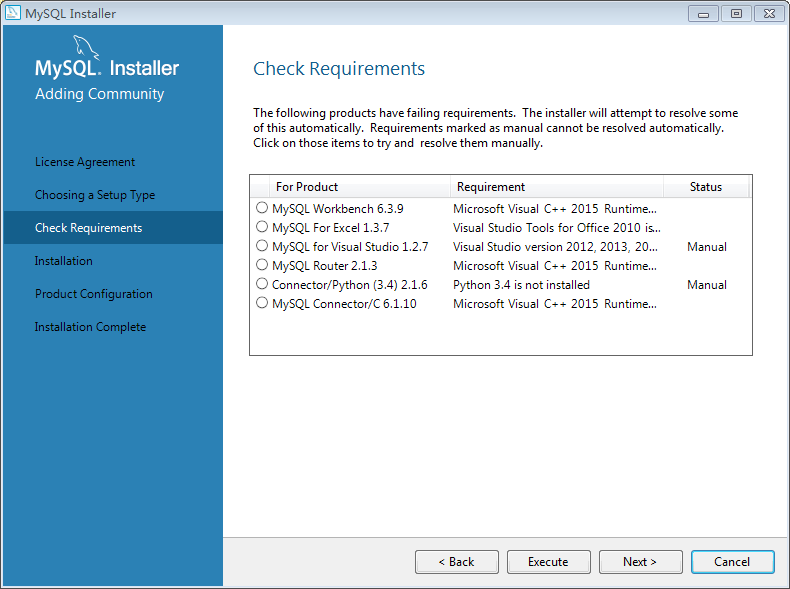
Today, in the process of installing the database, we encountered an error prompt:

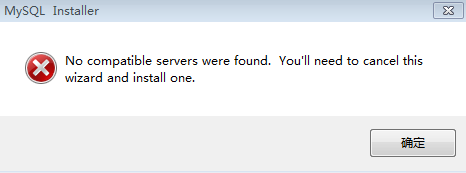
No compatible servers were found,You'll need to cancel this wizard and install one!

As shown in the figure below:

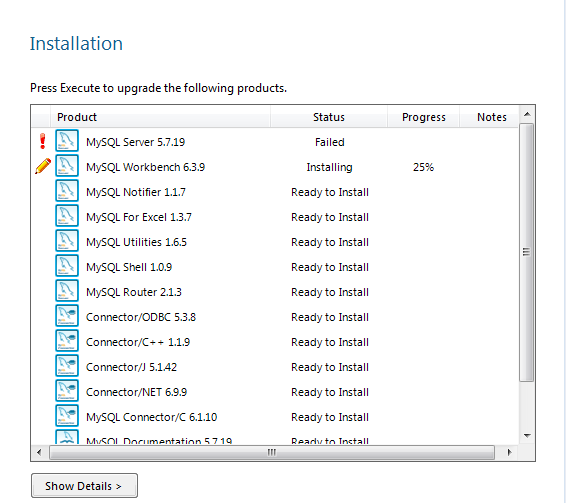
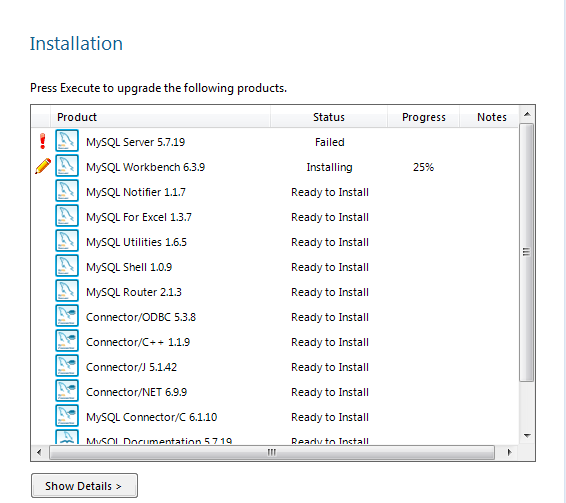
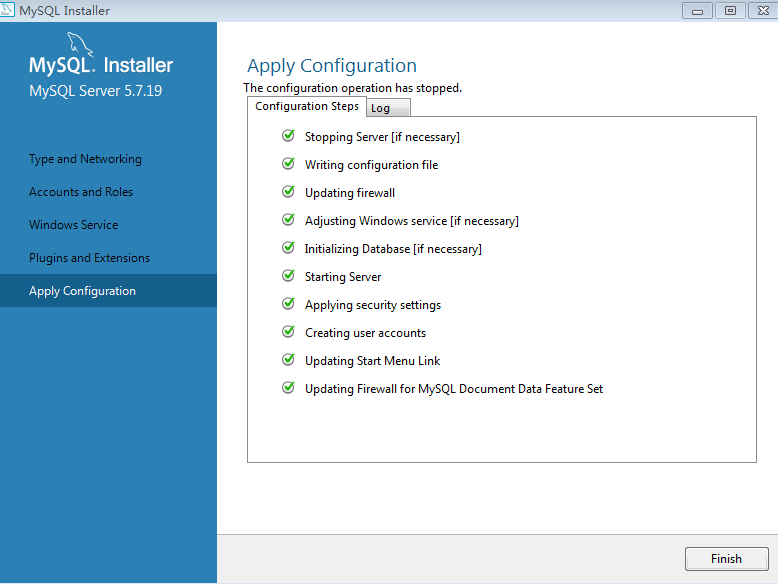
I’m proficient in installing and uninstalling databases. I even had a “wet shoe” day. After a period of time, the first thing I thought was that the previous registry information had not been deleted completely. Well, it must be so. I decisively went to the control panel to uninstall MySQL and found the blog related to the deletion of the MySQL registry. After a period of busy work, I vowed to reload it again, Then, I was hit in the face!!! Learn from the past and work hard to check. Ah, this MySQL server was not installed successfully! As shown in the figure:

Then I thought about whether I needed to install other software, and then after unloading the database again, I chose to install the following big lump of things. Before, I chose to skip it directly, full of hope, waiting silently… However, he failed again, the same mistake.

Finally, according to the idea of software missing, we found a solution on the Internet

2、 Solutions

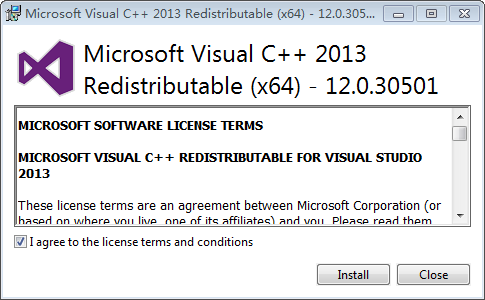
The reason for the installation failure is that you need to upgrade a plug-in, Visual C + + 2013 and Visual C redistributable packages and must be 32-bit Visual C + + redistributable packages for visual studio 2013 note that it is 32-bit, which has nothing to do with the system type of the computer, that is, 32-bit and 64 bit systems should be installed with 32-bit Visual C + + I choose to download it from the official website of Microsoft https://www.microsoft.com/zh-cn/download/details.aspx?id=40784 Enter the website and click download, as shown in the following figure:

Select vcredist_ X86.exe-6.2 MB, download and install

After installation, install MySQL database again

Complete, problem solved

The problem was solved by: https://blog.csdn.net/q95548854/article/details/78780916 To learn more about it. Please move to my blog

Mysql Error when creating table: Tablespace for table `tablexx` exists. Please DISCARD the tablespace before IMPORT.

When creating a table in a local database, the following error occurred unexpectedly, saying that the table already exists

However, when you view the table information through DESC, you say that the table does not exist

Searching for the table name in the local system, we found an. IBD file [InnoDB file]

After deleting the. IBD file, there is no problem to recreate the table

reference resources:

The MySQL InnoDB table space is occupied, and the table with the same name cannot be created or imported

Error: table space for table ‘database’. Temp ‘exists. Please discard the table space before import

MySQL data file description

InnoDB File-Per-Table Tablespaces


Prepared statement needs to be re prepared

Detailed map traversal, teach you to master the complex gremlin query debugging method>>>

I don’t like to say goodbye, because sometimes I know that the next goodbye is far away or no goodbye

The error is as follows:

ERROR 1615 (HY000) at line 406 in file: 'update-mysql.sql': Prepared statement needs to be re-prepared

This is where a stored procedure is called. The solution is to reset the values of the two cache size variables of MySQL, as follows:

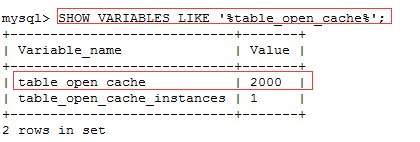
table_ open_ Cache: the size of the table cache

table_ definition_ Cache: table definition information cache

View the values of the two configuration variables:

SHOW VARIABLES LIKE '%table_open_cache%';

SHOW VARIABLES LIKE '%table_definition_cache%';

Reset the size of the current value:

mysql> set global table_open_cache=16384;
mysql> set global table_definition_cache=16384;

After setting, you can check the variable value again

Then re execute the script file that called the stored procedure

mysql Remote connection problems: Lost connection to MySQL server at ‘reading initial communication packet’, syste…

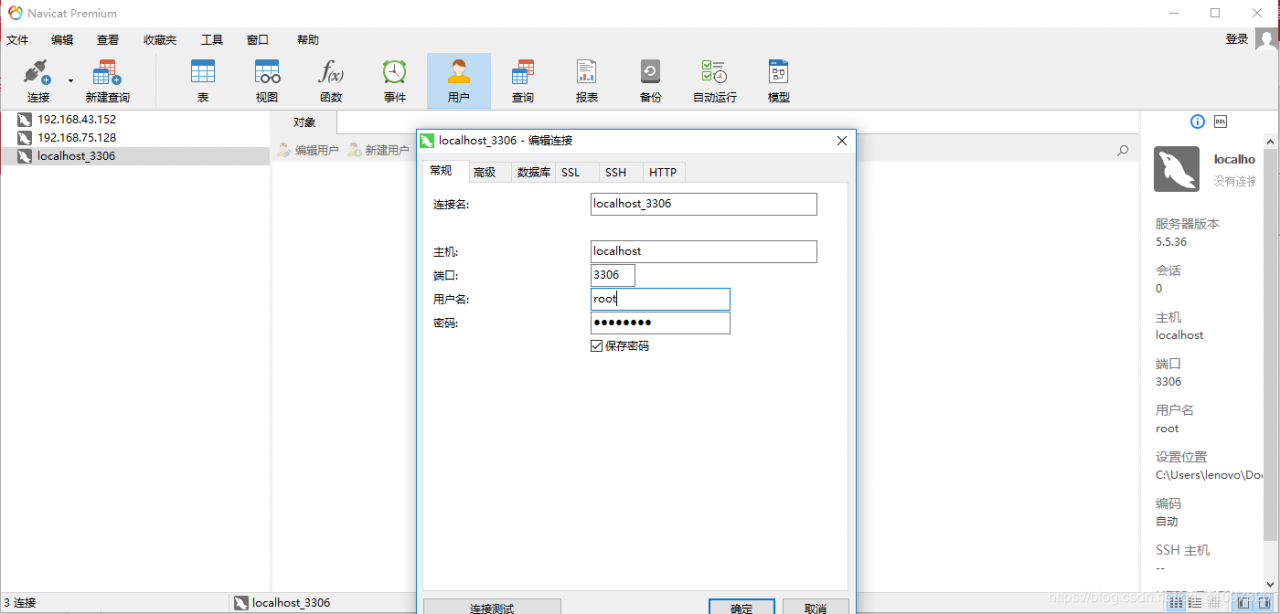
When using Navicat for MySQL to remotely connect to MySQL, there is a problem

Lost connection to MySQL server at ‘reading initial communication packet’, system error: 0

It’s disgusting. The server was rebooted once, and it was dealing with all kinds of MySQL problems all morning

Two methods were tried, but they didn’t work

Modify my.cnf file (my.ini for Windows)

Generally, it is in the installation directory of MySQL,/etc/mycnf

Add skip name resolve in the [mysqld] zone of my.cnf configuration file. What netizens say is to skip the DNS reverse resolution function of MySQL connection, which can improve the performance of MySQL. In this case, you can only use the IP in the MySQL authorization table to connect to the MySQL service

But it doesn’t work. Several parameters of my.cnf configuration are attached:
skip name resolve skips the DNS reverse resolution process. (in this way, you can’t use the host name to connect to MySQL, you can only use the IP connection)
skip grant tables skips the authorization table (the solution when the MySQL login password is forgotten)
skip networking skips the TCP/IP connection
skip host cache disable the host name cache; To clear the host name cache, execute the flush hosts statement or the mysqladmin flush hosts command

write the IP address of the client in the/etc/hosts file of the MySQL server, and do the host mapping for any name

Because the working environment needs to access MySQL at multiple addresses, it is unrealistic to maintain the hosts file all the time, so it is eliminated

It turns out that
remote access to MySQL is OK, but not local access, which means that you can run in the production environment as usual. It’s disgusting

Solving the problem of QT connecting MySQL database in Windows system: qmmysql driver not loaded

In the process of learning QT, we encountered the situation that we could not connect to the database

#include <QApplication>
#include <QtSql>
#include <QMessageBox>
#include <QDebug>

int main(int argc, char *argv[])
{
    QApplication a(argc, argv);

 //Show existing database driver
    qDebug()<<QSqlDatabase::drivers();

    QSqlDatabase db = QSqlDatabase::addDatabase("QMYSQL");
    db.setHostName("localhost");
    db.setDatabaseName("dbname");
    db.setUserName("root");
    db.setPassword("password");
    
    if (!db.open()) {
       QMessageBox::critical(0, QObject::tr("Database Error"),
                              db.lastError().text());
    }

    return a.exec();
}

The output of the console is:

As shown above, MySQL driver exists, but it still prompts an error: qmmysql driver not loaded

The reason is that libmysql.dll is missing in the program

This dynamic connection library is in the Lib directory of the MySQL installation file. For example, if my MySQL is installed on Disk C, libmysql.dll is located at:

C:\MySQL\MySQL Server 5.7\lib\

Find libmysql.dll, copy it to the directory where your exe is located, and then run the program. At this time, you can connect to MySQL

note: 32-bit QT program must use 32-bit libmysql.dll, not 64 bit. Similarly, 64 bit programs use 64 bit libmysql. DLL

Libmysql.dll can be found in the Lib directory of the MySQL installation file

If there is no corresponding version, you can also download it here:

Connection: http://pan.baidu.com/s/1kVKwLuR

Password: v6uy

You can connect to the database through the above method, but it is very troublesome to copy libmysql.dll to the directory where the EXE is located every time. Therefore, when writing programs, you can use a convenient method:

Copy libmysql.dll to the bin directory of QT installation file, such as my bin directory:

D:\Qt\Qt5.7.0\5.7\mingw53_32\bin\

After copying to the bin directory, there is no need to copy libmysql.dll to the directory where the EXE is located. The program can connect to the MySQL database correctly

mysql 1142 – SELECT command denied to user ‘root_ssm’@’localhost’ for table …

A super detailed tutorial: springboot integrates mybatis plus>>>

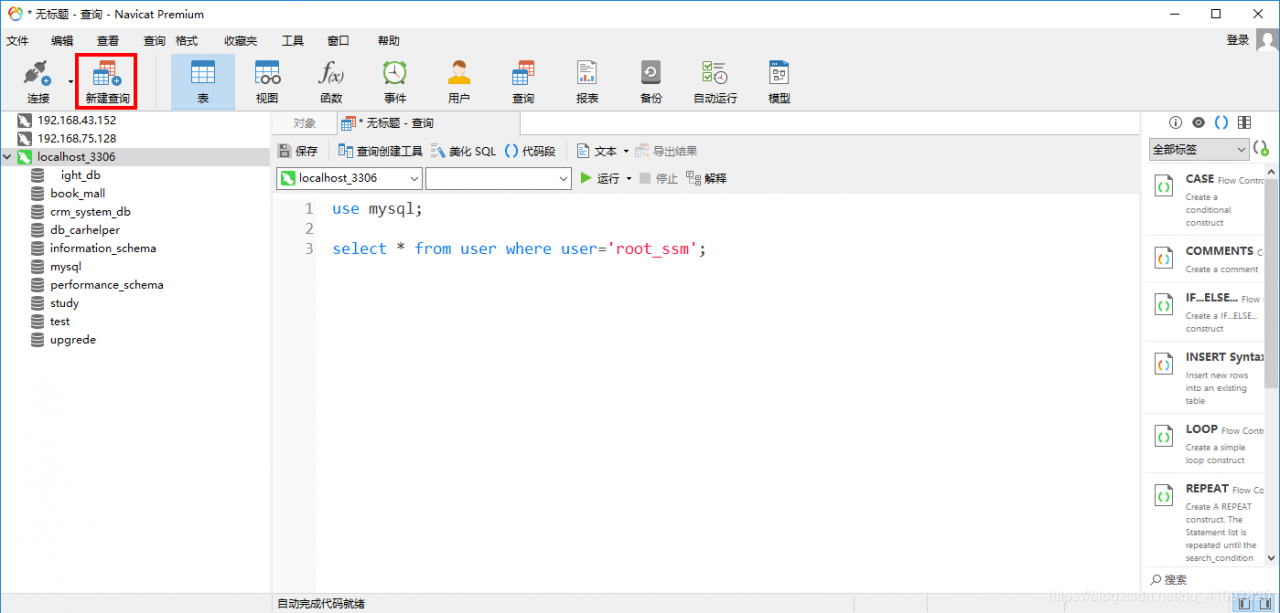
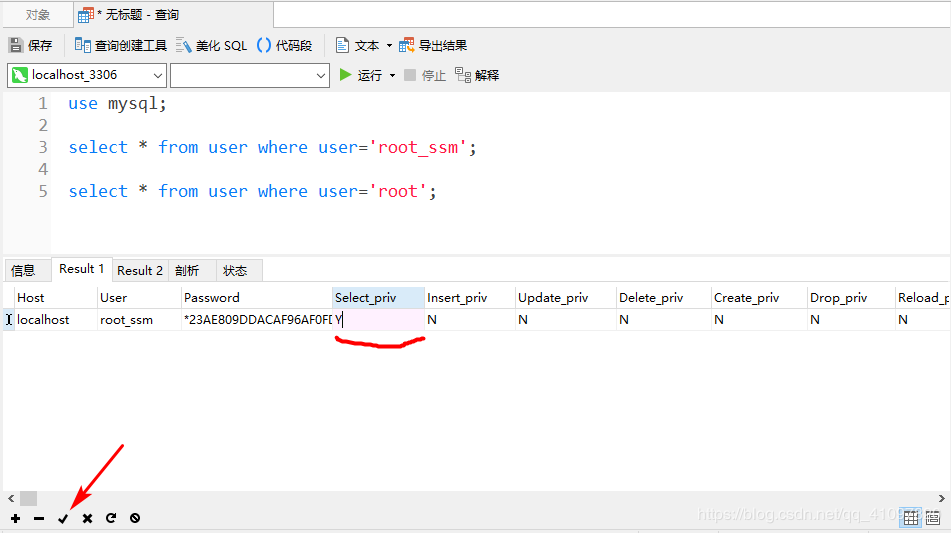
Use client authorization (Navicat premium 12)

1. Login MySQL with root

2. To create a new query, enter the command:

use mysql;

select * from user where user=’root_ ssm’;

the user name to be authorized is written in the condition following the SQL statement where

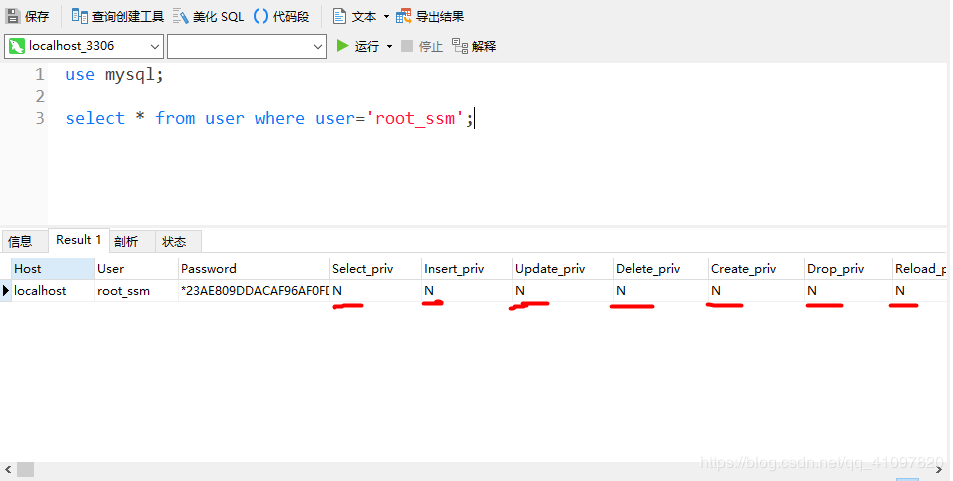
3. Execute the statement to view the user’s information

The value in the red part of the icon is “n”, which means that there is no permission. Just change it to y

change all columns with the value of ‘n’ to ‘y’, and remember to restart the service after the change

2. Command line client using MySQL 2

look at ‘root’_ SSM ‘user information

use mysql;


select * from user where user='root_ssm';


modify the localhost permission of root user

according to the column names in the query results, write the update statement one by one to modify

update user set Select_pri='Y' where user='root_ssm'

refresh the MySQL system permission related table after all the changes are completed:

flush privileges;

after that, restart the MySQL service and you will have all the permissions