Geeks, please accept the hero post of 2021 Microsoft x Intel hacking contest>>> ![]()
After we install mysql, we enter the MySQL command in the terminal and find that we can’t see the database we installed. This is because you don’t configure the environment variables
Install MySQL database in OS system and save it in/usr/local/MySQL by default
So how do we configure environment variables
1. Open terminal, enter: sudo Su enter to enter the system administrator management directory (of course, you need to enter your user password to enter)
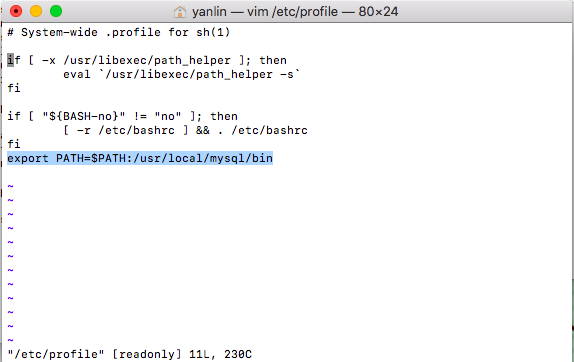
2. Enter the command: VIM/etc/profile, and then enter the VIM editing interface
3. In the VIM editing interface, press I to enter the editing state. Then, you can add the path name and enter the command: export path = $path/usr/local/MySQL/bin
4. Press the ESC key to exit the editing state
5. Enter the command: WQ( Indicates save and force exit)
6. Then I’ll call back to my previous terminal interface
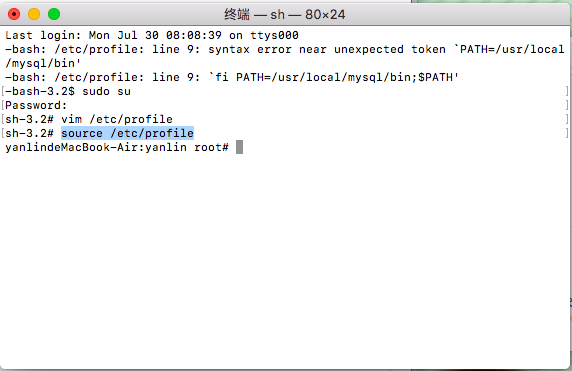
7. Then enter the command: source/etc/profile in this interface to indicate that the settings will take effect immediately. Of course, it’s the same for you to restart after closing
At this time, you can enter: MySQL carriage return to test
What if the system still prompts MySQL: command not found
1. Apple – > System Preferences – > At the bottom, click Mysql to close the MySQL service in the pop-up page
2. Enter the terminal input: CD/usr/local/MySQL/bin
3. After entering, log in the administrator permission sudo Su (enter your computer password)
4. Enter the following command to disable the MySQL verification function./mysqld_ safe –skip-grant-tables & ( Note that mysqld
5. After entering, MySQL will restart automatically (you can see in the preferences that the state of MySQL will change to running)
6. Then enter the command./MySQL
7. After entering, you can see the following effect:
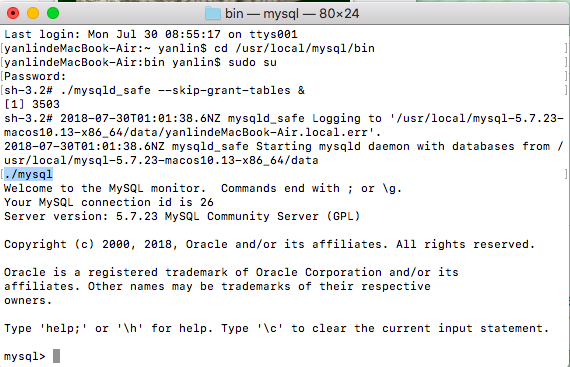
The comfortable MySQL > Prompt
8. Here’s how to change the password
Then enter: flush priorities
After entering, enter: set password for ‘root’ @’localhost ‘= password (‘123’)
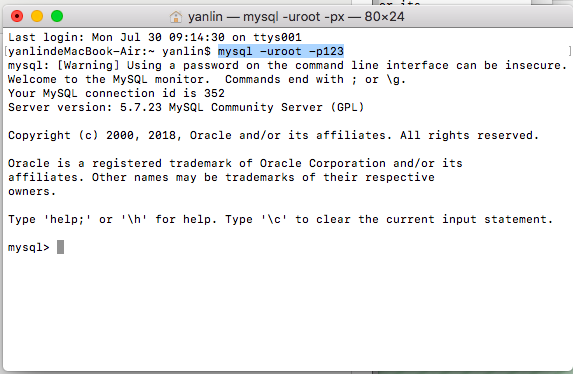
9. Re open a terminal and enter: MySQL – uroot – P123 to enter MySQL data:
Reference: https://blog.csdn.net/adley_ app/article/details/54694230
Similar Posts:
- When installing MySQL database on MAC, the system prompts MySQL: command not found
- Solutions to Ubuntu forgetting password and root password
- [Solved] MYSQL ERROR 1044 (42000): Access denied for user ”@’localhost’ to database ‘mysql’
- [Solved] JMeter startup error: integer expression expected
- Linux use the man command error: Man: command not found [How to Solve]
- [Mac Error]-bash: mysql: command not found
- NodeJS Connect MYSQL Error: ER_NOT_SUPPORTED_AUTH_MODE: Client does not support authentication protocol requested by server; consider upgrading MySQL client
- MySQL Error: the solution of command not found
- [Solved] MYSQL ERROR 1044 (42000): Access denied for user ”@’localhost’ to database ‘mys…
- sudo: /etc/sudoers is world writable sudo: no valid sudoers sources found, q…