How to Copy Echarts Map Examples to Local vueCLI Project (Commissioning Operation)

(4) Copy the Echarts map case to the local vueCLI project to debug and run


Note: ① Use $.get to get related local variables, you need to use self instead of this. And you need to download and import JQuery dependencies.


② Baidu map download and ak introduction.


//under main.js file


1. import BaiduMap from ‘vue-baidu-map’

2. Vue.use(BaiduMap, {

ak:’your ak’

});


3. import * as echarts from “echarts” // The introduction method of echarts5.

4. Vue.prototype.$echarts = echorts


************************************************


//Specific case under .vue file


1. import ‘echarts/extension/bmap/bmap’ //Introduce Baidu Map

2. import { loadBMap } from ‘../map.js’ //Import map.js file

3. var $ = require(‘jquery’); //jquery import


************************************************

//Create a new map.js file in the same folder as the main.js file.


export function loadBMap(ak) {

return new Promise(function(resolve, reject) {

if (typeof BMap !== ‘undefined’) {

resolve(BMap)

return true

}

window.onBMapCallback = function() {

resolve(BMap)

}

let script = document.createElement(‘script’)

script.type = ‘text/javascript’

script.src =

‘http://api.map.baidu.com/api?v=2.0&ak=’+ ak +’&__ec_v__=20190126&callback=onBMapCallback’

script.onerror = reject

document.head.appendC

Caused by: org.gradle.api.internal.plugins.PluginApplicationException: Failed to apply plugin [id ‘com.android.internal.application’]

Two Error Messages:

Caused by: org.gradle.api.internal.plugins.PluginApplicationException: Failed to apply plugin [id 'com.android.internal.application']

and

Caused by: org.gradle.api.tasks.StopExecutionException: Your project path contains non-ASCII characters. This will most likely cause the build to fail on Windows. Please move your project to a different directory. See http://b.android.com/95744 for details. This warning can be disabled by adding the line 'android.overridePathCheck=true' to gradle.properties file in the project directory.


Solution:

Add the following line in the gradle.properties file of your project

android.overridePathCheck=true

Centos7 Install datax Error: [/usr/local/datax/plugin/reader/._drdsreader/plugin.json] do not exist. Please check your configuration file.

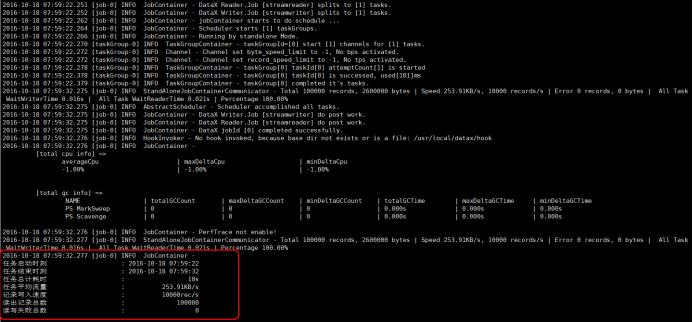
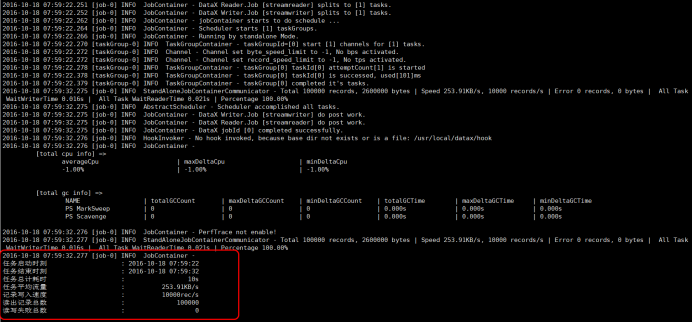
Install datax and execute the self-test script: python /usr/local/datax/bin/datax.py /usr/local/datax/job/job.json, the error is as follows:

solution

Need to delete hidden files (important)
rm -rf /usr/local/datax/plugin/*/._*

cd /usr/local/datax/bin
python datax.py ../job/job.json

Successfully started as follows

How to Decompress PetaLinux rootfs.cpio.gz with Script

Test environment: PetaLinux 2021.2

During development, it is often necessary to check the contents of the rootfs. Using the command, “gzip -d rootfs.cpio.gz”, “cpio -i < rootfs.cpio”, you can decompress the contents of rootfs.cpio.gz.
If you decompress frequently, you can use the following script to simplify the operation.

#!/bin/bash

echo -e "\nBegin to run script: $0"

# array definition, work for /bin/bash, does not work for /bin/sh
file_array_check=( 
bl31.bin
bl31.elf
BOOT.BIN
boot.scr
Image
image.ub
rootfs.cpio.gz
rootfs.manifest
system.dtb
u-boot.bin
u-boot.elf
vmlinux
)

# Get array elements number
file_array_check_length=${#file_array_check[@]}

# C-language style loop
# Check PetaLinux image/linux directory.
for (( i=0; i<$file_array_check_length; i++))
{
    CHECK_FILE=${file_array_check[i]}
    echo "Check No.$i directory: $CHECK_FILE";
    if [ ! -f  $CHECK_FILE ]; then 
        echo "Not PetaLinux project image directory. No file: $CHECK_FILE. "
        echo "Exit."
        exit 1
    fi 
}

mkdir -p rootfs
rm -rf ./rootfs/*
ls -l ./rootfs

cd rootfs
cp ../rootfs.cpio.gz ./
gzip -d rootfs.cpio.gz 
cpio -i < rootfs.cpio 
ls -l 

cd ../

How to Solve Rancher Install Longhorn Error

1. Rancher Install Longhorn

When you are installing Longhorn, longhorn-driver-deployerand longhorn-managerfailing to start successfully.

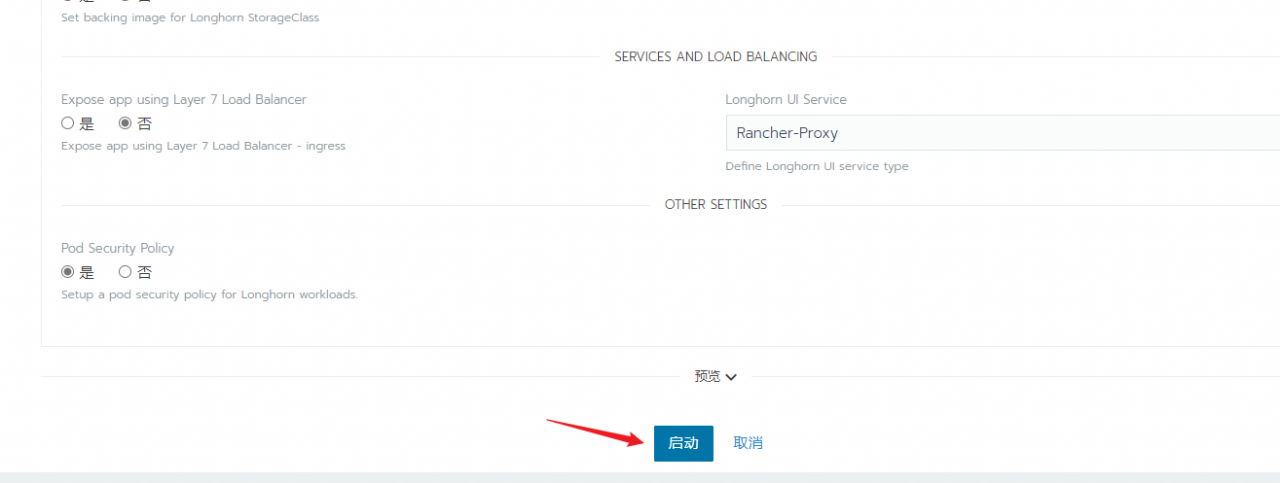
Search in the app storeLonghorn

image-20220222110610953

Others keep the default, just startclick

image-20220222110716492


2. Solution

View longhorn-managerone of the Pod logs as follows:

2022/02/22 02:45:53 proto: duplicate proto type registered: VersionResponse 
time="2022-02-22T02:45:53Z" level=error msg="Failed environment check, please make sure you have iscsiadm/open-iscsi installed on the host" 
time="2022-02-22T02:45:53Z" level=fatal msg="Error starting manager: Environment check failed: Failed to execute: nsenter [--mount=/host/proc/1/ns/mnt --net=/host/proc/1/ns/net iscsiadm --version], output , stderr, nsenter: failed to execute iscsiadm: No such file or directory\n, error exit status 127" 

Snipaste_2022-02-22_10-56-54

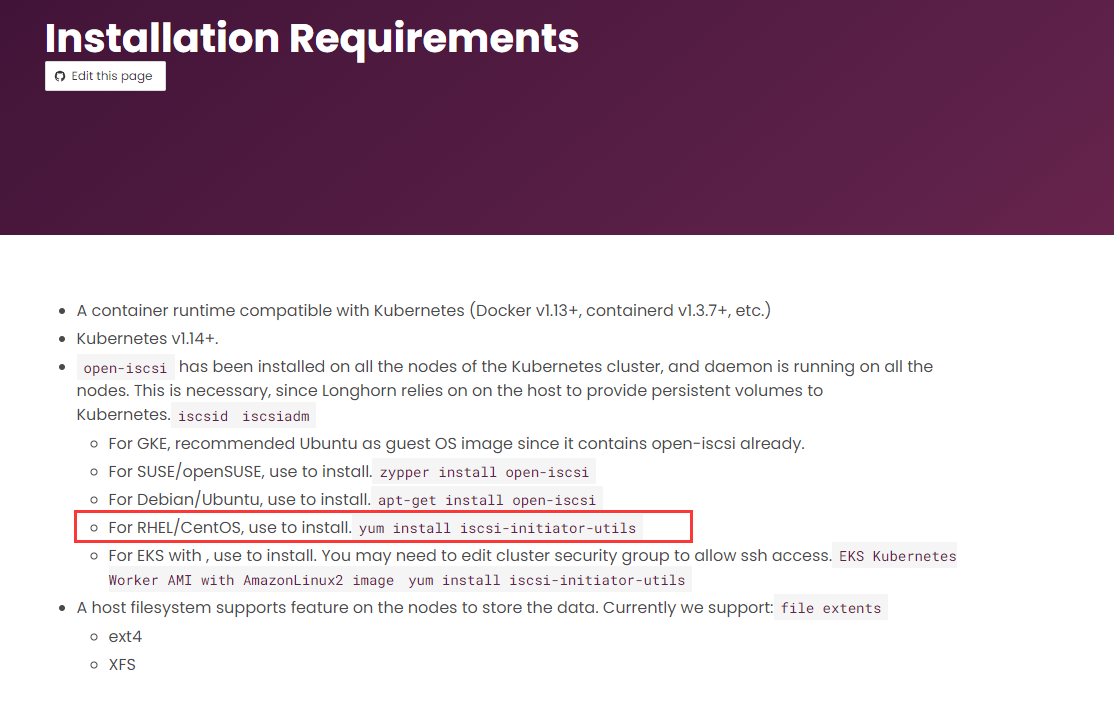
The missing iscsiadmcommand is found through the log error report. You can install the command according to your system. The relevant information queried is as follows:

https://github.com/longhorn/longhorn/issues/1493

https://longhorn.io/docs/0.8.0/install/requirements/

image-20220222111946811

My system is CentOS and each node needs to install:

[root@k8s-master01 ~]# yum install iscsi-initiator-utils

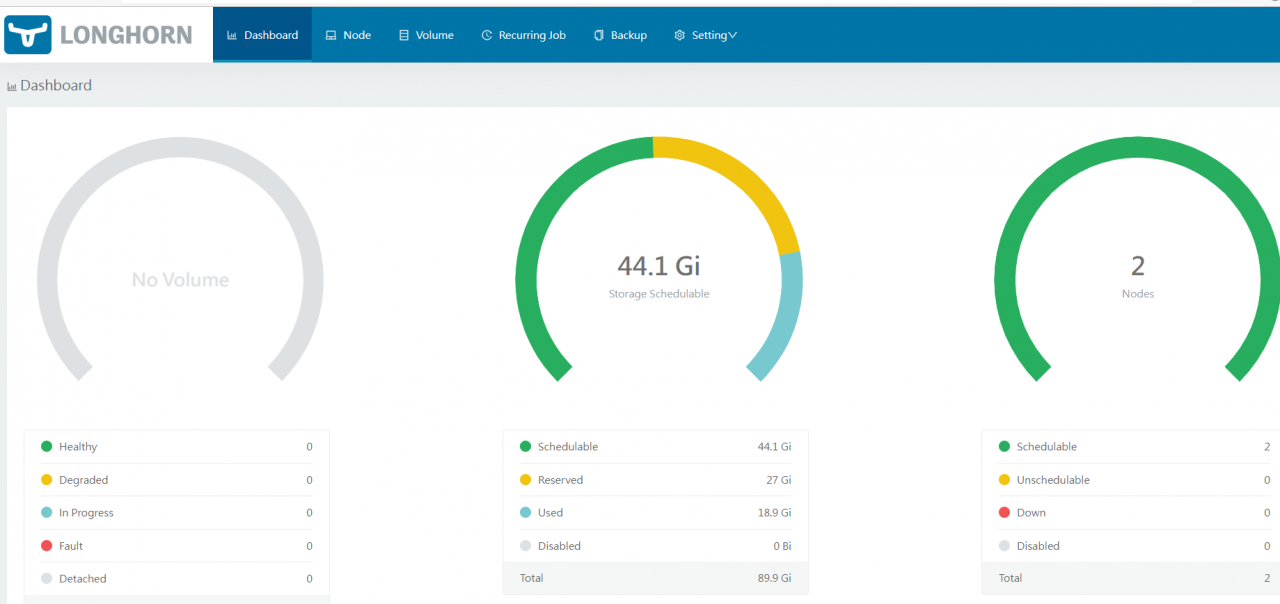
After installation, select the Pod that cannot be successfully started and redeploy it.

image-20220222112618218

[Solved] MYSQL Error: [Warning] Changed limits: max_open_files: 1024

The mysql log reports an error:

2022-02-22T03:21:39.505055Z 0 [Warning] Changed limits: max_open_files: 1024 (requested 5000)
2022-02-22T03:21:39.505065Z 0 [Warning] Changed limits: table_open_cache: 431 (requested 2000)


problem causes:

The number of files that the user needs to open exceeds the upper limit, which can be viewed through the command “ulimit -a”


Solution:

ulimit -n 65535

The ulimit command is used to limit system users’ access to shell resources, but it only takes effect temporarily. To take effect permanently, you need to configure the /etc/security/limits.conf file. The syntax and common configurations are as follows:

vi /etc/security/limits.conf # The linux resource limit configuration file is /etc/security/limits.conf; limiting the number of user processes is very important for the stability of the linux system. The limits.conf file limits the maximum number of files a user can use, maximum threads, maximum memory and other resource usage.

Add the following two lines to set
mysql hard nofile 65535        

mysql soft nofile 65535     #The maximum number of file descriptors a mysql user can open is 1024 by default, the value here will limit tcp connections. soft is a warning value, while hard is a real threshold value, exceeding it will result in an error.


vi /usr/lib/systemd/system/mysqld.service Add the following line
LimitNOFILE=65535


# systemctl daemon-reload
# systemctl restart mysql.service

Docker Container Performance Monitoring Tool: google/cadvisor

dockerhub: https://hub.docker.com/r/google/cadvisor/

github:  https://github.com/google/cadvisor

cAdvisor ( Container  Advisor) provides container users with an understanding of the resource usage and performance characteristics of their running containers. It is a running daemon that collects, aggregates, processes and exports information about running containers. Specifically, for each container, it keeps a histogram of resource isolation parameters, historical resource usage, and full historical resource usage. This data is exported by container and machine scope.


Install:

# get image
docker pull google / cadvisor
 
# run the container
docker run --volume=/:/rootfs:ro --volume=/ var /run:/ var /run:rw --volume=/sys:/sys:ro --volume=/ var /lib/docker/: / var /lib/docker:ro --publish= 8080 : 8080 --detach= true --privileged= true --name=cadvisor --restart=always google/ cadvisor:latest
 
# Run container shorthand
docker run -v /:/rootfs:ro -v / var /run:/ var /run:rw -v /sys:/sys:ro -v / var /lib/docker/:/ var /lib/docker:ro -p 8080 : 8080 --detach= true --privileged= true --name=cadvisor --restart=always google/ cadvisor:latest
 
# View container logs
docker logs - f cadvisor
 
# access instructions
#curl http: // host:8080

Cmake: How to Connect boost Library

Here is a simple guide on how to connect to boost library in Cmake.


How to Connect boost Library to Cmake

Situation 1: Not installed in the default path use:

set(BOOST_ROOT /usr/include/boost)////Set your own path
set(Boost_NO_SYSTEM_PATHS NO)////////Here is the system path for instructions. Generally, the default installation is in /usr/include/boost
find_package (Boost COMPONENTS regex system REQUIRED)

if(Boost_FOUND)
include_directories(${Boost_INCLUDE_DIRS})
MESSAGE( STATUS "Boost_INCLUDE_DIRS = ${Boost_INCLUDE_DIRS}.")
MESSAGE( STATUS "Boost_LIBRARIES = ${Boost_LIBRARIES}.")
MESSAGE( STATUS "Boost_LIB_VERSION = ${Boost_LIB_VERSION}.")
add_executable(main main.cpp)
target_link_libraries (main ${Boost_LIBRARIES})
endif()


Situation 2: Install it in the default path and use it directly


find_package(Boost COMPONENTS regex system REQUIRED)
if(Boost_FOUND)
include_directories(${Boost_INCLUDE_DIRS})
MESSAGE( STATUS "Boost_INCLUDE_DIRS = ${Boost_INCLUDE_DIRS}.")
MESSAGE( STATUS "Boost_LIBRARIES = ${Boost_LIBRARIES}.")
MESSAGE( STATUS "Boost_LIB_VERSION = ${Boost_LIB_VERSION}.")
add_executable(main main.cpp)
target_link_libraries (main ${Boost_LIBRARIES})
endif()

Database Start Error after Recovery: ORA-01092: ORA-30012: undo tablespace

After data recovery, open the database and report an error

RMAN> alter database open resetlogs;

RMAN-00571: ===========================================================
RMAN-00569: =============== ERROR MESSAGE STACK FOLLOWS ===============
RMAN-00571: ===========================================================
RMAN-03002: alter db command (on 01/19/2022 09:40:13) failed
ORA-01092: ORACLE instance terminated. Disconnection forced
ORA-30012: undo tablespace 'devices' does not exist or of wrong type
Process ID: 9320
Session ID: 5 Sequence number: 11
RMAN-00571: ===========================================================
RMAN-00569: =============== ERROR MESSAGE STACK FOLLOWS ===============
RMAN-00571: ===========================================================
ORA-03114: Not connected to ORACLE
RMAN-00571: ===========================================================
RMAN-00569: =============== ERROR MESSAGE STACK FOLLOWS ===============
RMAN-00571: ===========================================================
RMAN-03002: alter db command (on 01/19/2022 09:40:13) failed
ORA-01092: ORACLE instance terminated. Disconnection forced
ORA-30012: undo tablespace 'devices' does not exist or of wrong type
Process ID: 9320
Session ID: 5 Sequence number:  11

Report undo error, check undo parameters

SQL> show parameter undo;

NAME                                 TYPE
------------------------------------ ----------------------
VALUE
------------------------------
undo_management                      string
AUTO
undo_retention                       integer
900
undo_tablespace                      string
devices

The original undo name is UNDOTBS1, modify the pfile parameter, add undo_tablespace=UNDOTBS1 in the last line

After reboot and startup, it is normal.