Open in system32 cmd.exe , execute powercfg.exe /Hibernate off, restart and then execute the installation program
After installation, start powercfg
Open in system32 cmd.exe , execute powercfg.exe /Hibernate off, restart and then execute the installation program
After installation, start powercfg
[BEGIN] 2017/9/28 17:09:03
Last login: Thu Sep 21 14:54:32 2017 from 10.2.202.39

########    ###    ########  ########  #### ##     ##
     ##    ## ##   ##     ## ##     ##  ##   ##   ##
    ##    ##   ##  ##     ## ##     ##  ##    ## ##
   ##    ##     ## ########  ########   ##     ###
  ##     ######### ##     ## ##     ##  ##    ## ##
 ##      ##     ## ##     ## ##     ##  ##   ##   ##
######## ##     ## ########  ########  #### ##     ##
root@zabbix:~# cat /etc/os-release
NAME="Ubuntu"
VERSION="14.04.5 LTS, Trusty Tahr"
ID=ubuntu
ID_LIKE=debian
PRETTY_NAME="Ubuntu 14.04.5 LTS"
VERSION_ID="14.04"
HOME_URL="http://www.ubuntu.com/"
SUPPORT_URL="http://help.ubuntu.com/"
BUG_REPORT_URL="http://bugs.launchpad.net/ubuntu/"
root@zabbix:~#
root@zabbix:~# yum install -y gcc gcc-c++ automake make
-bash: yum: command not found
root@zabbix:~# mkdir /mnt/cdrom/
root@zabbix:~# mount /dev/cdrom /mnt/cdrom/
mount: block device /dev/sr0 is write-protected, mounting read-only
root@zabbix:~# cd /mnt/cdrom/
root@zabbix:/mnt/cdrom# ll
total 71816
dr-xr-xr-x 2 root root     2048 May 23  2016 ./
drwxr-xr-x 3 root root     4096 Sep 28 17:13 ../
-r-xr-xr-x 1 root root     2012 May 23  2016 manifest.txt*
-r-xr-xr-x 1 root root     1850 May 23  2016 run_upgrader.sh*
-r--r--r-- 1 root root 72083159 May 23  2016 VMwareTools-10.0.9-3917699.tar.gz
-r-xr-xr-x 1 root root   687524 May 23  2016 vmware-tools-upgrader-32*
-r-xr-xr-x 1 root root   757944 May 23  2016 vmware-tools-upgrader-64*
root@zabbix:/mnt/cdrom# cp VMwareTools-10.0.9-3917699.tar.gz /tmp/
root@zabbix:/mnt/cdrom# cd /tmp/
root@zabbix:/tmp# ll
total 70420
drwxrwxrwt  3 root   root       4096 Sep 28 17:14 ./
drwxr-xr-x 22 root   root       4096 Jul 25 09:45 ../
drwxr-xr-x  2 zabbix zabbix     4096 Sep 26 11:16 hsperfdata_zabbix/
-r--r--r--  1 root   root   72083159 Sep 28 17:14 VMwareTools-10.0.9-3917699.tar.gz
-rw-rw-r--  1 zabbix zabbix       23 Sep 28 17:14 zabbix_server_1169.pinger
-rw-rw-r--  1 zabbix zabbix       24 Sep 28 17:14 zabbix_server_1173.pinger
-rw-rw-r--  1 zabbix zabbix       23 Sep 28 17:14 zabbix_server_1178.pinger
root@zabbix:/tmp# umount /dev/cdrom
root@zabbix:/tmp# tar -zxvf VMwareTools-10.0.9-3917699.tar.gz
root@zabbix:/tmp# ll
total 70420
drwxrwxrwt  4 root   root       4096 Sep 28 17:14 ./
drwxr-xr-x 22 root   root       4096 Jul 25 09:45 ../
drwxr-xr-x  2 zabbix zabbix     4096 Sep 26 11:16 hsperfdata_zabbix/
-r--r--r--  1 root   root   72083159 Sep 28 17:14 VMwareTools-10.0.9-3917699.tar.gz
drwxr-xr-x  9 root   root       4096 May 23  2016 vmware-tools-distrib/
-rw-rw-r--  1 zabbix zabbix       13 Sep 28 17:14 zabbix_server_1172.pinger
-rw-rw-r--  1 zabbix zabbix       13 Sep 28 17:14 zabbix_server_1178.pinger
root@zabbix:/tmp# cd vmware-tools-distrib/
root@zabbix:/tmp/vmware-tools-distrib# ll
total 524
drwxr-xr-x  9 root root   4096 May 23  2016 ./
drwxrwxrwt  4 root root   4096 Sep 28 17:15 ../
drwxr-xr-x  2 root root   4096 May 23  2016 bin/
drwxr-xr-x  5 root root   4096 May 23  2016 caf/
drwxr-xr-x  2 root root   4096 May 23  2016 doc/
drwxr-xr-x  5 root root   4096 May 23  2016 etc/
-rw-r--r--  1 root root 282475 May 23  2016 FILES
-rw-r--r--  1 root root   2538 May 23  2016 INSTALL
drwxr-xr-x  2 root root   4096 May 23  2016 installer/
drwxr-xr-x 14 root root   4096 May 23  2016 lib/
drwxr-xr-x  3 root root   4096 May 23  2016 vgauth/
-rwxr-xr-x  1 root root    243 May 23  2016 vmware-install.pl*
-rwxr-xr-x  1 root root 205571 May 23  2016 vmware-install.real.pl*
root@zabbix:/tmp/vmware-tools-distrib# ./vmware-install.pl
open-vm-tools are available from the OS vendor and VMware recommends using
open-vm-tools. See http://kb.vmware.com/kb/2073803 for more information.
Do you still want to proceed with this legacy installer?[no] ^C
root@zabbix:/tmp/vmware-tools-distrib# apt-get install open-vm-tools

root@zabbix:/tmp/vmware-tools-distrib# ./vmware-install.pl
The installer has detected an existing installation of open-vm-tools on this
system and will not attempt to remove and replace these user-space
applications. It is recommended to use the open-vm-tools packages provided by
the operating system. If you do not want to use the existing installation of
open-vm-tools and attempt to install VMware Tools, you must uninstall the
open-vm-tools packages and re-run this installer.
The packages that need to be removed are:
open-vm-tools
The installer will next check if there are any missing kernel drivers. Type yes
if you want to do this, otherwise type no [yes]

Creating a new VMware Tools installer database using the tar4 format.

Installing VMware Tools.

In which directory do you want to install the binary files?
[/usr/bin]

What is the directory that contains the init directories (rc0.d/ to rc6.d/)?
[/etc]

What is the directory that contains the init scripts?
[/etc/init.d]

In which directory do you want to install the daemon files?
[/usr/sbin]

In which directory do you want to install the library files?
[/usr/lib/vmware-tools]

The path "/usr/lib/vmware-tools" does not exist currently. This program is
going to create it, including needed parent directories. Is this what you want?
[yes]

In which directory do you want to install the documentation files?
[/usr/share/doc/vmware-tools]

The path "/usr/share/doc/vmware-tools" does not exist currently. This program
is going to create it, including needed parent directories. Is this what you
want?[yes]

The installation of VMware Tools 10.0.9 build-3917699 for Linux completed
successfully. You can decide to remove this software from your system at any
time by invoking the following command: "/usr/bin/vmware-uninstall-tools.pl".

Before running VMware Tools for the first time, you need to configure it by
invoking the following command: "/usr/bin/vmware-config-tools.pl". Do you want
this program to invoke the command for you now?[yes]

The file /usr/bin/vmware-hgfsclient that this program was about to install
already exists.  Overwrite?[no]

The file /sbin/mount.vmhgfs that this program was about to install already
exists.  Overwrite?[no]

Initializing...


Making sure services for VMware Tools are stopped.


The module vmci has already been installed on this system by another installer
or package and will not be modified by this installer.

The module vsock has already been installed on this system by another installer
or package and will not be modified by this installer.

The module vmxnet3 has already been installed on this system by another
installer or package and will not be modified by this installer.

The module pvscsi has already been installed on this system by another
installer or package and will not be modified by this installer.

The module vmmemctl has already been installed on this system by another
installer or package and will not be modified by this installer.

The VMware Host-Guest Filesystem allows for shared folders between the host OS
and the guest OS in a Fusion or Workstation virtual environment.  Do you wish
to enable this feature?[no]

The vmxnet driver is no longer supported on kernels 3.3 and greater. Please
upgrade to a newer virtual NIC. (e.g., vmxnet3 or e1000e)

VMware automatic kernel modules enables automatic building and installation of
VMware kernel modules at boot that are not already present. This feature can
be enabled/disabled by re-running vmware-config-tools.pl.

Would you like to enable VMware automatic kernel modules?
[no]

Creating a new initrd boot image for the kernel.
update-initramfs: Generating /boot/initrd.img-3.19.0-80-generic
vmware-tools start/running
The configuration of VMware Tools 10.0.9 build-3917699 for Linux for this
running kernel completed successfully.

Enjoy,

--the VMware team

root@zabbix:/tmp/vmware-tools-distrib# reboot


Broadcast message from root@zabbix

	(/dev/pts/0) at 17:16 ...


The system is going down for reboot NOW!

root@zabbix:/tmp/vmware-tools-distrib#
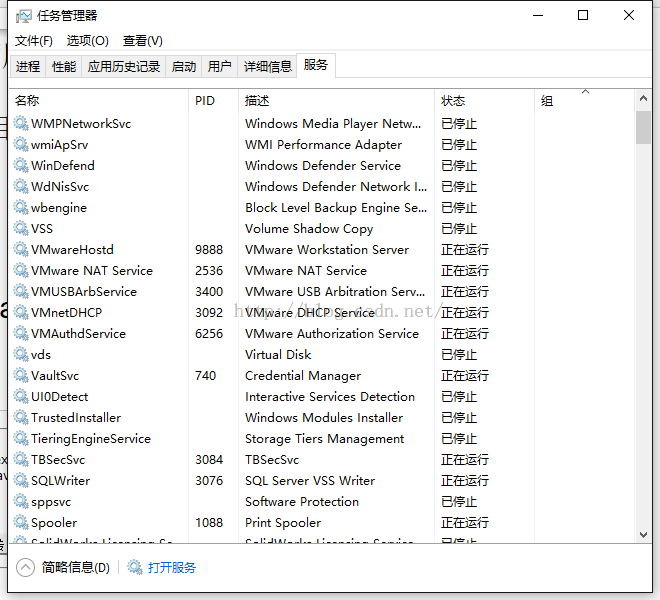
The VMware authorization service is not running.
my solution is to open the Windows Task Manager and select the “service” menu bar to display the following interface:

Then there is the “service” option in the top tab of the interface
click “service” to enter the “service” tab
search the services related to VMware in the service list, and the search results are as follows:
right click the “VMware authorization service” service, and click the start option.
View the status after startup.
Similarly, right-click the “VMware authorization service” service and click open service
Enter the service dialog box
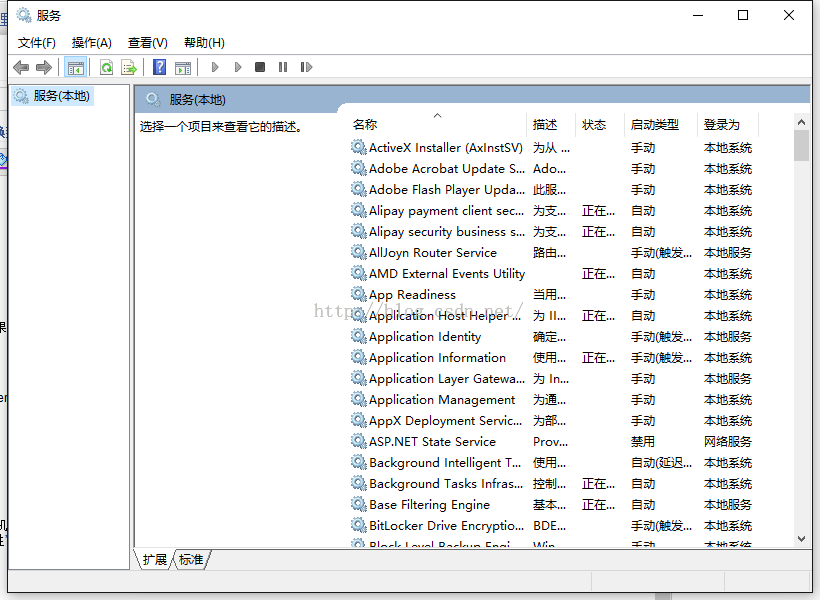
Find VM related services,
and
You can see that the startup mode of the service is “automatic”. If it is manual, it means that I have to operate it manually every time I turn off the service and then turn it on. In order to realize the self startup of the service.
Right click “VMware authorization service” and click “properties” to make the following settings:
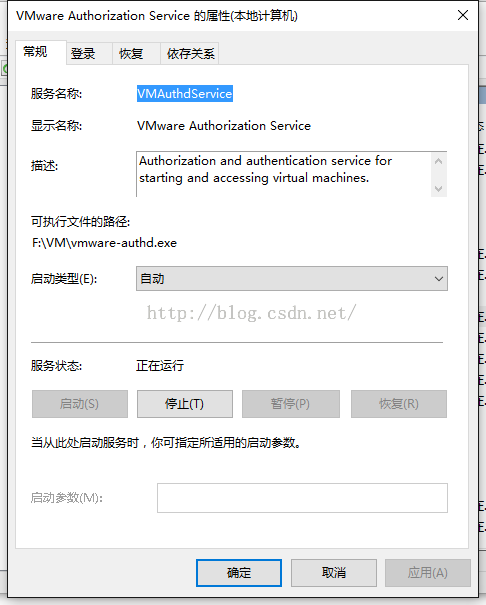
Change the “startup type” option from “manual” to “automatic”.
Now check the final startup status:
OK now, the settings are complete, and it’s OK to start the virtual machine again
Because of the need of work, we need to install a virtual machine to test and learn to use the common functions of panabit flow control system, so we add a lot of virtual machine network cards. However, the usage of each network card is different. We need a control port, an external network port and an internal network port.
The control port uses the static address, here uses the MAC new network configuration, and then the virtual machine bridges to the network configuration to make it in the same network segment.
The external network port is configured in Ethernet so that it can access the external network normally by using the IP of the superior router as a physical machine.
The intranet port uses the private network mode, and the DHCP service is enabled on the panabit, so the private network vmnet of the virtual machine has its own DHCP function, which makes my new XP virtual machine as a client unable to obtain the IP assigned by panabit.
So I didn’t find any information on the Internet. When I used to use windows, VMware had a virtual network editor that could close DHCP directly, which was more convenient.
But I want to turn off DHCP here, so the way I found is as follows
Enter the relevant directory
cd /Library/Preferences/VMware\ Fusion/Edit file
sudo vim networkingModification of documents
VERSION=1,0
answer VNET_1_DHCP no
answer VNET_1_DHCP_CFG_HASH 5D88992D00D27DF345A3A1B9D53D37DC64646B16
answer VNET_1_HOSTONLY_NETMASK 255.255.255.0
answer VNET_1_HOSTONLY_SUBNET 192.168.221.0
answer VNET_1_VIRTUAL_ADAPTER yes
answer VNET_8_DHCP yes
answer VNET_8_DHCP_CFG_HASH B871CF5BA10C8B875E2D9E45A46855B9E8644E55
answer VNET_8_HOSTONLY_NETMASK 255.255.255.0
answer VNET_8_HOSTONLY_SUBNET 192.168.240.0
answer VNET_8_NAT yes
answer VNET_8_VIRTUAL_ADAPTER yes
add_bridge_mapping en1 2
Just change the DHCP on it to No.
note: if you don’t know which one to modify, if you look directly at it without NAT, and if you don’t have a head NAT, it’s a private network. After modifying and saving, you must right-click to exit VM completely, and then reopen it to take effect. this is the first time that you want to modify a private network
1. Start — Attachment — [command prompt], right click “run as administrator”‘
If you are not an admin administrator, there will be an error:
System error 5 occurred
access is denied
2. Enter the command net start vmusbarbservice
For example,
C:\Windows\system32&> Net start vmusbarbservice
the VMware USB alignment service is starting.
the VMware USB alignment service has started successfully
Right-click “My Computer”->”Manage”->”Services” and make the following settings:
1. turn off “Cisco Systems, Inc. VPN Service;”
2. turn off and then disable “Internet Connection Sharing (ICS) Service;”
3. Start the “Cisco System, Inc. VPN Service.” 4.
4. Try dialing again!
— end
Cisco VPN report error 56 in win10: the Cisco Systems, Inc. VPN service has not been started
If you can’t find this service, find the software in the uninstall program list, right-click “repair”
If you find this service, see if it is turned on
Note: first stop the Internet connection sharing (ICS) service and restart the CISO VPN service
Temporarily modify the fields of the database table , I met this problem , To put it bluntly, it’s the watch lock , As a result, it cannot be modified successfully .
SSH Remote to server , Log in to MySQL
mysql -uroot -plalalalThen use the following command to see what you are doing:
show processlist;Find a lot of sleep under the same connection
kill id;Kill a few days later , It’s finally normal .
http://blog.163.com/l1_ jun/blog/static/1438638820124238493979/
Phenomenon: AMD CPU, trial
kernel
To replace the mach with macdrive under Windows_ Kernel and system.kext
It is found that it is stuck in waiting for dsmos
Reason: the file modified with macdrive is missing permission information
Solution: start in – S mode
Input first
/sbin/mount -uw /
Used to remove read-only mode
Then enter the following code to fix the permissions
chmod -R 755 mach_ kernel
chown -R root:wheel mach_ kernel
chmod -R 755 /System/Library/Extensions/
chown -R root:wheel /System/Library/Extensions/
rm -rf /System/Library/Extensions.*
rm -rf /System/Library/Caches/*
reboot
Copy code
After restart, enter Mac with parameter – V – F
I’m Intel’s CPU, and I’ve solved it, so this problem has little to do with CPU!
Analysis of Android sleep wake mechanism — wake_ lock
Android sleep wake is mainly based on wake_ Lock mechanism, as long as there is any effective wake in the system_ Lock, the system can not enter the deep sleep, but can carry out the shallow sleep operation of the device. wake_ Lock is usually used when the LCD and TP are turned off, but the system still needs to run normally, such as listening to songs and transferring large files.
Wake lock – Wake lock plays a core role in Android power management system. Wake lock is a lock mechanism. As long as a task holds the lock, the system can’t go to sleep and can be obtained by user mode processes and kernel threads. The lock can be timed out or not. The timed out lock will be automatically unlocked after the time has passed. If there is no lock or timeout, the kernel will start the standard Linux hibernation mechanism to enter hibernation.
Wakelock plays an important role in the sleep wake-up mechanism of Android. The main source code is in the file: kernel/kernel/power/wakelock. C, kernel/include/Linux/wakelock. H.
void wake_lock_init(struct wake_lock *lock, int type, const char *name);
void wake_lock_destroy(struct wake_lock *lock);
void wake_lock(struct wake_lock *lock);
void wake_lock_timeout(struct wake_lock *lock, long timeout);
void wake_unlock(struct wake_lock *lock);
Among them, wake_ lock_ init () Used to initialize a new lock. The type parameter specifies the type of the lock; wake_ lock_ destroy () Then cancel a lock; wake_ lock () And wake_ lock_ timeout () It is used to activate the initialized lock to be a valid permanent lock or timeout lock; wake_ unlock () Used to unlock and make it an invalid lock. There are also two interfaces:
int wake_lock_active(struct wake_lock *lock);
long has_wake_lock(int type);
Among them, wake_ lock_ Active() is used to judge whether the lock is valid or not. If it is valid, a non-zero value will be returned_ wake_ Lock() is used to determine whether there is a valid type lock in the system. If there is a timeout lock, the longest timeout of the lock will be returned. If there is a permanent lock, it will return – 1. If there is no valid lock in the system, it will return 0.