Tag Archives: React

[Solved] react Project Error: Support for the experimental syntax ‘decorators-legacy’ isn’t currently enabled

The write method of high-level component decorator is used in react project, and then the project reports an error. The information is as follows:

Support for the experimental syntax ‘decorators-legacy’ isn’t currently enabled


Solution:

1. Install Babel plugin transform decorators legacy

yarn add babel-plugin-transform-decorators-legacy

2. Modify the configuration file, package Add the following code to JSON:

"plugins": [

["@babel/plugin-proposal-decorators", { "legacy": true }]],

Package There is no Babel configuration in JSON, which needs to be executed

yarn eject

Display the configuration of react script that is not displayed in package JSON

If the console reports an error after execution, the solution is to submit the local modification and execute

git add
git commit -m ''

Then execute the yarn eject

3. Install Babel plugin transform decorators legacy

4. Modify package Babel in JSON

"babel": {

"plugins": [

["@babel/plugin-proposal-decorators", { "legacy": true }]

],

"presets": [

"react-app"

]}

[Solved] React Issue: Selected Style Not Working

Source code:

<NavLink to="/home1" activeClassName="selected"> Home Page 1</NavLink>
        <NavLink activeStyle={{
            fontWeight: 'bold',
            color: 'red'}}
          to="/home2"> Home Page 2
        </NavLink>

report errors:

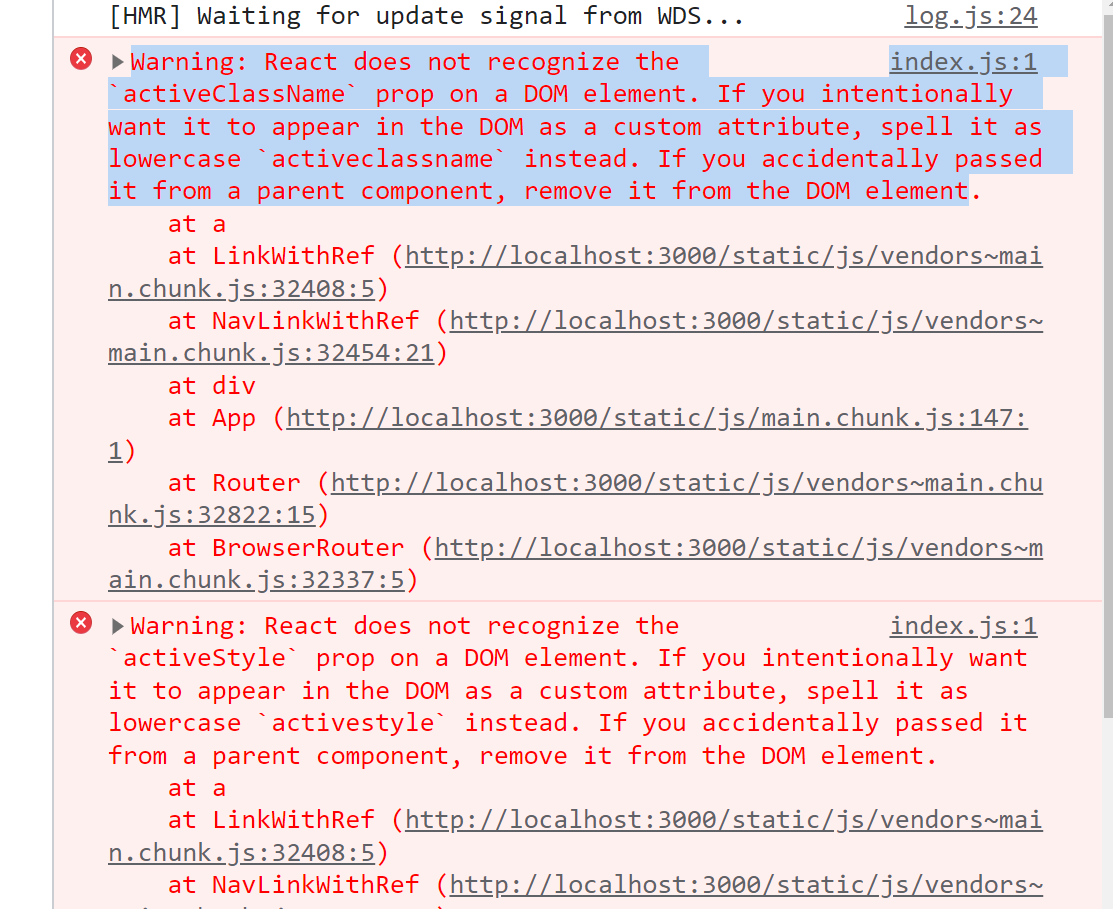
index.js:1 Warning: React does not recognize the `activeClassName` prop on a DOM element. If you intentionally want it to appear in the DOM as a custom attribute, spell it as lowercase `activeclassname` instead. If you accidentally passed it from a parent component, remove it from the DOM element.

First check your version:

All versions above V6 will report this error. Just change back to V5. At the same time, if you use <Routes> Please delete this V6 attribute

DOM style setting methods in the four components of react

1. Inline style

To add inline styles to the virtual DOM, you need to use expressions to pass in style objects

An inline style needs to be written to a style object, which can be placed in many places

For example, in the render function, on the component prototype, and in the external chain JS file

Note: there are two parentheses here. The first indicates that we want to insert JS in JSX, and the second is the parenthesis of the object

 <p style={{color:'red', fontSize:'14px'}}>Hello world</p>

2. Use class

React recommends that we use inline style, because react thinks that each component is an independent whole

In fact, in most cases, we are still adding a lot of class names to elements, but it should be noted that class needs to be written as classname (because after all, we are writing class JS code, we will receive the current JS rules, and class is a keyword)

import React, { Component } from 'react'
import styles from './style.css'

class ClassStyle extends Component {
  render() {
    let className = cx({
      font: false
    })
    return (
      <>
        <div className={className}>hello</div>
        <p className='setstyle'>style</p>
        <DivContainer>
          world
        </DivContainer>
      <>
    )
  }
}

export default ClassStyle

3. Classnames add different styles for different conditions

Sometimes different styles need to be added according to different conditions, such as completion status, green for completion and red for unfinished. In this case, we recommend using the package class names:

Purpose:

Because react-native dynamically adds multiple class names, an error will be reported

import style from './style.css'
<div className={style.class1 style.class2}</div>

To get the final rendering effect:

<div class='class1 class2'></div>

Download and install

npm i -S classnames

use

import classnames from 'classnames'
<div className=classnames({
    'class1': true,
    'class2': true
    )>
</div>

4.css-in-js

styled components is a CSS in JS framework written for react, which is simply to write CSS in JS. NPM link

The traditional front-end scheme advocates the principle of “separation of concerns”. HTML, CSS and JavaScript should perform their respective duties and be separated.

In the react project, component-based scheme is advocated, which naturally forms a way of centralized writing and management of HTML, CSS and JavaScript.

styled components

should be the most popular library of CSS in JS. Through styled components, you can use the tag template string syntax of ES6 to define a series of CSS properties for the component to be styled. When the JS code of the component is parsed and executed, styled components will dynamically generate a CSS selector, The corresponding CSS style is inserted into the head tag in the form of style tag. The dynamically generated CSS selector will have a small hash value to ensure global uniqueness and avoid style conflicts.

install

npm i -S styled-components

Define style

Style JS file

import styled from 'styled-components'
const Title = styled.div`
    color:red;
    font-size:16px;
    h3{
        color:blue;
        font-size:20px;
    }
`
export {
    Title
}

Display

Use the title just as you would with a regular react component

import React, { Component } from 'react'
import { Title } from './Styles'
class App extends Component {
render() {
    return (
        <div>
            <Title>
            I'm a Title
            <h3>Hello World!</h3>
            </Title>
        </div >
        );
    }
}
export default App

Style inheritance

style

import styled from 'styled-components'
const Button = styled.button`
    font-size: 20px;
    border: 1px solid red;
    border-radius: 3px;
`;

const Button2 = styled(Button)`
    color: blue;
    border-color: yellow;
`;

export {
    Button,
    Button2
}

display

import React, { Component } from 'react'
import {
Button,
Button2
} from './Styles'
class App extends Component {
render() {
    return (
    <div>
        <Button>Button1</Button>
        <Button2>Button2</Button2>
    </div >
    );
}
}
export default App

Attribute transfer

style

import styled from 'styled-components'
const Input = styled.input`
    color: ${props => props.inputColor || "blue"};
    border-radius: 3px;
`;
export {
    Input
}

display

import React, { Component } from 'react'
import { Input } from './Styles'
class App extends Component {
render() {
    return (
    <div>
        <Input defaultValue="Hello" inputColor="red"></Input>
    </div >
    );
}
}
export default App
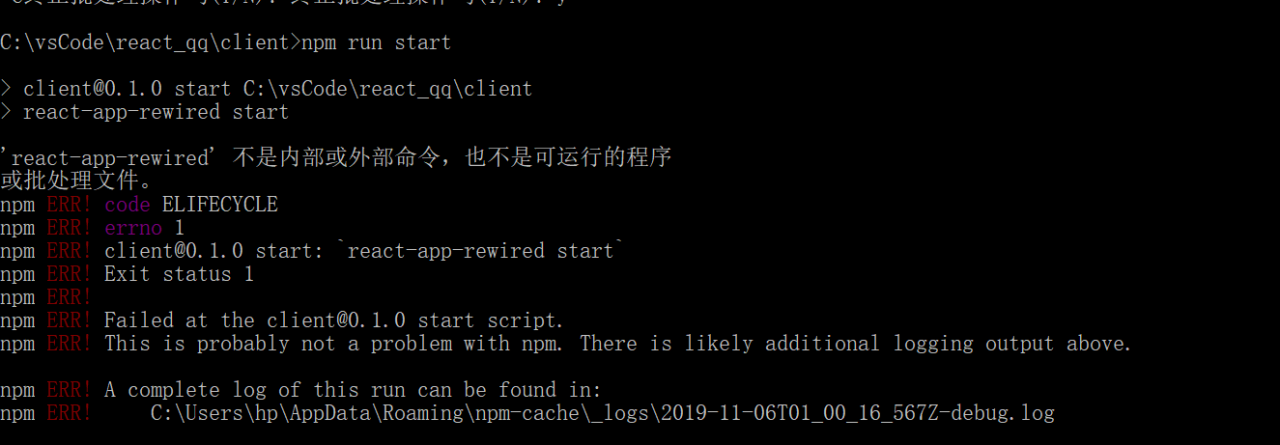
[Solved] React project NPM run error: npm ERR! errno 1

react project, execute NPM run eject to generate configuration file, and report error:

Remove untracked files, stash or commit any changes, and try again.
npm ERR! code ELIFECYCLE
npm ERR! errno 1
npm ERR! [email protected] eject: `react-scripts eject`
npm ERR! Exit status 1
npm ERR! 
npm ERR! Failed at the [email protected] eject script.
npm ERR! This is probably not a problem with npm. There is likely additional logging output above.

npm ERR! A complete log of this run can be found in:
npm ERR!     /Users/fengyang/.npm/_logs/2018-12-26T08_28_06_453Z-debug.log

error reporting reason:

The scaffold adds a. Gitgnore file, but there is no local repository

solution:

cd  project
git init  // New codebase in current directory
git add .  // Add all files in the current directory to the staging area
git commit -m 'Saving before ejecting' // Commit the staging area to the repository area
npm run eject


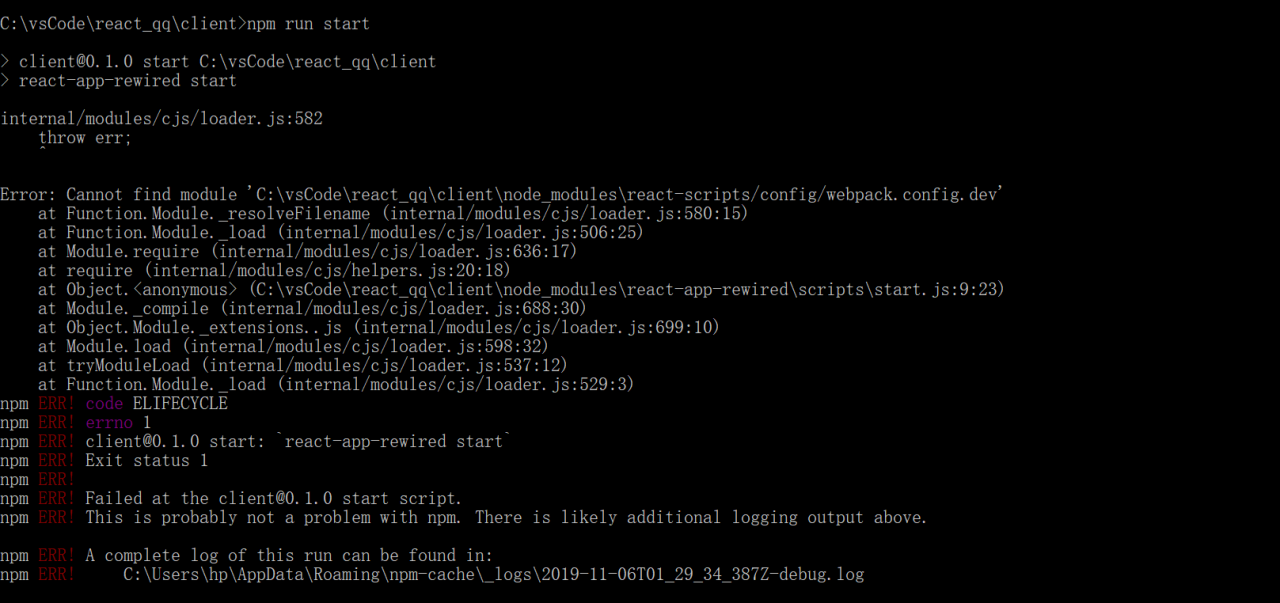
React uses antd to import error messages on demand

Introduction

According to the antd official website configuration, there are still a series of errors:

Cause

When we use react app rewired to configure on-demand loading, we cannot execute yarn eject and expose the configuration file of react scaffold webpack, otherwise the above error will be reported. If you need a burst profile, you can configure on-demand loading in the following way

Using Babel plugin import

Download

npm install babel-plugin-import --save-dev or
yarn add babel-plugin-import 

Configuration package.json file

Configure plugins in the Babel option, where style is set to true to customize the theme for antd. If an error is reported, the less is generally too high. A version less than 3.0.0 needs to be installed. yarn add [email protected] , after the installation is successful, run again

"babel": {
  "presets": [
    "react-app"
  ],
  + "plugins": [
  +  [
  +    "import",
  +   {
  +      "libraryName": "antd",
  +      "style": true
  +    }
  + ]
  +]
}


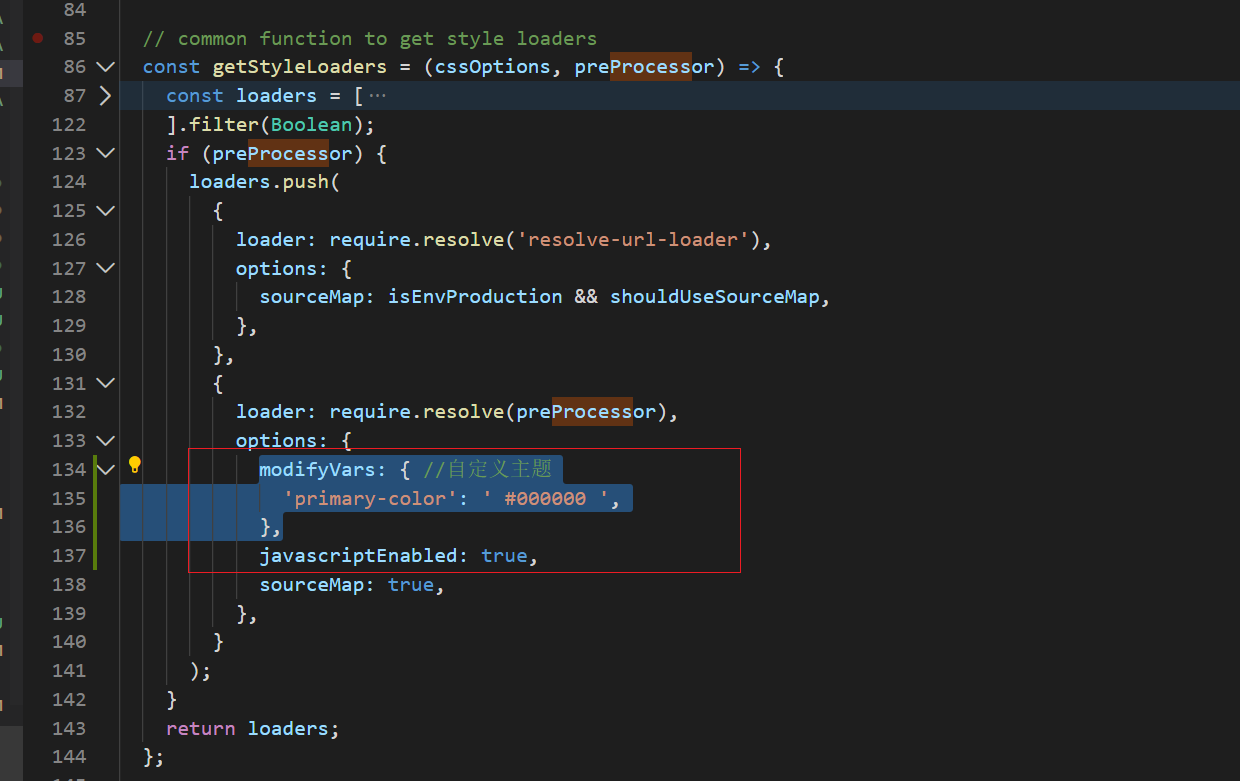
Antd custom theme

When the style is set to true, the running project will repackage the less file of antd and load the latest style file. Find the getstyleloaders () function in the webpack.config.js file, add the following code, and customize our theme in modifyvars

React Common Component Issues: Can’t perform a React state update on an unmounted component [How to Solve]

In some react components, there will be this warning

Can't perform a React state update on an unmounted component. 
This is a no-op, but it indicates a memory leak in your application.
 To fix, cancel all subscriptions and asynchronous tasks in the componentWillUnmount method”

This is because after writing a method to complete the request, we change the state

  payload:values,
        callback:res=>{
          if(res.code === 0){
            notification.success({
              message: 'Password updated successfully',
              description: `The new password is ${res.data}`,
              duration: 0,
            });
            successed&& successed();
              that.setState({
                updatePwdModalVisible:false
              })
            that.getCaptcha();

Solution: using the life cycle hook function: component will unmount, clear the timer before the component is unloaded

that.pwdErrorTimer = setTimeout(() => {
              this.setState({
                updatePwdModalVisible:false
              })
            }, 1000);
componentWillUnmount(){
    clearTimeout(this.pwdErrorTimer);
  }

Three common ways of react event binding and solution can’t update during an existing state transition (such as within ‘render’)

Front end developers must read! Starting from scratch, teach you to build a low code website platform in stages>>>

In react component, the context of each method will point to the instance of the component, that is, automatically bind this as the current component. Moreover, react will cache this kind of reference to optimize CPU and memory. When using ES6 classes or pure functions, this kind of automatic binding no longer exists. We need to implement this binding manually

1. Bind method. This method can help us bind this in the event handler and pass parameters to the event handler, as shown in the following figure

Bind method binding

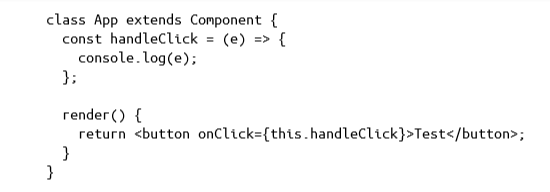
2. Bind arrow function. Arrow function is not only the “syntax sugar” of function, it also automatically binds this which defines the scope of this function, so we don’t need to use bind method for it, as shown in the figure below:

Arrow function 1

It can also be the following:

class App extends Component {

handleClick(e) { console.log(e); }

render() {return < button onClick={() => this.handleClick()}> Test</ button>}

}

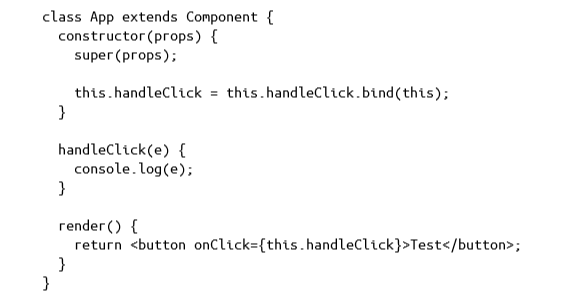
3. Declaration in constructor. This binding is completed in the component constructor. The advantage of this binding method is that it only needs to bind once, and it does not need to perform binding operation every time the event listener is called

Constructor inner declaration

These are three ways to bind events. I personally think the third one is better. Only one binding operation is needed to optimize performance

Finally, an example of rendering error is attached as follows:

Warning: Cannot update during an existing state transition (such as within `render`). Render methods should be a pure function of props and state

The above prompt shows that the event is not bound to this instance. Just solve it in the above three ways

I have little talent and shallow learning. If there is something wrong, please give me more advice and make progress together

React Error: Import in body of module; reorder to top import/first

The reason is as follows:

I divide a component into three files

|—Home.jsx         //  Business logic and html
         Home-|-Home.css // style
               |-index.js // Introduce Home.css , then expose the Home component

Index.js is the export of home.js and the import of home.css. The code is as follows:

export { default } from "./Home.jsx";
import "./Home.css";

So, then, it’s wrong. It’s OK to write like this before. Google search says that it’s because of this:

import must precede all other business codes (eslint burst), import must precede all other business codes

If an asynchronous component is imported, it can not be inserted in front of other imported items. If an asynchronous component is imported, it can not be inserted in front of other imported items

similar behavior will report this error

Change it to this:

import "./Home.css";
export { default } from "./Home.jsx";

Well, I’m just changing places here

React Run Error: Uncaught TypeError: Cannot read property ‘forEach‘ of undefined

as the topic, the react project startup error, detailed information, as shown in the following:

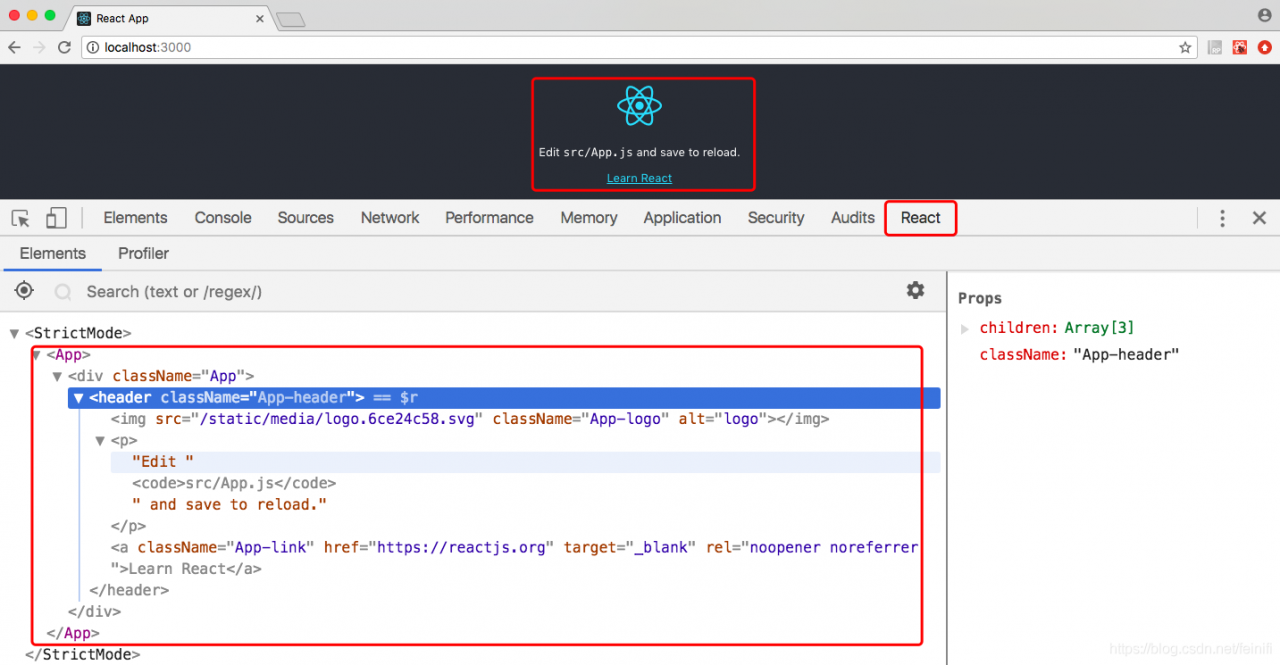
: The React -DevTools extension is installed in the browser. Many people simply disable the React -DevTools extension. I think it’s OK, but I just don’t feel good. We installed this to see the React element and the compiled code. That seems like a tough way to do it, so I’ll just drop you.

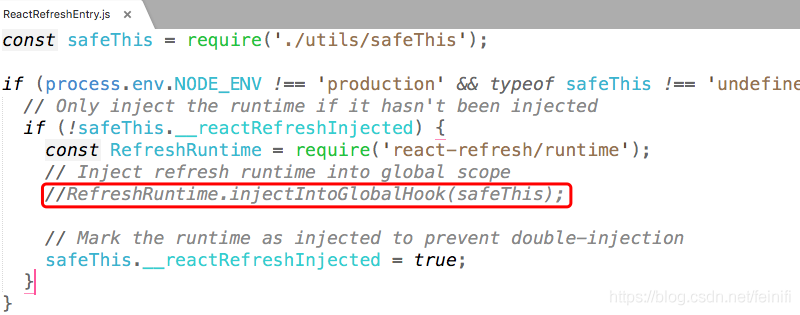
my personal information, according to the error stack to find node_modules/@ PMMMWH/react – refresh – webpack – the plugin/client/ReactRefreshEntry js the file, find the error code, Comment directly the line that caused the error:

so, restart the project, the browser load the project correctly, there is no error message, and the react – devtools plug-in also normal load, good job:

this error, but also have a lot to do with the react version, remember too old version if it won’t appear this problem. This approach also does not solve the root cause of the problem, if the new project, or reinstall the dependencies, you still need to manually modify the code.

How to deal with the error “cannot read property ‘set state’ of undefined” in react

App.js

import React, { Component } from 'react';
import './App.css';

class App extends Component {
 constructor(props){
  super(props);
  this.state = {
   num: 90
  }   
 };
 handleClick(){
  this.setState({
   num: this.state.num + 1
  })
 };
 render() {
  return (
   <div className="App">
   {this.state.num}
    <button onClick={this.handleClick}>点击</button>
   </div>
  );
 }
}

export default App;

We save the initial value of num in this. State through the constructor, and then we give the button a click event, handleclick

Then click the button to update the initial value of num. when we click, there is no doubt that “cannot read property ‘set state’ of undefined” is reported

The translation means: “can’t read the undefined property ‘setstate'”, which tells us that when we click, we don’t read the value in the setstate

This in the handleclick method is not the same as this in the component

There are two solutions to this problem: the purpose of these two methods is to ensure that this in the handleclick method is consistent with this in the component, so that the value in the setstate can be read to change num

First method:

import React, { Component } from 'react';
import './App.css';

class App extends Component {
 constructor(props){
  super(props);
  this.state = {
   num: 90
  }

this.handleClick = this.handleClick.bind(this); 
 };
 handleClick(){
  this.setState({
   num: this.state.num + 1
  })
 };
 render() {
  return (
   <div className="App">
   {this.state.num}
    <button onClick={this.handleClick}>click</button>

<button onClick={this.handleClick.bind(this)}>click</button> 
   </div>
  );
 }
}

export default App;

Second translation

import React, { Component } from 'react';
import './App.css';

class App extends Component {
 constructor(props){
  super(props);
  this.state = {
   num: 90
  } 
 };

handleClick(){
  this.setState({
   num: this.state.num + 1
  })
 };
 handleClick = () => { 
  this.setState({
   num: this.state.num + 1
  })
 };
 render() {
  return (
   <div className="App">
   {this.state.num}
    <button onClick={this.handleClick}>click</button>

<button onClick={()=> {this.handleClick()}>click</button> or <button onClick={() => this.handleClick()}>click</button>
   </div>
  );
 }
}

export default App;

In react, to transfer the prototype method of a class to the subcomponent through props, the traditional writing method requires bind (this), otherwise this will not be found when the method is executed

<button onClick={this.handleClick.bind(this)}></button>

Or

<button onClick={() => this.handleClick()}></button>